How to Calibrate Joystick on Windows 11: Step-by-Step Guide
Learn how to calibrate a joystick on Windows 11 using built-in tools, fix drift, adjust dead zones, and verify accuracy to improve precision in games and simulations.

You will learn how to calibrate a joystick in Windows 11, covering how to access the built-in calibration tool, common settings to adjust (dead zones, saturation, center), and how to verify performance. Before you begin, connect your joystick and update drivers. The steps apply to most USB gamepads and compatible controllers.
Understanding how to calibrate joystick windows 11
If you’ve noticed drift, offset, or inconsistent response from a controller, there’s a practical way to fix it: calibrate the joystick within Windows 11. This process aligns the physical range of motion with the digital input that Windows and your games interpret. In simple terms, calibration normalizes the center point, the extremes, and the overall linearity of each axis. The exact phrase that often guides DIYers is how to calibrate joystick windows 11, which is addressed throughout this guide with a practical, hands-on approach. By following these steps, you’ll restore predictable input for racing sims, flight games, and platform titles. Expect to dedicate about 20–40 minutes for a thorough pass, depending on how many axes your controller supports and whether you need to recalibrate multiple profiles.
Preparing your workspace for calibration
Before you jump into the Windows 11 calibration workflow, set up a stable workspace and gather your materials. A quiet, well-lit desk helps you focus on axis movement and centering. Ensure your joystick is clean and free of loose debris that could affect the hardware. If you’re calibrating a flight stick or multi-axis controller, take a moment to map each axis to its physical control. Have your PC connected to a reliable power source and consider temporarily disabling power-saving features that could interrupt calibration steps. Finally, make sure you have the latest Windows 11 updates installed, as some improvements and fixes impact input devices.
Accessing Windows 11's built-in calibration tools
Windows provides a built-in calibration option accessible through the classic Game Controllers panel and the newer Settings path. The quickest route is to open Run (Win+R) and type joy.cpl to launch the Game Controllers dialog. From there, select your joystick and click Properties. A Settings or Calibrate button prompts you through axis tests, dead zones, and centering. If you prefer Settings, navigate to Bluetooth & devices > Accessories or Games, then select the Game Controller properties. The goal is to reach a calibration screen that lets you move each axis through its full travel while the UI records neutral center and endpoints. This built-in method keeps calibration aligned with Windows input handling and is suitable for most consumer controllers.
Step-by-step: calibrating a joystick using joy.cpl
Here is a practical, device-agnostic path to calibrate with the joy.cpl tool:
- Open the calibration panel and choose your joystick from the list.
- Click Properties, then select Settings or Calibrate depending on the device.
- Center the stick and press the center button or keep it still until the UI marks the center.
- Move each axis from its minimum to maximum position, returning to center after each sweep.
- Save the calibration profile, then repeat for other axes if present.
- Test in a game or test app to confirm neutral centering and linear response across the travel range.
If you’re calibrating a flight stick or a programmable pad, also record throttle and any rudder axes, then re-test in your preferred sim or game. The goal is consistent, predictable input across all axes.
Fine-tuning dead zones and sensitivity for different games
Dead zones are small neutral ranges around the axis center where input is ignored to prevent drift. Different games and genres benefit from tailored dead zones and sensitivity curves. Start with a conservative dead zone (for example, 5–10%) and gradually adjust to a point where the stick feels neither twitchy nor sluggish. For precision tasks such as sniping or fine steering, you may prefer a slightly larger dead zone to counteract occasional micro-movements. If your controller supports programmable profiles, save separate settings for shooters, racers, and sims. Remember to re-test after each change to ensure improvements are consistent across titles.
Testing and validating calibration with games and apps
Calibration is only useful if validated in real scenarios. Launch a neutral test environment or a forgiving game and verify that the center returns to true zero and the edges map to the intended extents. Use a simple test program or the in-game calibration option to visually confirm the axes move symmetrically. Record a short gameplay session to check for smooth transitions from center to full travel, and watch for drift after returning to center. If you notice any persistent offset, re-open the calibration dialog and revisit the steps, paying particular attention to centering and the maximum travel.
Document your results for future reference. Saving multiple profiles per device can save time when switching between games that demand different input characteristics.
Troubleshooting common calibration issues
If calibration seems off after a reboot or update, verify that Windows recognizes the correct device and that the latest drivers are installed. A common problem is stale or conflicting profiles from previous hardware. Uninstall any old profiles or delete saved calibration data, then re-run the calibration routine. Cable issues can also cause intermittent readings; try a different USB port or a wired connection if you’re using a wireless controller. If the axis still drifts after comprehensive tweaking, consider resetting to default settings and performing a fresh calibration to eliminate accumulated preferences from prior sessions.
Advanced calibration for flight sticks and multi-axis controllers
Flight sticks and flight yokes add complexity with multiple axes, throttle levers, and rudder inputs. For these, calibrate each axis individually and then verify all cross-axis interactions in the target software. Some devices offer software that interpolates axes to ensure smooth transitions across combinations. When calibrating in Windows 11, document each axis’s neutral, min, and max values, and ensure any dead zones are consistent across devices. Align these settings with your flight sim or design software so that hardware input translates predictably into virtual movement and control surfaces.
Maintenance, drivers, and Windows updates
Regular maintenance keeps calibration reliable. Clean the joystick connectors and check for any firmware updates from the manufacturer. Keep Windows and device drivers up to date to ensure compatibility with calibration utilities and improved input processing. If you experience persistent anomalies after updates, roll back to a known good driver version or re-run the calibration with default settings before reapplying refinements. Note that some devices require occasional recalibration after software updates or game patches to retain accuracy.
Quick calibration checklist you can reuse
- Confirm device is recognized by Windows and select the correct profile.
- Run the built-in calibration tool and complete all axis sweeps.
- Center the joystick and save the profile.
- Test with at least one game or app that exercises all axes.
- Adjust dead zones gradually and re-test until feel is natural.
Next steps and learning resources
If you want to deepen your calibration skills, explore official manufacturer guides, community tutorials, and calibration standards for game controllers. Practice sessions in different genres can reveal how axis response should feel across platforms. For ongoing reliability, maintain a routine: calibrate after hardware changes, after major Windows updates, and when relocating devices to different systems. As you refine your process, you’ll establish a dependable baseline for accurate input in both casual and professional contexts.
Tools & Materials
- Joystick/gamepad(USB or wireless; ensure driver support)
- Windows 11 PC(Updated to the latest build)
- Official or updated drivers(From manufacturer or Windows Update)
- USB cable or wireless dongle(If wired connection)
- Joy.cpl (Game Controllers control panel)(Accessible via Run: joy.cpl)
- Optional test games or apps(For practical testing)
Steps
Estimated time: 25-40 minutes
- 1
Connect and verify device
Plug the joystick into the PC and confirm Windows detects it in Device Manager or the Game Controllers panel. Seeing the device listed is essential before calibration to avoid misreads later.
Tip: If the device isn’t detected, try a different USB port and reboot if necessary. - 2
Open the calibration tool
Launch joy.cpl via Run (Win+R) to access the Game Controllers dialog, then select the joystick and click Properties. Navigate to the Settings or Calibrate option to begin.
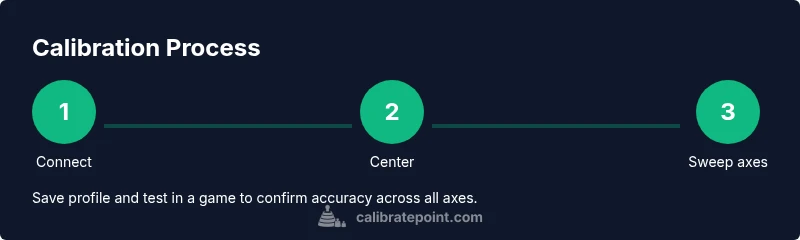
Tip: Use the Calibrate option to ensure you’re calibrating the active profile. - 3
Center the stick
Hold the stick completely centered and let the calibration utility record the neutral position. A stable center is critical for accurate input mapping.
Tip: Keep hands off the stick while the center is measured. - 4
Sweep each axis
Move each axis from its minimum to maximum travel once, returning to center between sweeps. This registers the full range and helps identify any dead zones.
Tip: Do not force beyond the axis limits; if you feel resistance, stop and retry. - 5
Test throttle and extra axes
If your controller has throttle levers, twist axes, or sliders, calibrate them separately by repeating the sweep process for each control.
Tip: Ensure simultaneous axes are not causing cross-axis drift during calibration. - 6
Save and apply the profile
Save the calibration profile and apply it as the active configuration. Closing and reopening the tool should retain the profile when the device is reconnected.
Tip: Create a named profile for different games or setups. - 7
Verify with a test app
Open a simple test app or game and confirm that the center is neutral and edges respond linearly. If not, re-run calibration with adjusted settings.
Tip: Use a staging environment to avoid affecting your primary games. - 8
Adjust dead zones as needed
If you notice subtle drift at rest, increase the dead zone slightly. For precision tasks, a smaller dead zone reduces input lag.
Tip: Make small adjustments and test after each change. - 9
Document and back up
Record the exact dead zone and sensitivity values so you can reproduce the setup or revert later.
Tip: Back up profiles to a cloud drive or external storage. - 10
Re-test after changes
If platform or driver updates occur, re-run the calibration to confirm results remain stable.
Tip: Schedule periodic re-calibration as part of maintenance.
Questions & Answers
Do I need to update drivers before calibrating?
Yes, ensure you have the latest drivers before calibration to prevent misreads. Use the manufacturer site or Windows Update.
Make sure your joystick drivers are current before calibrating to prevent drift.
Can Windows calibrate multiple joysticks at once?
Windows can calibrate each device individually. Repeat the calibration steps for each joystick to ensure accurate readings.
Calibrate each joystick separately to avoid cross-device interference.
What if calibration values reset after reboot?
Some profiles may revert if apps overwrite settings. Re-apply calibration after reboot and save the profile with a clear name.
If settings revert, recalibrate and save a named profile.
Why is my joystick drifting after calibration?
Drift can indicate worn pots or centering issues. Recalibrate, clean contacts, or consider hardware replacement if drift persists.
Persistent drift may mean hardware wear; recalibrate and inspect the device.
Is joy.cpl the only method to calibrate?
Joy.cpl is a primary built-in tool, but some controllers come with vendor software offering advanced calibration.
Joy.cpl covers most needs, but vendor apps may provide extra controls.
How often should I recalibrate?
Calibrate after hardware changes, major Windows updates, or noticeable drift. Regular checks help keep precision.
Recalibrate when you install updates or notice drift.
Watch Video
Key Takeaways
- Calibrate with a stable center and full axis sweeps
- Test across multiple games to confirm consistency
- Document your profile settings for quick reuse
- Keep drivers up to date to avoid misreads
- Recalibrate after major software changes