How to Calibrate Keurig: A Step-by-Step Guide
Learn how to calibrate your Keurig for consistent brewing. This practical, science-backed guide covers measuring brew volume, verifying temperature, descaling, and maintaining reliability across Keurig models.

Calibrating a Keurig isn’t about a hidden setting; it’s about standardizing brew volume and temperature through measurement, descaling, and routine testing. Start with a clean reservoir, verify fill accuracy, and use a thermometer to check a representative brew. Then descale and re-test to confirm repeatable results. Follow this four-step approach for consistent cups.
Why calibrate Keurig for consistent brews
Consistency in coffee starts with understanding how small variances in water volume, temperature, and cleaning impact flavor. While Keurig machines don’t offer a formal calibration mode, you can approach calibration as a structured routine: verify the fill accuracy of the reservoir, confirm brew temperature with a thermometer, descale regularly, and test multiple brews to confirm repeatability. Following a clear workflow helps technicians, DIYers, and professionals achieve reliable results across models, especially when you’re aiming for a signature brew profile. In practice, Calibrate Point emphasizes documentation, discipline, and routine maintenance as the foundation of reliable brewing results.
This section sets expectations: calibration is about repeatability, not perfecting every possible variation. By anchoring your process to objective measurements, you’ll notice drift sooner and can correct it before your coffee loses consistency.
The science behind brew temperature and flavor
Brew temperature directly influences extraction. Coffee brewed too hot can taste sharp, while brew too cool can taste flat and underdeveloped. For most coffee styles, a target range of about 195–205°F (90–96°C) balances solubility and aroma without scorching the coffee. Keurig machines generally heat water to a stable temperature but may drift with environmental conditions, lime scale, or a partial clog. To calibrate by temperature, use a calibrated kitchen thermometer and run a set of test brews to verify consistency across multiple cycles. Maintaining a steady water temperature helps preserve the intended flavor profile and aroma you expect from your brews.
Baseline volume and fill accuracy for Keurig brews
The second pillar of calibration is ensuring the machine dispenses a consistent amount of water. Even minor differences in hot water delivery can change brew strength noticeably. To establish a baseline, measure the actual volume of several consecutive brews with a transparent cup or measuring cup. Compare to the machine’s stated brew volume (e.g., 6, 8, or 10 oz). If you observe systematic under- or over-dispensing, investigate the water reservoir seal, the needle assembly, and any air in the line. Small adjustments, paired with consistent test coding, help you build a reliable baseline you can repeat in future checks.
Cleaning and descaling prerequisites for accurate results
Descaling removes mineral buildup that can affect both temperature and flow. Before any calibration test, thoroughly descale the machine according to your model’s manual or a reputable general method. Use a descaler or citric acid solution as directed, flush the lines with fresh water, and run several plain-water cycles to purge residue. Clean removable parts and the needle area with a soft brush. A clean system yields more accurate results and reduces the chance of skewed data from mineral deposits.
Tools and prep you’ll need (before you start)
Gather the essential tools so you’re ready to measure against a consistent baseline:
- Keurig coffee maker (model with standard reservoir)
- Clean, filtered water for test brews
- Measuring cup (1 cup/240 ml) for volume checks
- Digital thermometer (optional but recommended for accuracy)
- Descaling solution or citric acid, per manufacturer recommendations
- Soft cloth for cleaning, and a timer or smartphone timer
- A few identical, heat-safe mugs for repeat testing
- Notebook or digital log to record results and baselines
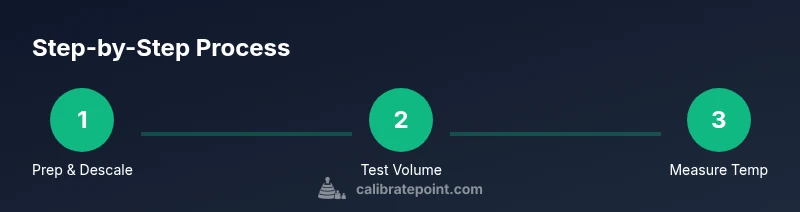
Step-by-step calibration overview (high level, non-repetitive)
This section presents a practical overview of the calibration workflow you’ll implement in the detailed steps below. The goal is to align brew volume and water temperature while ensuring the machine remains free of mineral buildup that can skew results. You’ll perform a controlled sequence: prep and clean, descale, run test brews with measured volumes, check temperature, and document the results to establish a repeatable baseline.
Step-by-step actions at a glance (workflow map)
This outline helps you visualize the flow before you dive into the detailed steps. It’s designed to be simple enough to follow but structured enough to capture meaningful data:
- Prep and clean the brewer to remove potential sources of drift.
- Descale and flush to ensure consistent water flow.
- Run calibrated test brews with measured volumes.
- Verify brew temperature using a thermometer and adjust technique if needed.
- Record results, compare to baseline, and plan future maintenance.
- Prepare a maintenance cadence to preserve calibration over time.
Interpreting test results and next actions
Observe whether your test brews cluster around a target volume and temperature. Small drift is normal, but consistent drift indicates an ongoing issue (e.g., reservoir seal leaks, miscalibration of the warmer unit, or mineral buildup). If drift is detected, repeat the test with a fresh calibration cycle after descaling. If results are stable, set your baseline as the target and schedule regular checks every 1–3 months depending on usage and water hardness.
Maintenance cadence and best practices
Calibrating is not a one-off event; it’s a maintenance habit. Create a calendar reminder for descaling every 1–3 months (more often in hard-water areas) and perform a quick quality check every 2–4 weeks via a test brew. Keep logs of volumes and temperatures to identify gradual drift. Store your calibration logs with the device documentation so future technicians or colleagues can duplicate your methodology, should you ever move the machine or hand it off for service.
Authority sources and recommended reading
For broader context on appliance maintenance and water quality affecting beverages, consult reputable sources such as health and safety agencies and university extension programs. These outlets offer guidelines that support safe descaling practices, cleanwater standards, and best-practice maintenance schedules. Always compare manufacturer recommendations with independent sources to ensure you’re following evidence-based procedures.
Tools & Materials
- Keurig coffee maker(Model with standard reservoir)
- Clean bottled water(For test brews)
- Measuring cup (1 cup/240 ml)(To verify brew volume)
- Digital thermometer(For checking brew temperature with precision)
- Descaling solution or citric acid(Follow manufacturer guidance)
- Soft cloth or sponge(For exterior and needle area cleaning)
- Test cups(Heat-safe mugs for testing)
- Timer(To track brew cycles and wait times)
Steps
Estimated time: 60-90 minutes
- 1
Power down and prep
Unplug the Keurig and remove the water reservoir. Gather all testing tools and cleaning supplies. Clearing the workspace reduces the risk of spills and ensures an undistracted workflow. This initial prep also minimizes accidental heating or water exposure during maintenance.
Tip: Use a dry, non-slip surface and keep the power cord away from the work area to prevent accidental pulls. - 2
Empty reservoir and clean the brewer
Discard any remaining water and remove the drip tray if possible. Rinse the reservoir with warm water and mild soap, then wipe dry. Clean the needle and internal surfaces with a soft brush to remove residual coffee oils that could affect flow.
Tip: Be gentle around the needle assemblies to avoid bending or damage. - 3
Descale and flush the lines
Prepare the descaler solution according to the product instructions. Run 2 full cycles of descaling solution through the machine, followed by multiple plain-water flush cycles to purge any descaler residue. This step ensures consistent flow and accurate test results.
Tip: Never mix descaler with other cleaners; follow the recommended dilution ratio. - 4
Brew a test volume
Fill the reservoir with test water and run a brew into a measuring cup. Record the actual volume to compare against the intended 6, 8, or 10 oz setting. Repeat at least twice to confirm consistency.
Tip: Use identical cups for all test brews to avoid measurement errors. - 5
Verify brew temperature
If your model allows, insert a digital thermometer into the cup after a normal brew and record the temperature. Target range is about 195–205°F (90–96°C). If your model lacks temperature control, use a preheated mug to approximate a stable temperature.
Tip: Take multiple readings to account for minor fluctuations. - 6
Re-test and document results
If volumes or temperatures differ from the baseline, perform a quick re-test after another descale or cleaning cycle. Document each result in a calibration log so you can track drift over time.
Tip: Label each entry with date, model, and ambient conditions for future reference. - 7
Establish a baseline and maintenance plan
Define target volumes and temperatures as your calibration baseline. Create a maintenance schedule (e.g., descaling every 2 months and test checks monthly) and store logs with the machine’s manual.
Tip: Set calendar reminders to keep the plan consistent.
Questions & Answers
Can you actually calibrate a Keurig, or is it just maintenance?
Keurig units don’t have a formal calibration mode, but you can calibrate for consistency by standardizing brew volume, temperature checks, and thorough cleaning. This yields repeatable results across brews and models.
Keurig machines don’t offer a dedicated calibration mode; you’ll achieve consistency by standardizing measurements and routine cleaning.
What temperature should a Keurig brew reach?
Aim for roughly 195–205°F (90–96°C) as a general target. Temperature can vary by model and environment, so use a thermometer for accuracy when possible.
Aim for about ninety to ninety-six degrees Celsius; use a thermometer for accuracy if your model supports it.
How often should I descale my Keurig?
Descale every 1–3 months depending on usage and water hardness. Heavier mineral buildup in hard water requires more frequent descaling.
Descale every one to three months based on usage and water hardness.
Why is brew volume inconsistent across cycles?
Inconsistency often comes from mineral buildup, clogged needles, or air in the lines. Clean, descale, and re-prime the machine to restore stable volumes.
Could be mineral buildup or clogs; clean and descale to normalize the flow.
Do I need special tools for calibration?
A measuring cup, a thermometer (optional but helpful), cleaning supplies, and a descaler are usually sufficient for a practical calibration workflow.
You mainly need a cup, thermometer if available, and descaler.
Will calibration improve all Keurig models equally?
Results vary by model and usage. Most models benefit from the same fundamental approach: clean, descalD, test, and log results to keep brews consistent.
Most models benefit from standard cleaning and testing; results depend on the model and environment.
Watch Video
Key Takeaways
- Establish a repeatable baseline for volume and temperature
- Descale and clean before measurement to prevent skewed results
- Document results and maintain a regular calibration cadence
- Calibration improves consistency, not unlimited control over every variable