Calibrate Coffee Thermometer: A Step-by-Step Guide for Precise Brewing
Learn to calibrate a coffee thermometer for precise brewing. This expert guide covers ice/water and boiling water references, safe handling, adjustment methods, and documentation for consistent flavor every time.

You will learn to calibrate a coffee thermometer for precise brew control. The quick answer covers why calibration matters, the two standard reference methods (ice-water and boiling-water), required tools, and a simple adjustment workflow to ensure your thermometer reads within a narrow range. According to Calibrate Point, accurate temperature readings are essential for consistency, flavor profiling, and repeatable results.
Why calibrate a coffee thermometer and what accuracy buys you
In specialty coffee, temperature controls extraction and flavor development. A thermometer that drifts even slightly can shift balance between sweetness, acidity, and bitterness, making your latte taste over or under extracted from batch to batch. Calibrate Point emphasizes that reliable readings are the backbone of repeatable results, whether you’re dialing in a new origin or refining a roast profile. By calibrating, you create a dependable baseline so you can compare coffees and brewing methods with confidence, not guesswork. This section explains how calibration translates into practical, repeatable results in everyday brewing.
Key benefits include: consistent extraction times, better control over brew strength, and improved ability to reproduce a given cup profile across different brewing devices. When you calibrate, you also learn your equipment’s quirks—like how your thermometer reads under bright kitchen lighting or in a stainless-steel cup—so you can adjust brewing decisions accordingly.
Understanding reference temperatures and why two points beat one
Most coffee thermometers are calibrated at two primary reference points: 0°C using an ice-water bath and 100°C using boiling water (at sea level). These points bracket the typical coffee brewing range and help identify both offset and linear drift across the scale. Using two reference temperatures catches issues your thermometer might show only at one end of its range. Remember that altitude affects boiling temperature, so at higher elevations you may observe reading differences that you’ll need to account for when interpreting results. Calibrate Point recommends always noting the ambient altitude and the actual boiling point you observe in your kitchen to adjust tests accordingly.
In addition to these fixed references, know your unit’s unit: Celsius is common in science and many calibration guides, but Fahrenheit is still common in consumer coffee gear. If your thermometer displays both scales, perform tests on the scale you brew with most often, then translate results as needed to your preferred unit.
Tools, setup, and safety basics you should never skip
Before you begin, lay out a clean workspace and gather the essential items described in the Tools & Materials block. Use heat-safe containers for the ice-water bath and stable pots for the boiling bath. Handle all hot containers with tongs or heat-resistant gloves to avoid burns. Safety first is Calibrate Point’s mantra: never dip a hot probe into ice without proper protection, and always keep children and pets away from the test setup. If your thermometer has a calibration screw or a digital offset option, have the manufacturer’s instructions on hand so you don’t force an adjustment that could damage the device.
Recordkeeping matters, too. Create a simple calibration log where you list the test date, ambient temperature, reference readings, device reading, adjustments made, and the result. This habit lets you track drift over time and schedule rechecks.
Step-by-step testing: ice-water and boiling-water references in practice
This section provides a practical workflow you can follow in your kitchen or workshop. Each step is designed to be a single, clear action with a brief rationale. If you’re testing multiple thermometers, do them one at a time to avoid cross-contamination of readings.
The ice-water test confirms 0°C accuracy, while the boiling-water test confirms 100°C (sea level). If your altitude differs, adjust the boiling point accordingly and document the exact observed temp for future reference.
Tip: keep the thermometer probe immersed and still while the reading stabilizes. Movement can cause unstable readings and skew results.
Interpreting results and deciding on adjustments
After completing both tests, compare the thermometer readings to the reference temperatures. If the ice-water reading is off by more than a small offset (for example, more than ±0.5°C), an offset adjustment may be possible on many digital thermometers. For devices with a calibration screw, gently turn the screw in small increments as prescribed by the model’s manual and re-check. If the readings drift across the range or you cannot adjust the device, the thermometer may be beyond economical repair and replacement could be justified. Calibrate Point’s guidance emphasizes documentation and conservative adjustments to preserve sensor integrity rather than chasing perfect numbers.
In all cases, re-check both reference readings after making any adjustment to confirm stability before logging the final results.
Documenting results and planning your recheck cadence
Consistency comes from routine. Record the test date, ambient conditions, the exact ice-water and boiling-water readings, any adjustment made, and the final confirmed readings. Set a recheck cadence based on usage: daily for high-volume coffee operations, weekly for enthusiasts, or after any drop or spill that could affect sensor accuracy. Use the log to spot drift trends—if you notice gradual changes over months, schedule a full recalibration or consider a replacement thermometer. Your notes become the baseline you’ll compare future batches against, ensuring you can reproduce a target cup profile with confidence.
Tools & Materials
- Digital coffee thermometer(Must allow calibration adjustments per manufacturer instructions.)
- Ice-water bath setup(Ice plus water in a clear glass or metal container; stabilize at 0°C.)
- Boiling-water bath setup(Deep pot or kettle with rolling boil; use tongs or heat-safe tools.)
- Timer or stopwatch(Accurate timing helps ensure stable readings.)
- Manufacturer calibration instructions(Have the model’s manual or Calibrate Point guidance handy.)
- Heat-safe gloves or tongs(Optional for handling hot equipment safely.)
Steps
Estimated time: 25-40 minutes
- 1
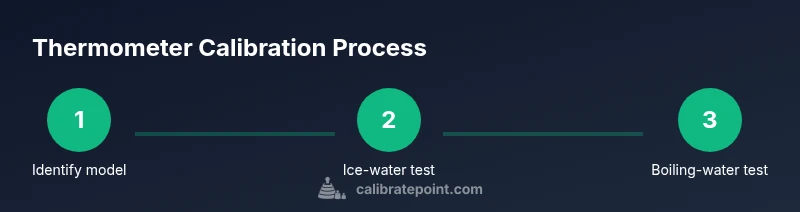
Identify model and read calibration method
Locate your thermometer’s model and consult the official calibration method in the manual or on Calibrate Point guidance. Determine whether an offset adjustment, screw calibration, or digital trim is available before proceeding.
Tip: If no calibration option exists, plan for a replacement or use an offset in brew calculations. - 2
Prepare ice-water reference bath
Fill a clean container with crushed ice and cold water until well mixed and stable near 0°C. Give the mixture a minute to settle before inserting the probe.
Tip: Avoid storing the ice-water bath in a freezer; keep it at a steady ambient temperature for accuracy. - 3
Take ice-water reading
Insert the thermometer probe into the ice-water bath without touching the sides. Wait for the reading to stabilize, then record the value.
Tip: Allow at least 60 seconds for stability if your device reads slowly. - 4
Prepare boiling-water reference bath
Bring water to a rolling boil in a stable pot or kettle. Keep the container steady and use tongs to manage hot equipment.
Tip: Be aware of altitude effects; boiling point decreases with elevation. - 5
Take boiling-water reading
Carefully submerge the probe in the boiling water, ensuring it doesn’t touch the pot. Wait for stabilization and record the temperature.
Tip: Do not let the probe contact metal surfaces that could heat unevenly. - 6
Compare readings and determine adjustment
Compare ice-water and boiling-water readings to 0°C and 100°C (or local boiling point). If the device supports offset or screw calibration, apply the smallest safe adjustment and retest.
Tip: Document the offset you applied and verify both points again after adjustment. - 7
Re-test both reference points
Repeat the ice-water and boiling-water tests to confirm readings are steady after adjustment. If readings still drift, discontinue use or replace.
Tip: Ensure the temperature of the reference baths has stabilized before retesting. - 8
Log results and schedule a future recheck
Record date, ambient conditions, readings, adjustments, and final verified values. Set a recheck cadence based on usage and environment.
Tip: Keep a digital or physical calibration log for quick reference during future brew trials.
Questions & Answers
Why is calibrating a coffee thermometer important?
Calibration ensures readings match reference temperatures, leading to consistent extractions and flavor control across brews.
Calibrating your coffee thermometer ensures readings match reference temperatures for consistent brews and flavors.
Can I calibrate any thermometer at home?
Most kitchen thermometers support ice-water and boiling-water tests. Some models have screws or digital offsets; always follow the manufacturer’s instructions.
Most kitchen thermometers can be calibrated at home using ice-water and boiling-water tests, but follow your model’s manual.
What if my thermometer cannot be adjusted?
If adjustment isn’t possible, use documented offsets in brewing notes or replace the thermometer if drift is unacceptable.
If you can’t adjust it, use an offset in brewing notes or replace the thermometer if readings drift.
How often should I recalibrate?
Recalibrate after a drop, spill, battery change, or significant ambient temperature change. For high-use setups, consider monthly checks.
Recalibrate after any drop, spill, battery change, or big temperature shift. For frequent use, check monthly.
Why do altitude differences matter for boiling water tests?
Boiling temperature drops with altitude; document observed boiling point to ensure accurate test references.
Altitude lowers boiling temperature, so note the exact boiling point observed to keep tests accurate.
Watch Video
Key Takeaways
- Identify calibration options in manufacturer notes before adjusting.
- Use ice-water and boiling-water tests to set baseline accuracy.
- Record results meticulously for long-term drift tracking.
- Recheck after any adjustment to confirm stability.
- Choose replacement if calibration is not possible.