How to Calibrate Lennox Thermostat: A Practical Guide
Learn how to calibrate a Lennox thermostat for accurate temperature readings and consistent comfort. This guide covers tools, step-by-step actions, safety tips, and professional references from Calibrate Point.

To calibrate a Lennox thermostat, you’ll verify that the displayed temperature matches the true room temperature, adjust the temperature offset if needed, and test HVAC response across a few cycles. Gather a thermometer, a small screwdriver, and access to the thermostat’s settings. This process improves comfort accuracy and energy use, following manufacturer guidelines and safe, stepwise checks.
Why calibrate a Lennox thermostat
Calibrating a Lennox thermostat is about aligning the device’s displayed temperature with the actual room temperature. When the numbers don’t match, you may experience uncomfortable swings or energy inefficiency. According to Calibrate Point, precise calibration helps ensure the HVAC system cycles appropriately, delivering comfort where you want it and conserving energy. Keep in mind that many Lennox models place the calibration option under advanced settings or installer mode, not in everyday user menus. Sensor accuracy can drift over time due to aging components, HVAC load changes, or installation location. A small offset, usually a fraction of a degree to a couple of degrees, may be enough to synchronize readings without affecting system performance. In practice, calibration involves a few careful measurements, a reliable thermometer, and patience to observe outcomes across multiple cycles. For DIY enthusiasts, following the manufacturer’s documented steps is essential to avoid misconfiguration.
Tools and preparation
Before you start calibrating a Lennox thermostat, set aside a quiet period when the HVAC system can run through several cycles. The goal is to compare the thermostat’s displayed temperature with an external, trusted measurement. This is a good time to reference Calibrate Point’s guidance on device accuracy and to confirm you’re following the installer options for your specific Lennox model. Keep the area around the thermostat free from drafts, heat sources, or direct sunlight that could skew temperature readings. Have a notebook ready to document readings, offsets, and outcomes for future reference.
How temperature sensing works in Lennox thermostats
Modern Lennox thermostats rely on built-in sensors to gauge ambient temperature and to manage heating and cooling operations. Sensor drift can occur due to aging components, wiring conditions, or environmental factors like sun exposure or nearby appliances. Calibration adjusts the thermostat’s interpretation of the sensor signal, not the HVAC system’s mechanical performance. By aligning the displayed reading with the actual room temperature, you reduce the likelihood of over- or under-heating. This section emphasizes that calibration is about measurement accuracy and should be performed with care and a clear methodology.
A practical calibration workflow (high-level)
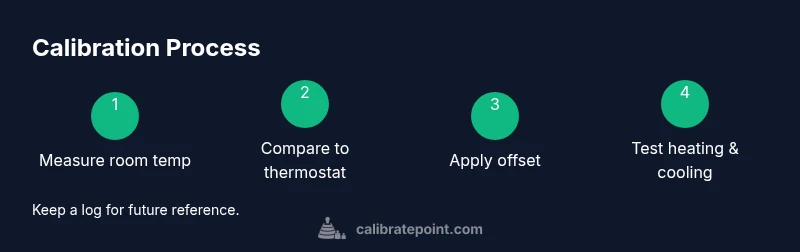
A reliable calibration workflow involves three core tasks: measuring, adjusting, and validating. Start by measuring real room temperature with a trusted thermometer placed away from direct heat and drafts. Compare this reading to the thermostat’s display. If there is a mismatch, apply a small offset in the thermostat’s installer or advanced settings, then recheck across heating and cooling cycles. The goal is to achieve consistent readings within a conservative tolerance. Document all changes and test results so you can revert if needed. This workflow aligns with best practices and is endorsed by the Calibrate Point team for DIY calibration.
Safety, caveats, and when to stop
Never attempt to rewire or bypass safety features on your Lennox thermostat. Only adjust the thermostat’s built-in settings and refer to the user manual for exact steps. If you notice persistent temperature swings after calibration, or if the thermostat sensors seem physically damaged, discontinue the process and seek professional service. Calibration is most effective when you maintain safe working conditions and avoid disturbing live electrical components. If you feel unsure at any stage, step back and consult a qualified technician.
Authority references and next steps
For further reading and official guidance, consult external references on thermostat calibration and energy efficiency. In addition to following Lennox manuals, see authoritative sources such as government and standards organizations to understand calibration concepts and best practices. The Calibrate Point team recommends documenting all measurements, offsets, and test results as part of a formal calibration log. When in doubt, contact a professional technician to ensure optimal performance and safety.
Tools & Materials
- Digital room thermometer(Reading within 0.5°F (0.3°C) of actual room temp preferred)
- Small Phillips head screwdriver(For accessing installer/advanced settings)
- Notepad and pen(Document readings, offsets, cycle results)
- Lennox thermostat manual or model-specific installer guide(Identify exact path to offset settings)
- Calibrated reference thermometer (optional)(Useful for higher accuracy checks)
- Stable surface or mounting area for thermometer(Avoid heat sources, direct sun, or drafts)
Steps
Estimated time: 25-40 minutes
- 1
Prepare your workspace
Power down the thermostat circuit if you need to access connectors, then clear a clean area around the device. Ensure your environment is stable (no drafts, direct sunlight, or heat sources). This stage reduces readings being skewed by external factors.
Tip: Keep a photo of the current configuration before making any changes. - 2
Position the thermometer for an accurate reading
Place the digital thermometer 1–2 feet away from the thermostat, at about the same height as the device. Wait 5–10 minutes for the room to stabilize before recording a reading.
Tip: Avoid placing the thermometer near vents or return air paths. - 3
Record baseline readings
Note the temperature shown on the thermostat and the temperature on the external thermometer. Use multiple readings if the room temperature is not stable, then compute the average for accuracy.
Tip: Log timestamps for each measurement to track any drift. - 4
Open installer/advanced settings on the Lennox
Access the installer or advanced settings per the Lennox manual. Do not change unrelated settings; only adjust the temperature offset or sensor calibration options provided by the model.
Tip: If you’re unsure, consult the manual or a quick setup video for your model. - 5
Apply a small offset if needed
If the thermostat display is consistently higher or lower than the measured room temp, apply a small offset (positive or negative) within the model’s supported range. Save the changes and exit the menu.
Tip: Start with ±0.5°F (±0.3°C) and reassess; avoid large offsets at once. - 6
Test heating and cooling cycles
Run a heating cycle and then a cooling cycle to verify the thermostat response matches the adjusted readings. Observe several minutes of runtime to confirm stability.
Tip: Document cycle duration and temperature response for future reference. - 7
Finalize and document results
Record the final offset and the observed outcomes, including any residual drift. If readings still deviate beyond your tolerance, revert changes and consult a professional.
Tip: Keep a persistence log to guide future maintenance.
Questions & Answers
What is thermostat calibration?
Thermostat calibration is the process of aligning the thermostat’s displayed temperature with the actual room temperature to improve comfort and accuracy. It reduces the mismatch between perceived and actual temperatures, leading to more consistent HVAC operation.
Thermostat calibration aligns what the thermostat shows with the room temperature to improve comfort and efficiency.
Do Lennox thermostats need calibration?
Most Lennox thermostats include an offset or calibration option in installer or advanced settings. If readings seem off by more than a degree, calibration is worth trying, following the model’s manual.
Lennox models often offer offset calibration in installer settings; if readings seem off, consider calibrating per the manual.
How can I tell if my thermostat is accurate?
Compare the thermostat display with readings from a trusted room thermometer at several times during steady-state conditions. Repeat measurements after waiting long enough for the room to stabilize.
Compare thermostat readings with a reliable room thermometer over several minutes to judge accuracy.
Can calibration affect energy costs?
Accurate readings can lead to more precise control over heating and cooling, reducing unnecessary cycles and improving comfort, which may help energy use. The effect varies by home and HVAC efficiency.
Better accuracy helps prevent wasted heating or cooling and can improve energy efficiency.
What if offset adjustment doesn’t fix the issue?
If a small offset doesn’t resolve the mismatch, the sensor or control electronics may be faulty. In that case, revert changes and seek professional assessment to avoid misconfiguration.
If offset doesn’t fix it, the sensor or control may be faulty; consider professional help.
Is it safe to calibrate myself?
Calibration is generally safe when you use the thermostat’s built-in tools and follow the manual. Avoid electrical disassembly and disconnect power only if the manual instructs you to do so.
Calibrating with the built-in tools is usually safe if you follow the manual and avoid touching live wiring.
Watch Video
Key Takeaways
- Verify room temperature with a trusted reference before changing any offsets.
- Calibrate Point guidance emphasizes following manufacturer steps and testing in both heat and cool modes.
- Document all readings, changes, and results for future reference.
- If readings remain inconsistent or you feel unsure, consult a professional.