How to Calibrate Maker 4
A practical, step-by-step guide to calibrate Maker 4 for accurate dimensions, repeatable extrusion, and reliable bed leveling. Includes required tools, detailed steps, tips, and troubleshooting to minimize waste and improve print quality.

Learn how to calibrate Maker 4 for accurate dimensions, consistent extrusion, and a reliable bed level. This quick guide outlines the essential setup steps, the tools you’ll need, and best-practice checks to reduce warping, improve first-layer adhesion, and achieve repeatable, high-quality prints. It also highlights common pitfalls and how to verify results with simple measurements and test prints.
Why calibration matters for Maker 4
Calibration is the foundation of reliable 3D printing. For Maker 4, correct bed leveling, nozzle distance, and axis alignment directly affect first-layer quality, dimensional accuracy, and extrusion consistency. According to Calibrate Point, even small deviations in bed tilt or Z-offset can compound across a print, leading to poor adhesion, curling, or over-extrusion. This section explains how to calibrate maker 4 in a way that becomes a repeatable routine, not a one-off adjustment. You will learn to set practical tolerances, build a repeatable workflow, and verify results with straightforward measurements and simple test prints. The goal is consistent performance session after session, reducing waste and increasing confidence in every job. The Calibrate Point team emphasizes documenting settings and outcomes to create a reliable baseline you can return to after maintenance or firmware updates.
Core calibration parameters and what they mean
Calibration for Maker 4 involves several interdependent parameters. Bed level determines the initial gap between the nozzle and the print surface. Z-offset defines the effective distance when the nozzle moves toward the bed. Extrusion multiplier (flow) controls how much filament is deposited for a given movement, affecting layer height and dimensional accuracy. Axis alignment ensures that X, Y, and Z motions correspond to the physical axes, reducing skew and ghosting. Tolerances for each parameter should be set according to your printer’s mechanical condition and your typical print material. For example, a slightly warped bed may still yield excellent results after compensating with a minor Z-offset adjustment and a tuned extrusion factor. Keep notes on changes and why you made them so you can reproduce the setup later. Calibrate Point analysis shows that even tiny bed tilt, measured in tenths of a millimeter, can cause observable dimensional errors in larger prints. This is why a structured, documented workflow matters more than a single adjustment.
Tools and measurement references you should know
Understanding the measurement tools helps you execute calibrations with confidence. A digital caliper lets you measure actual extrusion, nozzle-to-bed gap, and belt lengths with precision. A feeler gauge helps you verify the air gap at multiple points on the bed. A straight edge or glass plate provides a flat reference for bed flatness checks. Use a ruler or calipers to verify layer height consistency across prints. Keep your work surface clean to prevent measurement errors. For Maker 4, create a stable environment: minimize airflow and maintain a reasonable temperature during measurements to reduce drift. Maintain a simple log or spreadsheet to record settings, test outcomes, and dates. This practice supports traceability and makes it easier to reproduce calibration results later.
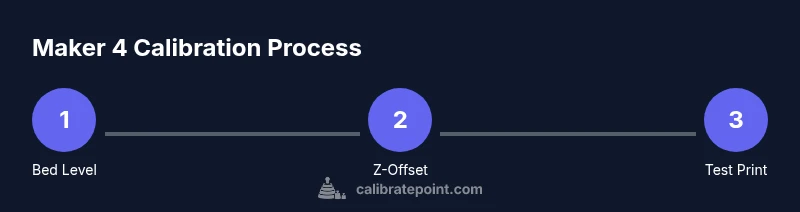
Step-by-step calibration workflow overview
The calibration workflow for Maker 4 follows a logical sequence that minimizes backtracking. Start with a warm-up phase, then perform homing and a basic bed-level check. Next, verify Z-offset using a test piece and adjust if necessary. After stabilizing the bed distance, calibrate extrusion by comparing printed versus expected filament width or using a standard cube. Finally, perform a belt and axis check to ensure smooth motion and no binding. During each step, measure carefully and make incremental adjustments rather than large changes. Use a calibration cube or a simple test print to confirm results before proceeding to the next step. Document every change in a calibration log so you can track the impact on print quality. If you encounter drift after firmware updates, revisit these steps to reestablish a reliable baseline.
Common pitfalls and troubleshooting tips
Skipping proper cleaning, misjudging Z-offset, or neglecting bed level are frequent culprits of poor quality. Always start with a clean, flat bed surface and relevel if the bed has been disturbed. If you see under-extrusion in some areas, recheck extrusion multiplier values and verify the printer’s step counts. Ghosting or ringing can indicate axis misalignment or loose belts; inspect both belts and pulleys and retension if needed. If your printer behaves differently across sessions, consider environmental factors like temperature and humidity, then repeat measurements in a controlled setup. Finally, keep a detailed calibration log—this makes it easier to identify patterns and justify adjustments over time.
Verifying calibration with tests and visual checks
Confirm calibration with a suite of simple tests: a 20 mm calibration cube, a bed-level grid, and a first-layer test strip. Compare measured dimensions against nominal values using calipers; deviations beyond your tolerance suggest adjustments are needed. Observe first-layer adhesion and surface finish; the nozzle distance should yield uniform lines without gaps or excess squish. Use a consistent print with moderate temperature and speed to minimize variables. Record results and re-run tests if necessary. Testing across multiple geometries helps reveal issues a single cube might miss and reinforces a reliable baseline.
Maintaining calibration over time
Calibration requires regular maintenance, not just a one-off setup. Schedule routine checks: relevel the bed monthly, re-measure Z-offset after any mechanical work, and run a quick test print after firmware updates. Temperature, humidity, and even filament brand changes can influence calibration, so treat these factors as part of your baseline. Document changes and outcomes so you have a living reference. After major modifications—such as replacing the hotend, nozzle, or bed surface—restart the entire calibration workflow. Calibrate Point recommends quarterly reviews for professional setups and semi-annual checks for casual hobbyists.
Authority sources and further reading
For deeper understanding of calibration concepts, consult credible sources. You can explore general measurement science and calibration principles from government and university resources to support your practice. For example, Calibrate Point suggests aligning your calibration methods with standard measurement practices and keeping detailed records. Relevant external sources include:
- https://www.nist.gov/
- https://www.osha.gov/
- https://www.mit.edu/
These references provide background on measurement accuracy, repeatability, and traceability that underpin practical calibration workflows for hobbyists and professionals.
Tools & Materials
- Digital caliper(0.01 mm precision preferred)
- Feeler gauge set(0.05–0.25 mm range for bed gap checks)
- Allen wrench set (metric)(Include 1.5, 2.0, 2.5 mm sizes for frame/drive screws)
- Calibrated straight edge (glass/steel)(Flat reference for bed flatness checks)
- Isopropyl alcohol 70%+(For cleaning bed, nozzle, and build plate)
- Fine-tip marker or masking tape(For bed reference markings)
Steps
Estimated time: 90-150 minutes
- 1
Power on and preheat
Power on Maker 4 and preheat to the typical printing temperature used for your material. Allow hotend and bed to reach target temperature before taking measurements to minimize thermal drift.
Tip: Active heating stabilizes dimensions and reduces measurement error. - 2
Home all axes
Use the printer control to home X, Y, and Z axes. Ensure there is no obstruction under the bed and that the carriage can move freely across travel paths.
Tip: Verify that endstops are functioning before proceeding. - 3
Clean and level the bed
Wipe the bed surface with IPA and inspect for nicks or debris. If you have a removable bed sheet, ensure it’s flat and properly seated.
Tip: A dirty surface can mask true height variations. - 4
Perform initial bed leveling
If using manual leveling, loosen corner screws a little to allow a slight tilt and then re-tighten as you measure. If you have an auto-level feature, run it first to establish a baseline.
Tip: Document the measured gap at several corners to identify bias. - 5
Set Z-offset
Place a standard piece of printer paper on the bed and adjust the nozzle distance until you feel slight friction with consistent movement across the sheet.
Tip: Too tight or too loose both lead to poor first layers. - 6
Calibrate extrusion multiplier
Print a calibration cube and compare wall thickness with nominal dimensions. If over- or under-extrusion is detected, adjust the extrusion multiplier (flow) in small increments.
Tip: Make minor adjustments and reprint for accuracy. - 7
Check belt tension and axis alignment
Inspect belts for tension uniformity and verify pulleys are tight. Misaligned axes can cause dimensional errors despite good bed leveling.
Tip: Tension should be firm but not overly taut. - 8
Print a verification test
Run a simple test print to verify overall calibration. Observe first-layer adhesion, edge crispness, and dimensional accuracy across the object.
Tip: If issues persist, revisit earlier steps in sequence. - 9
Document results and adjust
Record your settings and results in a calibration log. Use this baseline for future maintenance or firmware updates.
Tip: A log makes it easier to revert changes when needed.
Questions & Answers
What tools do I need to calibrate Maker 4?
You’ll want a digital caliper, a feeler gauge, an Allen wrench set, a straight edge, IPA for cleaning, and a marker for reference. The exact items listed in Tools & Materials are essential for accurate calibration.
You need a caliper, feeler gauge, wrenches, a straight edge, and cleaning supplies to calibrate Maker 4.
How long does calibration take?
Calibration time varies with experience and goals, but expect a dedicated session to cover bed leveling, Z-offset, extrusion, and verification. Plan for a deliberate, not rushed process.
Calibration can take a while. Plan for a thorough session to cover all steps and verify results.
Can I rely on test prints alone?
Test prints are essential for validating results, but they should complement precise measurements and checks rather than replace them. Use test prints to confirm changes.
Test prints help confirm changes, but you should also measure and log results.
How often should Maker 4 be recalibrated?
Recalibration is recommended after hardware changes, firmware updates, or when you notice a drift in print quality. Regular checks keep measurements reliable.
Recalibrate after changes or if you notice issues.
What is Z-offset and why does it matter?
Z-offset defines the nozzle distance to the bed. An incorrect offset leads to poor first-layer adhesion, while a correct offset helps achieve a consistent base layer.
Z-offset is the gap between the nozzle and bed. Getting it right is crucial for first-layer quality.
Why is bed leveling important for Maker 4?
Bed leveling ensures the nozzle is at the correct distance across the build area, preventing warps and ensuring uniform adhesion. It’s foundational for reliable prints.
A level bed is essential for good adhesion and consistent layers.
Watch Video
Key Takeaways
- Follow a structured calibration sequence.
- Document every setting and result.
- Verify with multiple tests before finalizing.
- Regular maintenance preserves print quality.
- Use the log to build a reliable baseline.