How to calibrate NordicTrack treadmill
Learn a practical, home-based calibration process for NordicTrack treadmills. This guide covers safety, tools, step-by-step speed and incline calibration, belt tracking, and verification to ensure accurate workouts.

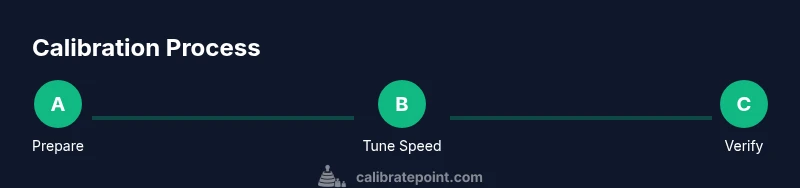
Goal: calibrate a NordicTrack treadmill to improve speed accuracy, incline alignment, and belt tracking. You’ll verify baseline measurements, perform targeted adjustments, and recheck results using built-in diagnostics and simple external tests. This guide provides a step-by-step procedure, required tools, estimated timing, and troubleshooting tips for safe at-home calibration.
Why calibration matters
Calibrating a NordicTrack treadmill ensures that the speed you feel matches the belt speed, the incline you set corresponds to the actual grade, and the belt tracks true without rubbing or slipping. For serious runners and those following precise training plans, even small discrepancies can throw off workouts and impact performance data. As you calibrate, you’ll reduce wear on the belt and motor, save time adjusting post-workouts, and gain confidence in your home gym setup. According to Calibrate Point, consistent calibration translates to more reliable workout metrics and longer equipment life, especially for mid-to-high-end treadmills used weekly. Regular checks also help catch wear before major issues develop, which protects your investment over time.
formatSpecificsPerBlockNoteInfo
wordCountIgnored
Tools & Materials
- Allen wrench set (commonly 5/16" or 3/8"(Model-specific sizes vary; verify bolts behind the rear roller)
- Digital stopwatch or smartphone timer(Precise timing for speed tests)
- Measuring tape or marked distance marker(For external speed tests (e.g., 10 meters))
- Level or inclinometer(To verify deck incline and surface flatness)
- Towel or mat for grip and safety(Keep feet dry and surfaces clean)
- Socket wrench (if needed for rear belt adjustment)(Only if your model uses rear belt tension bolts)
- Anti-slip gloves(Optional for grip and protection during adjustments)
- Tentatively, a helper(For holding tools or timing during tests)
Steps
Estimated time: 1 hour 30 minutes
- 1
Power down and safety check
Unplug the treadmill and wait for any residual movement to stop. Inspect the area for loose bolts, visible wear, and clear the belt path. Confirm that you have a dry, clean workspace and that your hands are dry before touching moving parts.
Tip: Keep a clear workspace and wear safety glasses if you’re unsure about bolt tension. - 2
Inspect belt area and deck
Lift the belt gently at the center and visually inspect for uneven wear, fraying, or a loose deck. Check rear rollers for wobble and ensure the belt edge sits evenly on both sides. Any misalignment should be noted before adjustments.
Tip: Take photos of the belt alignment before making changes so you can revert if needed. - 3
Verify baseline speed with external test
Set the treadmill to a low speed (e.g., 3 mph or 4.8 km/h). Mark a 10-meter distance on a smooth surface if possible. Run for 60 seconds and count the number of belt cycles if you have a sensor, or rely on your external measurement to compare with console readouts.
Tip: Use the same distance marker for each test to maintain consistency. - 4
Calibrate speed in the console (or belt adjustment)
If your model supports a calibration mode, access Diagnostics or Calibration from the console menu. Follow the on-screen prompts to adjust speed calibration until the external test and console reading align within an acceptable margin. If no calibration option exists, adjust belt drive tension and check pulley alignment.
Tip: Avoid over-tightening the belt; small adjustments yield better results. - 5
Calibrate incline using inclinometer
With the incline set to a defined angle, use a level or inclinometer to confirm the actual tilt. If the measured incline deviates from the displayed value, adjust the incline mechanism per manufacturer guidance and recheck with the inclinometer.
Tip: Clean pivot points before adjustment to ensure smooth operation. - 6
Adjust belt tracking and tension
If the belt drifts toward one edge, loosen the corresponding rear tension bolt and shift the belt center back toward the middle. Re-tension carefully and re-test edge alignment. Ensure the belt is evenly centered on the deck and does not rub the frame.
Tip: Make small incremental adjustments and test after each change. - 7
Post-calibration verification
Return to a moderate speed and incline, then perform the same tests as in Step 3 and Step 5. Compare results with your baseline and confirm that the changes bring measurements within a defined tolerance. Document results for future reference.
Tip: Keep a calibration log with dates and numbers for pattern tracking.
Questions & Answers
Do I need to disassemble the treadmill to calibrate it?
No, most calibration tasks can be done from access points on the frame and console. Avoid opening the motor housing or electronics. Refer to the manual for model-specific steps.
No. Calibration is typically done from exterior access points and the console. Do not open the motor housing.
How long does calibration typically take?
A typical home calibration takes about 60 to 90 minutes, depending on model and your familiarity with the steps. Allow extra time for verifying results.
Most people need about an hour to an hour and a half, including checks.
Can I calibrate without the recommended tools?
Basic calibration can be done with common tools (Allen wrench, stopwatch, level). More precise tests may benefit from a dedicated inclinometer or a marked running distance.
You can start with basic tools, but a level or inclinometer helps accuracy.
What parts should I avoid adjusting?
Do not modify the drive motor, electronics enclosure, or warranty-labeled components. Stick to belt tension, edge tracking, and posted calibration options.
Avoid opening the motor or electronics; focus on adjustable parts per the manual.
How often should I calibrate my NordicTrack treadmill?
Calibration should be done when you notice discrepancies in speed or incline, after major maintenance, or per the manufacturer's maintenance schedule. Some users perform a quarterly check.
Do it when you notice speed or incline differences or after maintenance.
Watch Video
Key Takeaways
- Calibrate speed, incline, and belt tracking for accuracy.
- Use external tests to validate console readings.
- Document results to track maintenance over time.