How to Calibrate Steps on iPhone: A Step-by-Step Guide
Learn how to calibrate your iPhone's step counter using Health and Motion data. This comprehensive guide covers prerequisites, practical tests, common pitfalls, and maintenance tips to keep your health data accurate across apps.

Goal: Learn how to calibrate your iPhone’s step count using the Health app and built-in sensors. You’ll need an iPhone with iOS 14 or later and a reference walk outdoors for accuracy. This quick guide outlines the exact steps to reset calibration, perform a controlled test, and verify your new step counts against a known distance.
Why Accurate Step Calibration Matters
Accurate step data is essential for people who rely on Health metrics for workouts, activity goals, and overall wellness tracking. When step counts drift, it can skew distance estimates, calorie calculations, and progress toward fitness targets. Calibrated steps help ensure your activity data reflects real-world movement, which in turn supports better planning and motivation. According to Calibrate Point, calibrated step counts improve consistency across apps that pull Health data, so you have fewer surprises when you review weekly activity trends. In practice, calibrated data means you can trust the numbers your phone reports during a brisk walk, a run, or a multi-mile hike.
How iPhone Counts Steps: The Basics
Your iPhone uses a combination of sensors—primarily the accelerometer and motion sensors—to infer when you take a step. The device analyzes changes in velocity and orientation, then translates those movements into step counts. The algorithms consider differences between walking, running, and stationary states. Because this process relies on how the device experiences motion, factors like carry position (pocket vs. hand), device orientation, and the type of activity can influence accuracy. A basic understanding of the sensors helps you design better calibration tests and interpret results more effectively.
The Role of Health and Motion Sensors in Calibration
Health and Motion data in iOS feed into the Health app and other services that aggregate activity. Calibration relies on sensor fusion—combining data from accelerometers, gyroscopes, and sometimes GPS for context. When you calibrate, you’re essentially teaching your device how your movement translates into steps under typical conditions. Keeping Motion & Fitness permissions enabled and allowing Health to access motion data helps ensure the calibration process has the necessary signals to base decisions on. This alignment between hardware sensors and software interpretation is what makes calibration meaningful for day-to-day activity tracking.
Outdoor vs Indoor Testing: When to Calibrate
Outdoor testing tends to yield the most reliable calibration because GPS context helps differentiate walking from other movements and provides a stable reference for pacing and distance. Indoor environments can introduce noise from elevators, escalators, or limited space, which can mislead calibration attempts. If you must calibrate indoors, use controlled movements that resemble walking (e.g., treadmill strides) and compare results with an indoor distance objective where available. The key principle is to test in conditions that resemble your usual activity to ensure the calibration generalizes across scenarios.
Planning Your Calibration Session: prerequisites and Route Design
Before you start, confirm you have a route with a known distance (for example, a 1 km loop) and a clear, safe path outdoors. You’ll need your iPhone in a consistent position—ideally in your pocket—throughout the test. Make sure Battery is reasonably charged to avoid unexpected shutdowns during data capture, and ensure Location Services are enabled for the Health app where relevant. Keep a steady pace during the test and avoid long stops that could reset movement data. Document the route distance and conditions so you can compare results accurately later.
Step-by-Step Calibration Protocol Overview
A robust calibration protocol combines sensor data review, a controlled outdoor walk, and a validation check using a known distance. The approach emphasizes repeatability so you can reproduce results across sessions. You’ll want to run at least one outdoor calibration walk of a fixed length, review the step counts in Health, and compare them with the actual distance and expected pace. If discrepancies persist across runs, you should revisit settings and consider a second calibration cycle. This section offers the practical framework, while the next sections (STEP-BY-STEP) deliver exact actions.
Interpreting Results: Aligning Step Count with Distance
After a calibration run, compare the reported steps to the actual distance using your known route. Look for proportional alignment: a higher distance should produce more steps, and the ratio of distance to steps should approximate your typical stride length. If you notice consistent undercounting or overcounting, it may indicate a need for recalibration or testing under different conditions (pace, terrain, or pocket position). Keep in mind that small deviations are normal; aim for a stable, repeatable ratio rather than perfect parity in every run.
Common Pitfalls and How to Avoid Them
One common pitfall is testing in irregular environments (dense crowds, uneven terrain) which introduces noise and false movement signals. Another is not maintaining a consistent carriage position, which can change how motion is detected. Ensure your iPhone remains in a consistent pocket position and avoid shaking or rapid arm movements during tests. Finally, don’t rely on a single calibration walk; repeat tests to confirm stability and reduce the impact of transient factors like weather or footwear.
Maintenance: When to Recalibrate and How Often
Calibration is not a one-off task; it can drift over time due to changes in walking style, footwear, or how you carry the phone. If you notice sudden changes in step counts, or after switching iPhones or updating iOS, schedule a new calibration session. A practical approach is to recalibrate every few months or after major changes to your routine. Regular checks help keep Health data reliable across apps and over the long term.
Additional Tips for Better Accuracy Across Apps and Devices
To maximize accuracy beyond the iPhone, consider cross-checking with a wearable or a dedicated pedometer on longer journeys. Ensure your Health data sources are up to date and that third-party apps have appropriate permissions. Clear, consistent test conditions—outdoor walks on flat ground, similar speeds, and minimal stops—will yield more reliable calibration results and fewer data discrepancies when you review activity summaries across platforms.
Tools & Materials
- iPhone with iOS 14 or newer(Ensure Fitness Tracking is enabled)
- Outdoor route or known distance(Example: 1 km loop)
- Health app access(View steps and calibration data)
- Reference distance/pace source(Cross-check results (optional))
- Pocket-friendly wear(Keep the phone in a consistent pocket)
- Optional fitness tracker(Cross-check step counts)
Steps
Estimated time: 1 hour 15 minutes
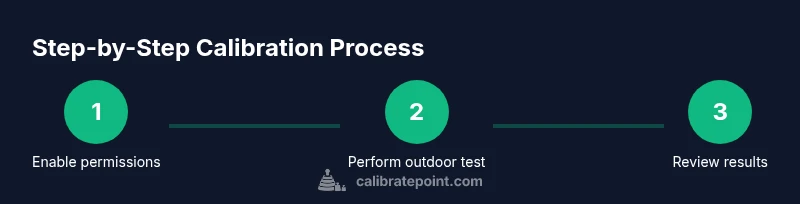
- 1
Enable motion & fitness permissions
Open Settings and verify that Motion & Fitness permissions are enabled for Health and any relevant fitness apps. This ensures the sensors can supply the data Health uses to count steps. A consistent permission setup reduces data gaps during calibration.
Tip: If permissions are off, re-enable them and restart Health before starting the test. - 2
Optionally reset calibration data if available
If your device or iOS version offers a Reset Calibration Data option, perform the reset to clear older baselines. If no reset option is present, proceed with a fresh outdoor walk to generate new data. The reset helps remove residual biases from prior calibrations.
Tip: Not all devices expose this option; document your current baseline before proceeding if you skip reset. - 3
Perform a known-distance outdoor walk
Walk a predefined distance at a steady pace with the iPhone in the same pocket position you will use daily. A 1 km loop is a common reference. Keep a consistent pace and avoid long pauses that could skew data collection.
Tip: Use a route with even terrain to reduce variations caused by accelerometer readings. - 4
Review Health data after the test
Open the Health app and locate the latest walk data. Compare the reported steps to the known distance, noting any significant deviations. If the steps are within a reasonable range and follow the distance, calibration is on the right track.
Tip: Record the result and keep a log for multiple tests to assess stability. - 5
Repeat under varying conditions
To ensure calibration holds in real-world scenarios, repeat the walk at different speeds and with alternate pocket placements. This helps build a robust calibration profile that generalizes beyond a single test.
Tip: Document each session's conditions to identify which factors influence results most.
Questions & Answers
Why is my iPhone step count off after calibration?
Discrepancies can arise from carry position, movement type, or environmental noise. Recalibration with a controlled outdoor walk often reduces drift. Also verify Motion & Fitness permissions are enabled for Health.
Discrepancies often come from how you carry the phone or how you move. Recalibrate with a controlled outdoor walk and check health permissions.
Should I calibrate indoors or outdoors?
Outdoor calibration generally provides more reliable data due to clearer movement signals and a measurable distance. Indoors, use a treadmill-based test with consistent pace if outdoor testing is not feasible.
Outdoor tests give better results, but you can use a treadmill if outdoor access isn’t possible.
How long does calibration take?
A typical calibration session with a known-distance walk takes about 20 to 30 minutes, plus time to review results. Plan for a 60-minute window to include setup and comparison checks.
Plan about an hour for setup, test, and review.
Can multiple users calibrate on the same iPhone?
Health data calibration is user-specific. If multiple people use the same iPhone, calibration should be performed per user or data may skew toward a shared baseline.
Calibration is user-specific; do it separately for each person.
Will turning off motion tracking affect calibration?
Turning off necessary motion tracking will prevent Health from gathering data, undermining calibration. Keep Motion & Fitness enabled during calibration and everyday use.
Keep motion tracking enabled; it’s essential for accurate calibration.
Watch Video
Key Takeaways
- Identify why calibration matters and how it affects health data.
- Follow a repeatable outdoor testing protocol for best results.
- Compare step counts to known distances to validate calibration.
- Recalibrate periodically to maintain accuracy over time.