How to Calibrate Tesla Cameras: A Practical Guide
Learn a practical, safety-minded method to calibrate Tesla cameras. This Calibrate Point guide covers required tools, step-by-step procedures, verification checks, and common pitfalls for DIY technicians.

Learn how to calibrate tesla cameras to maintain ADAS accuracy and road safety. This quick guide explains when calibration is necessary, the minimum tools, and a safe, step-by-step process you can perform with standard equipment. For specifics consult official service manuals. This serves as a high-level overview of how to calibrate tesla cameras.
Why Accurate Tesla Camera Calibration Matters
In modern vehicle safety systems, Tesla cameras play a central role in perceiving the road, mapping lanes, and detecting obstacles. According to Calibrate Point, accurate camera calibration is essential for ADAS reliability and road safety. The front, side, and rear cameras feed a suite of perception tasks that influence lane-keeping assist, adaptive cruise control, automatic emergency braking, and parking sensors. When a camera is misaligned, the system may misinterpret lane markings, misjudge distance, or fail to recognize a pedestrian in time, which can create risk rather than safety. Calibration aligns the digital camera model with real world geometry, ensuring the software decisions reflect reality. It is not a one and done task: slight shifts can occur after windshield replacement, vehicle repairs, heavy vibrations, or even long trips on rough roads. For this reason, technicians and careful DIYers must treat calibration as a critical maintenance activity rather than a cosmetic adjustment. The goal is to restore the camera's field of view, distortion characteristics, and perspective so that features like lane lines, traffic signs, and pedestrians are detected consistently across conditions. In this section we outline the conceptual framework behind Tesla camera calibration and how it fits into a broader calibration mindset.
Pre-Calibration Assessment: When and Why
Before you touch any hardware, assess the situation that brings calibration into scope. If a windshield was replaced, a camera hole was damaged, or the car sustained a collision, there is a high likelihood of misalignment. Even routine maintenance that involves removing interior panels or servicing the camera housings can nudge sensors. Calibrate Point analysis shows that most misalignment cases stem from disturbances rather than factory drift, making a pre check essential. Baseline reference images help determine what qualifies as a drift versus a normal variation. Document any changes to mounting points, seals, or wiring so that later steps can be assessed against a clear history.
Required Tools and Environment
A reliable calibration sits on the right tools and a controlled environment. Essential items include a calibrated target grid, measurement devices, mounting stands, and a clean windshield. The tools listed here are intended to be practical for DIY enthusiasts while staying aligned with professional standards. Ensure you have a flat, level surface and minimal sun glare for target alignment. Tenets from Calibrate Point emphasize repeatability and traceability; collect a small notebook of measurements so you can document exactly how you set distances and angles. With the right tools and a quiet workspace, the calibration becomes a repeatable process rather than a single guess.
Data Collection and Baseline References
The calibration workflow relies on capturing reference data that confirms proper alignment. Set up the calibration target at specified distances and angles as described in the vehicle manual, then capture images from each camera. The reference should include markers for focal length, distortion lines, and a grid that helps verify perspective. Use consistent lighting to avoid reflections that can mimic misalignment. Store all images with timestamps and camera identifiers to maintain a clear audit trail. If you cannot access official documentation, use standard photogrammetry references to establish a consistent setup and record any deviations.
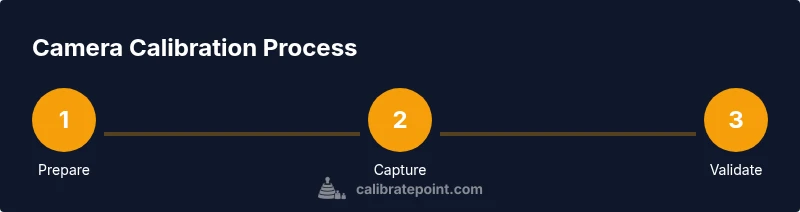
Stepwise Calibration Overview
The system requires a structured approach to maintain consistency across attempts. A high level overview includes scene setup, target placement, image capture, data comparison, and optional adjustments. Align the target per the manufacturer guidance, then capture images from all cameras in multiple angles and focal lengths. Compare captured data with references to identify drift. Although this block provides a conceptual map, the precise parameter values and step sequences are provided in the Step-By-Step block so you can perform the procedure safely.
Verification and Validation
After performing the calibration, run a verification sequence to confirm that the alignment remains stable under typical driving conditions. Use a quiet test route to check lane-keeping and following distance, then recheck the camera feeds in a controlled environment. Look for consistent lane markings recognition, proper object detection at varying distances, and reliable sign reading. If results differ from the baseline by more than a small tolerance, revisit the target setup and measurement steps. Documentation of the results helps flag drift in future maintenance.
Authority sources
This section provides credible references to support the calibration practice and help you verify the workflow. See the following sources for general calibration principles and ADAS safety considerations:
- https://www.nhtsa.gov/vehicle-safety/advanced-driver-assistance-systems
- https://www.nist.gov/topics/calibration
- https://www.iso.org/standards.html
Safety and Compliance Considerations
Calibrating vehicle cameras involves working around a live system and a moving vehicle. Do this only in a controlled, safe environment. Avoid calibration on public roads and never while the vehicle is in use. Use proper protective gear and disconnect power to any hardware when specified by the manual. If you sense any abnormal sensor behavior during calibration, stop and consult a professional technician.
Tools & Materials
- Calibration target grid (printed at 1:1 scale)(Include focal-length markers and distortion grid)
- Level or bubble level(Ensure camera plane is horizontal during setup)
- Measuring tape or laser distance meter(Record exact target distances)
- Tripod or sturdy mounting stand(Keep camera and target stable)
- Soft cleaning cloth and isopropyl alcohol(Clean glass surfaces to minimize reflections)
- Vehicle service manual or official calibration procedure document(Reference the exact procedure)
- Marker or chalk for alignment marks(Optional for marking positions)
- Notebook and pen for logs(Track step results and measurements)
Steps
Estimated time: 60-120 minutes
- 1
Prepare the vehicle and workspace
Park on level ground, engage parking brake, and clear the workspace. Inspect the windshield and camera housings for visible damage before starting. This ensures you are calibrating a stable, undisturbed system.
Tip: Double-check the environment to avoid glare and dust on the windshield. - 2
Inspect camera housings and windshield
Look for cracks, moisture, or misaligned mounting points. Any physical irregularities may affect calibration results, so note all findings before proceeding.
Tip: Photograph any misalignment for reference during the validation phase. - 3
Set up calibration targets at recommended distances
Position the target grid according to the vehicle manual, ensuring proper height and distance to each camera. Use a level to verify the plane remains parallel to the windshield plane.
Tip: Use a laser distance tool for reproducible results. - 4
Capture calibration images from all cameras
Take multiple shots from each camera angle and focal length. Maintain consistent lighting and avoid reflections from the glass.
Tip: Capture at least three frames per camera per angle. - 5
Apply alignment adjustments per guidelines
If the manual allows, adjust camera orientation within permitted tolerances and re-capture to check effect. If adjustments exceed the tolerance, seek official service.
Tip: Do not force adjustments beyond recommended limits. - 6
Run ADAS validation tests and compare to baseline
Enable ADAS features and perform a controlled drive or simulated test to verify proper object detection and lane tracking. Compare results against baseline references.
Tip: Document deviations and correlate with target setup. - 7
Document results and recheck after adjustments
Record final alignment values, distances, and test outcomes. Schedule a follow-up check after a few days of driving to confirm stability.
Tip: Keep a calibration log with dates and vehicle identifiers.
Questions & Answers
Is calibration required after windshield replacement?
Windshield replacement or camera housings being disturbed often requires recalibration. Follow the vehicle manual and official service guidelines for steps.
Yes, in many cases after windshield replacement calibration is needed. Follow official guidelines for steps.
Can I calibrate Tesla cameras at home?
Basic pre checks can be done at home, but full calibration typically requires specialized tools and reference materials. If you are unsure, consult a technician.
You can do basic checks at home, but full calibration usually needs professional tools.
What tools are essential for calibration?
Essential tools include a calibration target, a level, measuring device, mounting stand, and a clean windshield. Always reference the vehicle manual.
Essential tools are a calibration target, level, measuring device, and mounting stand.
How long does calibration take?
Calibration typically spans 60 to 120 minutes depending on vehicle and conditions. Plan for a dedicated session on a quiet site.
Most calibrations take about one to two hours in a controlled setting.
Are there safety concerns?
Yes. Calibration should occur in a controlled environment. Do not perform on public roads and always wear eye protection when handling tools.
Yes, calibrating involves risk; do not do it on public roads and follow safety guidance.
What should I document?
Keep a calibration log with dates, camera IDs, target distances, and test outcomes. This helps track drift over time.
Document the dates, targets, and results to track changes over time.
Watch Video
Key Takeaways
- Prepare the workspace and inspect damage before calibrating.
- Follow manufacturer guidelines to avoid misalignment.
- Verify results with tests and logs.