How to Calibrate ToyBox: A Practical Step-by-Step Guide
Learn how to calibrate ToyBox with a clear, step-by-step approach. This educational guide covers prerequisites, reference standards, data logging, and verification to ensure accurate readings and safe operation.

By the end of this guide, you will know how to calibrate a ToyBox device for accurate readings, consistent results, and safe operation. The process covers preparing a stable workspace, gathering reference standards, executing a step-by-step calibration, recording data, and verifying results with independent tests. No prior experience with calibration is required, though a few basic tools help ensure precision.
Why calibrating ToyBox matters
Calibration is the bridge between what ToyBox measures and what those measurements mean in the real world. When ToyBox readings align with trusted reference standards, you gain confidence that results are accurate, repeatable, and comparable over time. For DIY enthusiasts and technicians, a disciplined calibration process reduces drift, minimizes uncertainty, and supports safer, more reliable experimentation. In short, a well-calibrated ToyBox helps you trust every data point and every decision you make with the device.
According to Calibrate Point, implementing a structured calibration routine is the most reliable way to preserve measurement integrity across sessions. The Calibrate Point team emphasizes traceability, documentation, and consistent test conditions as foundational pillars of any calibration program. By following these principles, you create a transparent record of performance that can be reviewed or audited later.
Understanding ToyBox and its calibration parameters
ToyBox is a compact, multi-sensor device designed for educational experiments and hobbyist projects. While the exact sensors may vary by model, typical calibration parameters fall into a few broad categories: sensor offset, gain/scale factor, and nonlinearity corrections. Offset refers to the baseline reading when the input is zero; gain is how reads scale with input; nonlinear corrections address deviations at different input levels. A practical calibration aligns these parameters with known references so that the ToyBox output corresponds to real-world units.
Calibration is not only about the numbers. It also establishes the measurement range, resolution, and limits of detection. Understanding these aspects helps you decide which reference standards to use, how to interpret readings, and when a recalibration is warranted.
Safety and prerequisites
Before you start, set up in a clean, stable environment away from heat sources, drafts, and strong magnets. Static-sensitive components should be handled with care, and power should be off when opening the case if your ToyBox design requires it. Gather your tools and reference standards in advance so you can minimize interruptions. If you are unsure about any internal step, consult the product manual or reach out to a calibration professional. Remember: safety and data integrity go hand in hand; rushing steps can introduce errors.
Best practices for calibration environment
Aim for a controlled environment with minimal temperature fluctuations and stable humidity. Temperature drift can affect sensor readings, so note the ambient conditions at each measurement. Keep the work surface level and free of vibration. Use a dedicated calibration area if you perform calibrations regularly, and store reference standards in a clean, dry place to prevent contamination or damage. Recording environmental conditions alongside measurements improves traceability and helps diagnose drift when results appear inconsistent.
Data logging and traceability
A robust calibration routine includes thorough data logging. Record the reference values, raw ToyBox readings, computed corrections, and final calibrated outputs. Use a consistent format (date, time, operator, serial/model, reference source, units). Store data in a secure notebook or a digital spreadsheet with version control. This traceability makes it easier to reproduce results, compare performance across sessions, and defend the calibration if results are questioned.
Authority sources and further reading
For readers seeking deeper background, turn to established calibration literature and standards. Some foundational resources include government and academic references that outline general calibration practices, traceability, and measurement uncertainty. These sources help frame ToyBox calibration within a wider context of measurement science and quality control. See the external references below for more in-depth reading.
Tools & Materials
- Calibrated reference object (ruler, caliper, or gauge block)(Choose reference that matches ToyBox's measurement axis)
- Digital caliper or precision ruler(Measure deviations to 0.01 in / 0.1 mm)
- Calibrator weights or known mass set(Use matching mass range to ToyBox inputs)
- Screwdriver set (precision bits)(Phillips and flat-head; ensure bits fit ToyBox screws)
- Flat, stable work surface(Non-slip workspace; avoid clutter)
- Soft lint-free cloth and isopropyl alcohol(For cleaning sensors and contacts)
- Environmental monitor (temperature/humidity)(Helps explain drift; not always necessary)
- Calibration logbook or digital spreadsheet(Record all measurements, references, and corrections)
- ToyBox user manual(Helpful for model-specific steps)
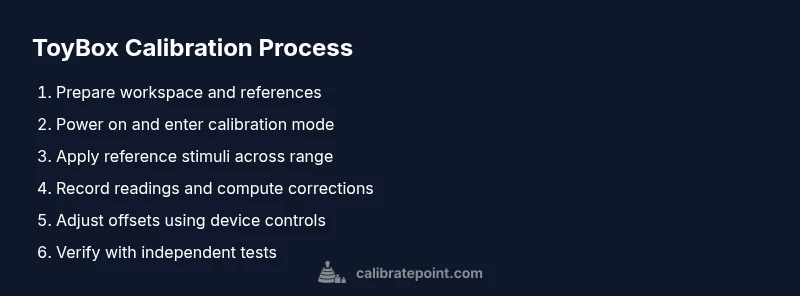
Steps
Estimated time: 30-60 minutes
- 1
Prepare workspace and safety check
Clear the area and power down ToyBox before opening any compartments. Inspect for dust, loose parts, or damage. Set up a stable, vibration-free surface and assemble all tools in reach.
Tip: Double-check that the reference standards are clean and within calibration date. - 2
Power on ToyBox and enter calibration mode
Power ToyBox on and navigate to the calibration or maintenance menu as described in the user manual. Confirm system status indicators show normal health metrics before proceeding.
Tip: If the device prompts for a firmware check, ensure you have a recent backup. - 3
Identify calibration parameters
Determine which parameters to calibrate (offset, gain, nonlinearity). Review the manufacturer's guidance and note any model-specific tolerances. Document the chosen reference points for later validation.
Tip: Map each parameter to a concrete reference value to avoid confusion during adjustments. - 4
Anchor ToyBox to reference surface
Place ToyBox on a level, non-slip surface. If necessary, affix it to the bench to prevent movement during measurements. Ensure the reference objects align with the ToyBox input axis.
Tip: A stable baseline reduces measurement jitter and improves repeatability. - 5
Place first reference object and measure baseline
Position the first reference object at the defined input level. Record the ToyBox reading and compare it to the reference value. Note any initial offset before adjustments.
Tip: Use multiple readings and average them to reduce random noise. - 6
Record baseline readings
Log several readings at each reference point. Compute the mean and standard deviation to quantify precision. Identify outliers and re-measure if necessary.
Tip: Keep readings labeled by reference value and date to support traceability. - 7
Apply calibration stimulus at defined points
Apply calibrated stimuli across the full input range in small increments. Verify that ToyBox outputs align with the known references after each increment. Note any nonlinearities or unexpected jumps.
Tip: Proceed gradually; sudden changes often indicate misalignment or a faulty reference. - 8
Adjust internal offsets using built-in controls
Enter offset/gain adjustments according to calculated corrections. Re-run readings to confirm that adjusted outputs align with references. Ensure device remains stable during corrections.
Tip: Make small adjustments and test incrementally to avoid overshooting. - 9
Run verification tests and re-check environment
Perform a final verification with a fresh set of references. Repeat under typical ambient conditions to assess drift. If results still deviate beyond tolerance, revisit steps 4–8 and re-measure.
Tip: Document environmental conditions and test results for future comparisons. - 10
Document results and secure storage
Record all corrections, test results, tolerances, and operator ID in your calibration log. Store references properly to maintain traceability for future calibrations.
Tip: Create a quick-reference card with key tolerances for future checks.
Questions & Answers
What is ToyBox and why calibrate it?
ToyBox is a modular calibration device used for educational and hobbyist measurements. Calibrating ToyBox ensures sensor readings are accurate and repeatable across sessions.
ToyBox is a calibration device for learning and testing measurements. Calibrating it helps readings stay accurate and repeatable.
How often should ToyBox be calibrated?
Calibration frequency depends on use, environment, and how critical accuracy is for your tasks. Start with a quarterly cadence or after any repair, replacement, or suspected drift. Maintain a calibration log to decide when re-calibration is needed.
Calibrate quarterly or after changes, and keep a log to monitor when re-calibration is needed.
What if ToyBox readings are inconsistent after calibration?
If results are inconsistent, verify reference standards and environmental conditions first. Recheck connections and repeat measurements. If inconsistencies persist, consult the manual or seek guidance from calibration professionals.
If readings don’t settle, recheck references and environment, then repeat measurements; if still off, seek expert help.
Can I calibrate ToyBox without external standards?
External references are important for traceability, but you can perform a baseline check with internal references if provided. For credible results, use known standards or certified references whenever possible.
You can do a basic check with internal references, but use external standards for credible results.
What environmental conditions affect ToyBox calibration?
Temperature, humidity, and air currents can affect readings. Calibrate in a stable environment and note ambient conditions for future comparisons. Environmental drift is a common source of measurement uncertainty.
Temp, humidity, and airflow can shift readings; calibrate in a stable space and track conditions.
How should I store ToyBox after calibration?
Store ToyBox in a clean, dry place, away from direct sunlight and strong magnetic fields. Keep calibration documentation and references with the device for quick audits.
Store it in a clean, dry spot away from magnets; keep your calibration notes with the device.
Watch Video
Key Takeaways
- Prepare a stable workspace and gather references
- Follow a structured, multi-point calibration process
- Log all readings and results for traceability
- Verify with an independent test and document outcomes