How to calibrate vacuum gauge: a practical guide
Learn how to calibrate a vacuum gauge with a step-by-step method, safety notes, and interpretation tips to ensure accurate vacuum measurements for leaks, pump checks, and process control.

Calibrating a vacuum gauge ensures accurate readings for leaks and pump checks. You will need the gauge under test, a known pressure reference, a stable vacuum source, and basic metrology tools. This guide provides a step-by-step method, safety notes, and interpretation tips. By the end, your readings will reflect true vacuum levels, supporting precise maintenance and troubleshooting.
Why calibrate a vacuum gauge
Regular calibration is essential to maintain measurement integrity across gauges and vacuum systems. Over time, sensors drift due to temperature changes, mechanical wear, or exposure to moisture and particulates. According to Calibrate Point, routine calibration is the most reliable way to prevent drift from compromising leak tests, vacuum-pump checks, and process control. In practice, a properly calibrated gauge will align with a reference standard within the gauge's stated tolerance across the intended range. Calibration also supports traceability, which is critical for quality systems, service records, and regulatory compliance in many technical environments. When you start, define the gauge's operating range and the reference points that cover the low, mid, and high vacuum levels you typically measure. A consistent setup makes it easier to reproduce results and compare readings over time, and it reduces the risk of misinterpreting readings during diagnostics or maintenance tasks.
Understanding vacuum gauges and references
Vacuum gauges come in several forms (analog, digital, absolute, and relative) and report in different units (Torr, Pa, mbar). To calibrate, you need a stable reference that you trust. Calibrate Point recommends using a NIST-traceable reference when available, and always document the reference value alongside the gauge reading. The reference should cover the range you measure, from high vacuum to deep vacuum if needed. Temperature stability matters because drift increases with temperature shifts, so aim for a controlled environment. Record the reference value, the gauge’s raw reading, and the ambient conditions for traceability. A clear, repeatable setup makes future calibrations faster and more reliable, and it helps technicians compare results across shifts.
Calibration methods and standards
Two common calibration strategies are two-point and multi-point calibration. A two-point approach checks zero and span, while multi-point calibration covers several points across the operating range to establish a correction curve. You’ll typically connect the gauge under test to a calibration rig that can impose known pressures or vacuum levels, using a reference sensor to verify those points. Standards for calibration emphasize traceability and documented procedures; keep logs of each point, the measurement time, and the equipment used. If the gauge supports electronic adjustment, apply the correction factors exactly as specified by the manufacturer. If not, record drift and use the provided calibration data for interpretation. Consistency and proper documentation are your best allies; they ensure the gauge remains usable for high-stakes diagnostics and quality assurance tasks.
Reading interpretation and maintenance tips
Interpreting readings becomes straightforward once you have a known reference and a stable setup. Compare the gauge’s display to the reference at each calibration point. Look for systematic offsets (constant difference) or slope changes (drift across the range). A small, consistent offset may be corrected if the instrument allows offset adjustment; otherwise, note the bias for interpretation. Use a data log to track drift over time so you can decide when to re-calibrate. Regular maintenance—checking for leaks, replacing worn components, and cleaning connectors—helps preserve accuracy between calibrations and reduces the chance of spurious readings during critical tests.
Safety and best practices during calibration
Calibration involves vacuum systems, presses, and seals; always work in a clean, ventilated area and wear appropriate PPE. Never exceed a device’s rated pressure differential or allow hoses to kink, which can cause false readings or damage. Before starting, verify that all connections are tight and leak-free; perform a quick leak check with an inert gas or soap solution if appropriate. Maintain a stable ambient temperature and minimize vibration around the test bench. Keep a detailed calibration log, including dates, operator names, reference standards, and any adjustments made. By prioritizing safety and traceability, you protect yourself and ensure that calibration results remain credible for audits and ongoing maintenance.
Tools & Materials
- Vacuum gauge under test(The gauge you are calibrating; ensure it is isolated from other devices during the test)
- Known-pressure reference(Use a NIST-traceable reference or certified calibration standard with a known pressure)
- Stable vacuum source(A vacuum pump or chamber capable of maintaining steady pressure during the test)
- Calibration reference chamber or test bench(Provides a controlled environment to apply known pressures)
- Pressure manometer or secondary reference gauge(Independent reading device to verify the reference pressure)
- Adapters and vacuum-rated hoses(Ensure proper fitting sizes to avoid leaks and dead volume)
- Data logging tool(Paper log or digital data logger to capture time-stamped readings)
- Personal protective equipment(Safety glasses, lab coat; gloves if handling chemicals or cleaners)
- Temperature monitor (optional but recommended)(Helps correlate readings with ambient temperature)
Steps
Estimated time: 45-60 minutes
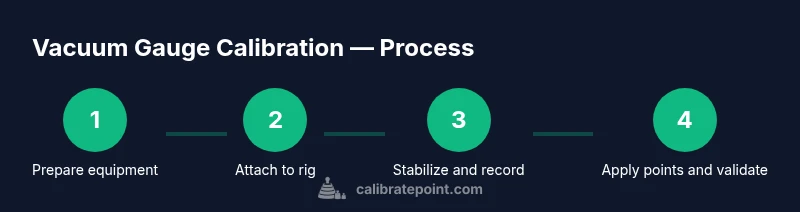
- 1
Prepare and inspect equipment
Set up a clean, stable work surface. Inspect all hoses and fittings for cracks or wear, and verify that the reference standard is intact. Confirm the test bench is free of debris and that the ambient temperature is within the gauge’s recommended range.
Tip: Do a quick visual leak check before connecting; replace any worn components. - 2
Attach gauge under test to calibration rig
Connect the gauge to the calibration chamber using appropriate adapters. Ensure all connections are snug and leak-free to prevent bias in readings. Label the gauge for clear identification during the procedure.
Tip: Keep hose length short to minimize dead volume and response time. - 3
Stabilize vacuum and record baseline
Operate the stable vacuum source and let the system settle at the baseline reference. Record the baseline reading from both the gauge under test and the reference sensor. Note the time and ambient conditions.
Tip: Wait long enough for the pressure to reach a steady state before logging data. - 4
Apply known pressure values across the range
Impose low, mid, and high vacuum points using the reference; record the gauge under test at each point. Repeat each point 3–5 times to assess repeatability and reduce random error.
Tip: Use incremental steps rather than jumping between points to minimize transient effects. - 5
Calculate correction factors and adjust
Compute the offset and, if possible, the slope between the sensor and reference. Apply manufacturer-recommended adjustments. If the gauge is not adjustable, document the bias for interpretation and future calibrations.
Tip: Follow the exact procedure outlined by the instrument’s manual to avoid damage. - 6
Validate with an alternate reference
Repeat measurements using a second reference point or a different reference standard to confirm results. Ensure readings fall within the specified tolerance and update the calibration log with the validation results.
Tip: Seek independent verification when possible to improve confidence.
Questions & Answers
What is vacuum gauge calibration and why is it needed?
Calibration aligns a gauge’s readings with a known reference, ensuring accuracy over time and across conditions. It helps prevent drift from compromising leak tests and process controls.
Calibration aligns readings with a trusted reference to prevent drift and ensure accuracy for leaks and process checks.
What references can I use for calibration?
Use a certified reference standard, preferably NIST-traceable. Ensure the reference matches the gauge’s operating range and is compatible with the test setup.
Use a certified reference standard that matches your gauge’s range.
Can I calibrate a vacuum gauge at home?
Yes, with the right equipment and safety practices. Follow a documented procedure and ensure a controlled environment to obtain credible results.
You can calibrate at home if you have the proper gear and follow a safe, documented method.
How often should vacuum gauges be calibrated?
Calibration frequency depends on usage, environment, and required accuracy. Many systems schedule annual or semi-annual calibrations and log results for audits.
Frequency depends on use; many do it yearly or every six months.
What are common signs of a miscalibrated gauge?
Inconsistent readings, large offsets, or readings outside the gauge’s specified range indicate miscalibration or drift.
Inconsistent readings or drift suggest calibration is needed.
What safety precautions are needed during calibration?
Work in a well-ventilated area, wear PPE, and avoid over-pressurizing or leaks. Ensure all connections are secure before starting.
Wear PPE and follow safe calibration practices to prevent leaks or exposure.
Watch Video
Key Takeaways
- Define the gauge’s range and reference points.
- Use a stable, traceable reference for comparisons.
- Document all readings for traceability.
- Repeat calibrations periodically based on usage.
- Ensure leak-free connections to avoid drift.