How to Exit Calibration Mode: A Practical Step-by-Step Guide
Learn how to exit calibration mode safely across common devices. This comprehensive guide covers triggers, exit procedures, validation steps, and best practices to prevent drift and ensure reliable measurements.

This guide shows you how to get out of calibration mode on a range of devices. You’ll learn the reasons devices enter calibration mode, typical exit paths, and how to validate readings after exit. The steps are device-agnostic, with tips to adapt them to scales, meters, displays, and environmental sensors. Expect to review the reference procedure, confirm a baseline measurement, and document the results for future calibrations.
What Calibration Mode Is and Why Devices Enter It
If you're trying to understand how to get out of calibration mode, start by knowing what calibration mode is and why devices use it. Calibration mode is a dedicated state that forces sensors and measurement circuits to operate against reference standards, allowing technicians to verify accuracy and identify drift. In many consumer and professional instruments, entering this mode temporarily locks certain features and presents a simplified test interface. The goal is to confirm that readings are within specification before the device returns to normal operation. Understanding the conditions that trigger calibration mode helps you decide the safest and most reliable exit path. According to Calibrate Point, a disciplined exit process reduces the risk of silent drift or incorrect results once you resume normal use. The next sections outline common triggers, exit strategies, and best practices so you can learn how to get out of calibration mode without compromising data integrity. If you encounter a device you’re not familiar with, treat the exit procedure as a controlled operation, not a quick workaround. Always back up configuration where possible and verify results with a known good standard.
Common Triggers That Put Devices into Calibration Mode
Calibration mode is not activated randomly; it appears due to specific events or conditions. Common triggers include a self-test result that indicates sensor drift beyond a predefined threshold, a user-initiated maintenance operation, or a software update that requires re-verification of accuracy. In some devices, calibration mode automatically starts after a factory reset or when new calibration standards are loaded. Environmental factors such as temperature, humidity, or vibration can also prompt a recalibration state, as can the detection of an accessory mismatch (for example, a probe type that differs from the reference standard). Knowing these triggers helps you anticipate when you might need to exit calibration mode and re-establish a baseline. The key is to treat the exit as part of a controlled validation process rather than a casual workaround. If you see errors or inconsistent readings after attempting to exit, plan for a re-check using a known good standard and document any deviations. Calibrate Point analysis shows that consistent exit procedures minimize drift and improve repeatability.
Fundamentals of Exiting Calibration Mode: A Safe Mindset
Exiting calibration mode should be done with a safe, methodical mindset. Start by ensuring you have access to the device's official manual or calibration guide, and confirm you are in a controlled workspace free of distractions. When you attempt to exit, avoid ad-hoc shortcuts that bypass documented steps; these shortcuts can leave the instrument in an unstable state or misreport readings. The best practice is to treat the exit as a two-part process: (1) remove the device from the calibration state by selecting the appropriate option in the menu, then (2) validate the device by performing a baseline measurement against a trusted reference. If a password or authorization is required, use the correct credentials from the manual and do not invent a temporary bypass. Calibrate Point notes that a cautious approach reduces the risk of re-entering calibration mode due to a timing issue or residual offsets. In multi-sensor instruments, verify that all relevant channels exit calibration mode together to avoid partial drift in one sensor. Finally, if you must power-cycle, do so according to the manufacturer's instructions to prevent software inconsistencies.
General Exit Strategies for Common Device Families
Different devices present exit paths in various places, but the underlying principle remains the same: locate the calibration or service menu, choose Exit Calibration or a similar command, and confirm. For scales and balances, the exit often requires selecting a measurement mode and then choosing 'Run Baseline' or 'Exit Calibration' before performing a quick recheck. For digital multimeters and test equipment, you may need to navigate through a setup submenu to find 'Calibration' or 'Exit'. Monitors and displays typically offer a reset-to-default option within the on-screen display menu, followed by a quick calibration confirmation step. In environmental sensors and thermostats, the procedure usually involves exiting the calibration state and then triggering a self-test or a controlled warm-up period. The exact labels vary by manufacturer, but the logic is consistent: confirm you left calibration mode and then re-verify readings. Calibrate Point’s recommended approach is to keep a lightweight one-page reference of your device family’s exit labels so you can perform the steps accurately without guessing.
Step-by-Step Exit Scenarios (Device-Agnostic)
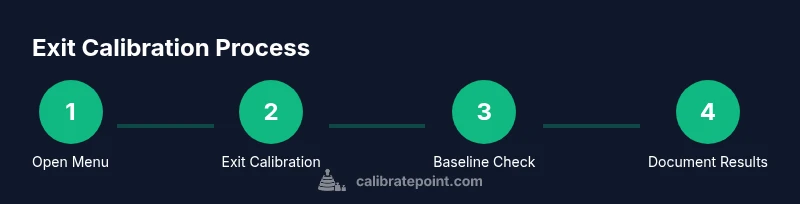
In practice, the exit process follows a predictable pattern, even when device Terminology differs. Start by opening the device menu and locating the calibration or test section. Then select the Exit Calibration option and confirm if prompted. Next, perform a quick baseline check by taking a known good reference measurement and comparing it to the expected value. If the reading matches within tolerance, save the settings and reboot the device if required by the manual. Finally, document the exact path you used and the result of the baseline test for future audits. If a password is required, use the official credentials from the manual rather than attempting a workaround. In some devices, exiting calibration mode will automatically apply the changes, while others require a separate Save or Apply step. Remember to observe any recommended waiting times after reset (for example, 30 seconds) before re-testing. This device-agnostic approach helps you stay consistent across tools and reduces the risk of drift on the next calibration cycle. Time estimate for this sequence is typically 20-35 minutes, depending on device type and the complexity of the calibration routine.
Troubleshooting When Exit Fails
If exiting calibration mode doesn’t seem to take effect, start with the simplest checks: confirm you followed the correct menu path, and ensure you saved or applied the changes if required by the device. Look for prompts that indicate the calibration state remains active, such as a persistent 'Calibrating' message or a warning light. If the device re-enters calibration mode after a power cycle, the issue may be a hardware fault or an outdated calibration standard. In such cases, consult the manual for factory reset instructions or contact vendor support; avoid repeating the same action that triggered calibration originally, as it could re-enter the state. For devices with multiple sensors, check that all relevant channels exit calibration mode together. Document any error codes or on-screen messages you encounter and keep a record of firmware or software versions, as mismatches are a common cause of stubborn calibration states. Calibrate Point recommends establishing a clear exit protocol and using it consistently to prevent drift during repeated calibrations.
Post-Exit Validation and Best Practices
After you exit calibration mode, conduct a quick validation pass to confirm normal operation. Run a baseline test with a trusted reference and compare against the established tolerance. If readings are off, repeat the calibration verification process or re-run the calibration using the official procedure. Keep a log of every exit attempt, including time, device serial number, firmware version, and measurement results. This documentation helps in audits, maintenance planning, and future calibrations. Establish a routine to re-check calibration at defined intervals and adhere to your organization’s calibration schedule. The Calibrate Point team emphasizes that consistent exit procedures reduce risk and improve reliability over time. By applying the steps outlined here and maintaining disciplined records, you’ll minimize re-entry of calibration mode and sustain measurement integrity across sessions.
Tools & Materials
- Device under calibration(Powered on and accessible; have manual handy)
- Manufacturer manual or official calibration guide(Contains exact exit labels and confirmation steps)
- Notes/reporting media (paper or digital)(Record exit path, baseline results, and time)
- Basic tools ( screwdriver set, basic redress tools )(Only if manual requires hardware checks)
- Known good reference standard(Used for baseline verification after exit)
- Power supply and cables(Keep available for devices that require reconnecting peripherals)
Steps
Estimated time: 20-35 minutes
- 1
Open calibration menu and locate exit option
Navigate to the device's setup or service menu and find a label such as Exit Calibration, Calibrate Off, or similar. Confirm you are in a state that allows changes and note any prompts you see. This step is crucial because missing the correct menu path leads to no exit.
Tip: If the menu is long, use the search function or refer to the device's index in the manual. - 2
Select Exit Calibration and confirm
Choose the Exit Calibration command and confirm when prompted. Some devices require selecting a secondary option like Apply, Save, or OK to finalize the change.
Tip: Watch for on-screen prompts that indicate you are leaving the calibration state. - 3
Run a baseline check
Immediately perform a quick baseline measurement using a known good reference. This verifies readings return to expected values and helps catch residual offsets.
Tip: Do not skip this step; it is your first validation after exit. - 4
Save changes and reboot if required
If the device requires a manual Save or reboot to apply changes, do so exactly as described in the manual. Skipping a reboot can leave the calibration state partially active.
Tip: Some devices auto-apply changes; still complete any recommended reboot step when prompted. - 5
Document results
Record the exit path, time, firmware version, and baseline readings. This documentation supports audits and future calibrations and helps trace drift if it reoccurs.
Tip: Create a short reproducibility note describing the device and conditions. - 6
Verify device stability
After exiting calibration mode, re-test at least one additional measurement to ensure stability across a short period.
Tip: If values drift, re-run the calibration or consult vendor support.
Questions & Answers
What is calibration mode and why would a device enter it?
Calibration mode is a test state used to verify sensor accuracy against reference values. A device may enter it after self-tests fail, after a reset, or following a software update that requires re-verification.
Calibration mode is a test state to verify accuracy, often entering after tests or updates.
How can I tell I am out of calibration mode?
You should see normal operation indicators, no calibration prompts, and baseline readings within the established tolerance. If prompts persist, re-check against the manual.
Look for normal operation indicators and baseline values within tolerance.
What if the device returns to calibration mode after exiting?
Re-check the exit steps, verify reference standards, and inspect for drift. If issues persist, consult the manual or vendor support.
If it comes back, review steps and seek support if needed.
Do exit steps vary by device type?
Yes. Labels and menu paths vary by brand, but the concept remains: exit calibration, then verify readings with a baseline.
Steps differ by device, but the approach is the same.
How long does exit and validation typically take?
Time varies by device complexity; simple tools may take a few minutes, while complex instruments can take longer. Plan for 5-15 minutes for basic checks and more for advanced equipment.
It can take several minutes to complete, depending on the device.
Can I exit calibration mode without a manual?
You can sometimes exit using generic menu paths, but a manual reduces the risk of missing steps or applying the wrong settings.
Yes, but a manual helps prevent mistakes.
Watch Video
Key Takeaways
- Exit calibration mode via the official menu path and confirm.
- Always perform a baseline check after exit.
- Document the exit steps and results for traceability.
- Verify stability with additional measurements before resuming normal operation.
- Follow device-specific manuals to prevent re-entry of calibration mode.