How to Use Calibrated Sculk: Step-by-Step Guide
Learn how to safely and accurately use calibrated sculk with a practical, step-by-step workflow. This guide covers tools, setup, calibration steps, verification, and maintenance for DIYers and technicians.

Learn how to use calibrated sculk with a repeatable, field-tested workflow. According to Calibrate Point, this guide covers setup, essential tools, calibration steps, verification, and safe handling. Calibrate Point analysis shows that following these steps yields reliable readings and consistent results in DIY projects or professional calibration tasks for practitioners everywhere.
What is calibrated sculk and why it matters
Calibrated sculk is a specially prepared material designed to produce a repeatable signal response under defined conditions. It is used in calibration tasks to establish a stable baseline, verify measurement systems, and compare test results across environments. For DIY enthusiasts and technicians, understanding how to use calibrated sculk means achieving consistent data and reducing drift in readings. The Calibrate Point team emphasizes that the material’s behavior should be characterized under known temperature, humidity, and lighting conditions to ensure repeatability when performing calibration checks. In practice, calibrated sculk acts as a reference that helps you align sensors, tune instruments, and validate measurement processes. Expect a small, predictable shift when environmental factors change, which you can quantify and compensate for in your workflow. When you know how to use calibrated sculk effectively, you unlock reliable data streams for quality control, instrument testing, and process optimization. This guide keeps the focus on practical steps, common pitfalls, and clear checkpoints that make calibration approachable for beginners while still valuable for seasoned professionals.
Safety and handling considerations
Working with calibrated sculk requires attention to safety and handling practices, especially in lab or workshop environments. Always wear appropriate PPE, including safety goggles and gloves, to prevent skin or eye contact with the material or any calibration fluids that may accompany it. Keep the work area clean and free of moisture, static charges, and dust that could affect readings. Use non-conductive mats and containers to minimize unintended signal paths and cross-contamination. Label all samples clearly and store calibrated sculk away from incompatible substances. If you suspect contamination or degradation, replace the batch to preserve data integrity. Calibrate Point’s safety guidance highlights the importance of conduct and documentation, so every calibration task remains auditable and safe.
Core calibration principles for calibrated sculk
Key calibration principles for calibrated sculk include establishing a stable baseline, tracking drift, and applying tolerances that reflect your measurement goals. Start by defining reference conditions—temperature, humidity, and ambient light—and ensure the material is equilibrated before readings. Record baseline readings to serve as a comparison point for all subsequent measurements. Use a traceable reference standard when available, and maintain a calibration curve that maps input stimuli to output readings. Small, predictable changes are acceptable if they are well-documented and accounted for in the final results. Regularly review the calibration process to detect drifting behavior and update procedures as needed. This disciplined approach helps you maintain accuracy over time and across equipment.
Establishing a baseline reading for calibrated sculk
Baseline readings establish the standard against which all future measurements are judged. Before initiating any calibration, allow calibrated sculk to reach ambient conditions and perform a series of quick, repeatable measurements to gauge normal response. Document the average, variance, and any outliers. If the baseline drifts between sessions, investigate environmental controls or sample integrity. A robust baseline reduces the risk of false positives or negatives during verification, and it also makes it easier to spot equipment malfunctions. This step is foundational for achieving repeatable results when using calibrated sculk in real-world tests.
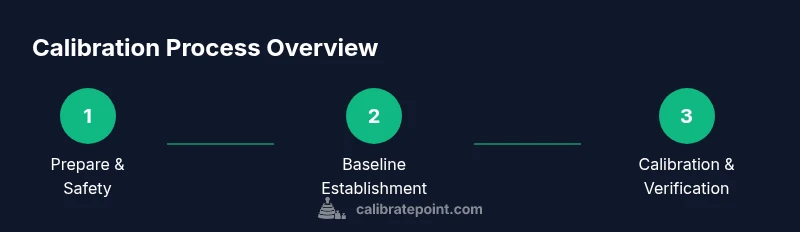
The calibration workflow: setup, alignment, and verification
A well-structured calibration workflow for calibrated sculk balances setup, alignment, and verification. Begin with a controlled environment to minimize noise. Align the measurement instrument so it samples consistently from the same reference surface, and calibrate your instrument’s gain and offset as needed. Apply a known stimulus to the calibrated sculk and record the response across multiple trials. Use statistical methods to compute adjustments and quantify uncertainty. Finally, verify the calibration with an independent reference or alternate test condition to confirm the results are not instrument-specific. This workflow emphasizes repeatability, traceability, and transparent documentation.
Note: Always log the exact environmental conditions, instrument settings, and sample identifiers for auditability. This reduces ambiguity when diagnosing future drifts or discrepancies.
Practical calibration workflow: setup, execution, verification
In practice, you will follow a structured, repeatable sequence to calibrate calibrated sculk. Start by preparing the workspace, ensuring a clean, non-static surface. Connect your data logger or multimeter, and verify the baseline using a short pre-test. Apply the calibration stimulus in a controlled manner and capture multiple readings to assess consistency. Compute the adjustments and apply them to the instrument’s calibration parameters. Then re-test with the independent reference to confirm stability. Finally, archive all data and metadata for future audits and comparisons.
Troubleshooting common issues with calibrated sculk
Common issues include unexpected signal drift, saturation at high stimulus levels, and noisy measurements. If you notice drift, re-check environmental controls and sample integrity, then repeat the baseline and calibration steps. Saturation usually indicates the stimulus is outside the instrument’s dynamic range or that the sample has degraded; reduce stimulus or replace the sample. Noise may stem from grounding issues, loose connections, or electrical interference; verify cables, shielding, and grounding paths. Maintain a strict log of all changes so you can trace root causes.
Maintenance, storage, and lifecycle management
To ensure ongoing reliability, perform periodic re-calibration of calibrated sculk according to your organization’s schedule or when process conditions change significantly. Store samples in sealed, labeled containers in a climate-controlled cabinet to minimize exposure to humidity and contaminants. Maintain an artifact library with batch numbers, calibration dates, and reference standards used. When disposing of expired material, follow local regulations for hazardous materials and ensure records reflect the disposal as part of traceability. Regular reviews of calibration procedures also help keep the workflow current with best practices.
Real-world scenarios and getting reproducible results
In practice, calibrated sculk shines in quality-control contexts where repeatable measurements are critical. For example, use calibrated sculk to validate sensor responses across a batch of devices, then compare the results against defined acceptance criteria. In research settings, calibrated sculk can help verify instrument linearity and detect subtle drifts over time. Regardless of the scenario, the key is to maintain a strict protocol, document every variable, and use a well-characterized baseline. With disciplined practices, your results become reproducible, auditable, and trustworthy.
Tools & Materials
- Calibrated sculk sample(Record batch/lot information and verify integrity)
- Non-conductive work surface/mat(Minimize unintended signal paths)
- Personal protective equipment (goggles, gloves)(Follow lab safety guidelines)
- Digital multimeter or data logger(Capture readings with timestamped data)
- Environmental control equipment (optional)(Humidity/temperature monitor for drift control)
- Calibration reference standard(Traceable standard if available)
- Non-reactive containment containers(Store samples securely between tests)
Steps
Estimated time: 2-3 hours
- 1
Prepare workspace and safety checks
Set up the workstation on a non-conductive surface, ensure the area is clean and dry, and confirm all personnel are wearing PPE. Verify that environmental controls are stable to prevent sudden readings. This step establishes a safe, controlled baseline for calibrated sculk calibration.
Tip: Document the ambient conditions before you start; small changes here affect later accuracy. - 2
Inspect materials and references
Inspect the calibrated sculk sample for signs of degradation or contamination. Check that the batch/lot information matches your calibration plan and that reference standards are traceable. If anything looks off, replace the sample to avoid skewed results.
Tip: Seal the sample after inspection to prevent moisture exposure between tests. - 3
Connect instrumentation and verify baseline
Connect the data logger or multimeter and power up the measurement system. Run a quick baseline test with a nominal stimulus to confirm the instrument is sampling correctly and nothing is misconfigured. Record the baseline values for later comparison.
Tip: Time-stamp each reading and verify there are no missing data points. - 4
Position sculk in controlled environment
Place the calibrated sculk on the non-conductive mat inside the controlled environment. Ensure consistent orientation and spacing from any sensors or stimuli. This positioning minimizes variability due to geometry or stray fields.
Tip: Use alignment guides or fixtures to maintain repeatable placement. - 5
Apply calibration stimulus and record response
Apply the defined calibration stimulus in a controlled, incremental manner. Capture multiple readings per step and ensure the stimulus levels remain within the instrument’s dynamic range. This generates the data needed to construct the calibration curve.
Tip: Avoid rushing; patterned, evenly spaced stimuli improve curve quality. - 6
Compute calibration adjustments
Compute the needed adjustments by comparing responses to the reference data. Use statistical methods (mean, standard deviation, confidence intervals) to determine the optimal calibration parameters. Document the calculations and the resulting settings clearly.
Tip: Keep a copy of the raw data; do not overwrite before verification. - 7
Validate calibration with independent reference
Test the calibrated sculk with an independent reference to confirm the calibration holds beyond the primary dataset. If the results diverge, revisit steps 3–6 and reassess environmental or measurement factors. Validation is crucial for trustworthiness.
Tip: Aim for at least three independent validation trials for robust confidence. - 8
Document results and archive artifacts
Prepare a calibration report detailing setup, readings, baseline, adjustments, and validation outcomes. Archive all data, instrument settings, environmental conditions, and sample identifiers for traceability. Store artifacts securely for future audits.
Tip: Include a summarized table of results and an appendix with raw data.
Questions & Answers
What is calibrated sculk and why is it used?
Calibrated sculk is a material engineered to provide a repeatable signal response under defined conditions. It is used to establish baselines, verify measurement systems, and compare test results across environments. Proper use improves data integrity and repeatability.
Calibrated sculk is a repeatable signal material used to set baselines and verify instruments. It helps you get consistent results across tests.
What equipment do I need to calibrate sculk?
You’ll need a calibrated sculk sample, PPE, a non-conductive work surface, and a data logger or multimeter. An environmental monitor and a traceable reference standard are recommended for higher precision and traceability.
You need the sculk sample, PPE, a non-conductive surface, and a data logger. Optional standards increase precision.
How long does calibration typically take?
Calibration duration depends on the complexity and required precision, but a typical workflow can take 2 to 3 hours, including setup, baseline establishment, adjustments, and validation.
Most calibrations take a couple of hours, including setup and verification.
What are common signs that calibration is off?
Common signs include drift over time, inconsistent readings across trials, or saturation at expected stimulus levels. Investigate environmental controls, sample integrity, and instrument stability to identify the cause.
Watch for drift, inconsistent results, or saturation; these signal calibration issues.
How should I store calibrated sculk after calibration?
Store calibrated sculk in labeled, sealed containers in a climate-controlled area. Record batch, date, and storage conditions, and ensure easy retrieval for future audits.
Keep it in labeled, sealed containers in a climate-controlled area and log storage details.
Watch Video
Key Takeaways
- Establish a stable baseline before adjustments
- Maintain consistent environmental conditions
- Document every measurement and setting
- Verify results with an independent reference
- Store artifacts securely for traceability