Klipper E-steps Calibration Guide
Learn how to calibrate extruder steps (E-steps) in Klipper with a practical, repeatable method. This guide covers prerequisites, measurement techniques, math to update step_distance, verification, and maintenance for reliable extrusion.

You will calibrate your Klipper extruder’s E-steps to ensure accurate filament extrusion. Start by confirming your current step_distance, marking 100 mm of filament, and extruding 100 mm. Measure actual extrusion, apply the formula to adjust step_distance, save to config, and restart. This step-by-step method reduces under- or over-extrusion in inaccurate prints.
What are E-steps and why calibrate them?
In 3D printing, E-steps (extruder steps per millimeter) dictate how far the filament advances with each motor step. In Klipper, the extrusion distance is governed by step_distance, which is the inverse of steps-per-mm. Small inaccuracies can compound into under- or over-extrusion, visible as gaps between lines or blobs on the print. Calibrating E-steps ensures consistent extrusion, improves dimensional accuracy, and reduces material waste. The Calibrate Point team has found that a disciplined approach to E-steps calibration yields more reliable prints across different filaments and temperatures. This guide uses a practical, repeatable method suitable for hobbyists and professionals alike.
Klipper E-steps vs Marlin: what changes in practice?
Klipper uses a different parameterization for extrusion compared to many firmwares like Marlin. Instead of a fixed extrusion multiplier in software, Klipper relies on the step_distance value, which translates motor steps into millimeters of filament. Adjusting step_distance updates how far the filament moves per step. Because Klipper offloads a portion of timing and motion planning to the host, calibration can be more repeatable but requires editing printer.cfg and restarting the service to apply changes. This section helps you understand where to look in your configuration and what gets affected when you recalibrate E-steps.
Prerequisites and safety considerations
Before starting, ensure you have a Klipper-powered printer connected to a reliable host (PC or Raspberry Pi) and access to edit printer.cfg. Power off safety is essential when handling hot ends and moving axes. Use proper personal protective equipment if you work with heated components. Keep a clean workspace, secure loose filament, and verify that the nozzle and hotend are at typical printing temperatures for the filament you will use during calibration. This reduces dimensional drift caused by thermal expansion and ensures your test results reflect normal operating conditions.
Understanding the math: how to calculate a new step_distance
E-steps calibration hinges on comparing the requested extrusion length with what actually comes out of the nozzle. The commonly used relationship is:
new_step_distance = current_step_distance * (expected_length / actual_length)
Where current_step_distance is the existing mm-per-step value derived from steps_per_mm, and actual_length is how much filament was actually extruded when you asked for the expected_length. In Klipper, step_distance is the inverse: step_distance = 1 / steps_per_mm, so updating step_distance directly changes extrusion in millimeters per motor step. This math works for single filaments and general-purpose testing. Always verify by repeating a second calibration cycle to confirm stability.
Choosing a calibration method: length-based vs weight-based extrusion
The most common approach uses a fixed extrusion length (e.g., 100 mm) and a ruler/caliper to measure actual extrusion. A weight-based method can provide cross-checks by weighing the extruded filament before and after a test print, then inferring the volume extruded. Length-based methods are faster and adequate for most users, while weight-based methods offer a higher precision check when you require the tightest tolerances. This section helps you decide which approach matches your goals and available tools.
Tools and setup: readying Klipper and the host
Having the right tools makes calibration smoother:
- Digital caliper or precise ruler for measuring extrusion length
- Filament of known diameter (1.75 mm or 2.85 mm as used by your printer)
- A stable host computer with access to printer.cfg (via Moonraker/Fluidd/OctoPrint) and a text editor
- A standard 100 mm extrusion test length for consistency
- A notebook or digital log to capture measurements and calculations
This section aligns tools with the step-by-step workflow, ensuring you can execute measurements reliably and reproduce results across sessions.
Step-by-step workflow overview
The calibration workflow combines measurement, calculation, and configuration edits. You will start by preheating, homing, and marking a filament reference. Then, you will extrude a known length, measure the actual extrusion, compute a new step_distance, update printer.cfg, and verify with another extrusion pass. Rechecking ensures the new setting holds under typical print temperatures and speeds. This overview sets the stage for the concrete steps that follow.
Practical considerations for different filaments and temps
Filament diameter tolerance, temperature, and drive gear can influence extrusion. For example, softer filaments may compress slightly and require small adjustments, while rigid filaments may reveal more precise alignments. If you switch spool brands or filament types, re-run the calibration to capture changes in extrusion behavior. This section discusses practical considerations to help you plan calibration sessions around your material choices and print settings.
Maintaining accurate E-steps over time and hardware changes
Calibration is not a one-and-done task. Mechanical changes, nozzle swaps, gear wear, or roller tension can alter extrusion. Schedule periodic recalibration, especially after hardware changes. Maintain a calibration log and note the environment (filament type, temperature, print speed) to simplify future recalibrations. Regular checks help you keep extrusion consistent across prints.
Common mistakes and how to avoid them
Avoid relying on a single measurement or a quick pass of extrusion. Inaccuracies in measurement, incorrect reference length, or neglecting nozzle warm-up can lead to misleading results. Always re-check after adjusting, validate with a second extrusion pass, and keep your test conditions close to typical printing scenarios. This reduces the chance of chasing noise in your results.
Tools & Materials
- Digital caliper(to measure extrusion length with 0.01 mm precision)
- Ruler or marked tape(to verify the extrusion length against the reference mark)
- Filament spool (same material/dia as printing test)(for a realistic extrusion test and spacing checks)
- Screwdrivers/Allen wrenches (appropriate sizes)(to adjust extruder hardware if needed)
- Printer.cfg access (Klipper)(for updating step_distance and saving changes)
- Notebook or digital log(record measurements, calculations, and results)
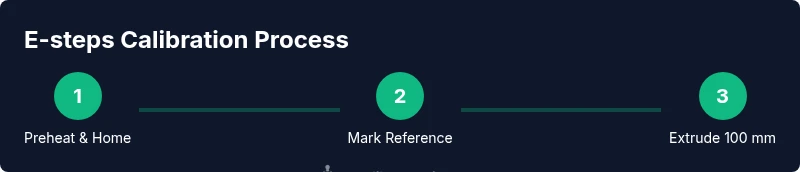
Steps
Estimated time: 45-75 minutes
- 1
Preheat and home the printer
Power on the printer and preheat to the typical printing temperature for the chosen filament. Home X, Y, and Z to establish a known reference frame before starting extrusion tests.
Tip: Preheating ensures plastics behave predictably during extrusion tests. - 2
Mark a filament reference length
Using a caliper or ruler, mark the filament at a precise reference distance from the nozzle entry (commonly 120 mm). This mark serves as your length reference for the test.
Tip: Ensure the mark is clearly visible and aligned with a fixed feature on the extruder. - 3
Mark reference length on the filament
Place the mark so that, when the filament is fed, the reference distance will be exactly 100 mm of extrusion after starting the test.
Tip: A second mark at the 120 mm point helps verify the reference during testing. - 4
Extrude a known length
In Klipper, command the extruder to move 100 mm of filament at a moderate feed rate. Keep the nozzle close to normal printing distance to avoid temperature changes affecting extrusion.
Tip: Use a conservative feed rate to minimize slipping and back pressure. - 5
Measure actual extrusion
After extrusion, measure how far the marked filament moved past the reference point. Record the actual extrusion length.
Tip: If possible, take multiple measurements to average out minor variations. - 6
Calculate new step_distance
Compute a new step_distance (or steps_per_mm) using the formula: new_step_distance = current_step_distance * (expected_length / actual_length).
Tip: Double-check your math and ensure units are consistent. - 7
Update printer.cfg
Edit printer.cfg to set step_distance for the extruder. Save the file and prepare to restart Klipper to apply changes.
Tip: Use a copy of your current config as a backup before edits. - 8
Restart and re-test
Restart Klipper and perform a second extrusion test with the same 100 mm length to confirm the result improves accuracy.
Tip: If results are still off, iterate once more with a smaller adjustment step. - 9
Document results
Log the measurements, updated step_distance, and the verification outcome for future reference.
Tip: A good calibration log speeds up future maintenance and filament changes.
Questions & Answers
What is E-steps in Klipper and why does it matter?
E-steps (extruder steps per millimeter) determine how far filament moves per motor step. In Klipper, this is controlled by step_distance. Accurate E-steps prevent under- or over-extrusion, improving dimensional accuracy and surface finish.
E-steps tell the printer how much filament to push with each motor step; getting this right matters for smooth, accurate prints.
How long does E-steps calibration typically take?
A careful calibration session usually takes 30 to 60 minutes, depending on how many iterations you perform and how quickly you measure filament length.
Most users spend about half an hour to an hour calibrating, including validation.
What if extrusion is still off after recalibration?
If extrusion remains off, recheck filament diameter, nozzle temperature, and drive gear condition. Re-measure, and consider performing a second calibration cycle with tighter tolerances.
If it still doesn’t match, recheck measurements and try a second calibration pass.
Can I calibrate E-steps for different filaments separately?
Yes. Different filaments can behave differently; run a separate E-steps calibration per filament type or diameter if you switch materials often.
You can calibrate for each filament type to keep extrusion accurate across materials.
Should I recalibrate after changing the nozzle or cooling hardware?
Yes. A nozzle change or significant hardware adjustment can alter extrusion dynamics, warranting a recalibration.
Hardware changes can affect extrusion, so recalibration is a good safety check.
Is weight-based extrusion calibration more accurate than length-based?
Weight-based calibration provides cross-check validation, but length-based methods are sufficient for most users. Use weight-based checks as a secondary verification if precision is critical.
Length tests are common; weigh-filament checks give extra confidence if you need it.
Watch Video
Key Takeaways
- Calibrate E-steps to align actual extrusion with commanded length
- Use a repeatable test (100 mm extrusion) for consistency
- Update step_distance in printer.cfg and restart Klipper for changes to take effect
- Validate results with a second extrusion test and document outcomes
- Recalibrate after hardware or material changes to maintain accuracy