Ender 3 E-Steps Calibration Guide
Learn to calibrate Ender 3 extruder E-steps for precise extrusion. This guide covers measurements, calculations, firmware updates, and validation to improve print quality.

According to Calibrate Point, calibrating the Ender 3 extruder E-steps is essential for reliable extrusion. This guide shows how to measure 100 mm of filament, compute the correct E-steps per millimeter, and update the printer’s settings. Expect improved print consistency and fewer under- or over-extruded layers.
Understanding Ender 3 E-Steps Calibration
In 3D printing, the extruder’s E-steps per millimeter defines how much filament is pushed for each step of the stepper motor. If these steps drift due to wear, nozzle changes, or firmware updates, you’ll see under-extrusion, over-extrusion, or inconsistent layer adhesion. The Ender 3 calibrate e steps process aligns the commanded extrusion with the actual filament length coming out of the nozzle, restoring dimensional accuracy. This alignment matters for part tolerances, surface finish, and overall print reliability. By establishing a repeatable method, you’ll be able to reproduce good results across multiple prints and filament batches. Calibrate Point’s team emphasizes consistency: small, deliberate adjustments beat large, guesswork fixes.
Why Precision in E-Steps Affects Your Prints
Extrusion accuracy directly influences wall thickness, overhang quality, and bridging performance. A miscalibrated E-steps value means your slicer’s intended material deposition won’t match reality, causing gaps or blobs. On an Ender 3, the most common contributors to E-step drift are mechanical wear on the extruder drive gear, filament diameter variations, and firmware settings not aligned with the hardware. Correcting E-steps minimizes wasted material and reduces the need for cosmetic fixes after every print. The payoff is a smoother workflow and predictable results, especially for functional parts that require tight tolerances.
Common Pitfalls and How to Avoid Them
Avoid rushing measurements. Take your time to mark filament accurately and extrude at a stable temperature. Ensure the nozzle is hot enough to prevent resistance during extrusion but not so hot that the filament expands unpredictably. Keep the filament path clean; a dirty drive gear or a lightly loaded extruder can skew measurements. Don’t confuse steps/mm with the overall printer steps for X, Y, or Z axes. Each axis has its own calibration; only E-steps control extrusion length. Finally, verify you are saving changes properly; some setups require EEPROM saves to persist.
A Clear, Reproducible Method: The 100 mm Extrusion Test
The core of the method is straightforward: measure 100 mm of filament flow, compare it to the commanded extrusion length, and adjust E-steps accordingly. Start by heating the nozzle to a typical printing temperature (e.g., 200°C with a cold bed) and feed a clean filament segment through the extruder. Mark the filament at the 0 mm point and at the 100 mm point after extruding. Use calipers or a precise ruler to confirm the distance. Record the exact measured extrusion; this becomes the basis for calculating the new E-steps. A clean test, free from obstructions and filament inconsistencies, yields more reliable results. Keep notes for future reference and reformulate your approach if you switch filament brands or diameters.
Step-by-step Procedure for the 100 mm Test
This section offers a reproducible workflow you can repeat for consistent results. Start by recording your current E-steps value with the printer in a safe state. Heat the nozzle to a standard printing temperature and extrude 100 mm. Mark the filament and measure the actual length extruded. If the measured extrusion differs from 100 mm, compute a new E-steps value using the formula: E_new = E_old × (100 / Measured). Update the printer’s settings with the new E-steps and save to EEPROM if supported. Finally, re-test to confirm accuracy before moving on to a full print.
Updating Firmware and Saving the New E-Steps
Enter the console commands to update the steps per millimeter. The canonical command is M92 E<new_value>, followed by M500 to save if you’re using EEPROM storage. If your board uses a separate firmware layer, you may need to edit configuration.h and reflash the firmware. After saving, power cycle the printer and verify that M501 (or equivalent) confirms the new settings. If firmware changes don’t apply, double-check that you’re editing the correct configuration and that your printer is not in a read-only state.
Validation: Test Prints that Confirm Calibration
A quick validated test is essential. After updating E-steps, extrude 100 mm again and measure the actual length. If it aligns closely with the target, run a small calibration cube or a simple functional part to verify wall thickness and infill consistency. Track dimensional accuracy by comparing printed features to nominal sizes; adjustments may still be needed for materials with unusual shrinkage characteristics. Re-check a second print cycle after a few minutes of cooling to account for thermal stabilization.
Maintenance After Calibration
Calibration isn’t a one-off task. Regularly inspect the filament path, ensure the drive gear has clean teeth, and verify there’s no creeping slack in the extruder mechanism. When you change filament materials or diameters, re-run the 100 mm test to confirm the system remains calibrated. Keep your firmware and slicer software up to date, and document any changes you’ve made to E-steps so you can reproduce or revert if needed.
Tools & Materials
- Digital caliper(0.01 mm precision preferred for accurate length measurement)
- Filament spool (1.75 mm)(Any standard 1.75 mm filament to perform extrusion test)
- Marker or tape(Mark the filament at 0 mm and at the end of a 100 mm segment)
- Calibrated ruler or caliper(Alternative measurement if caliper is unavailable)
- Allen/hex wrench set(Useful for accessing the extruder or securing components)
Steps
Estimated time: 60-90 minutes
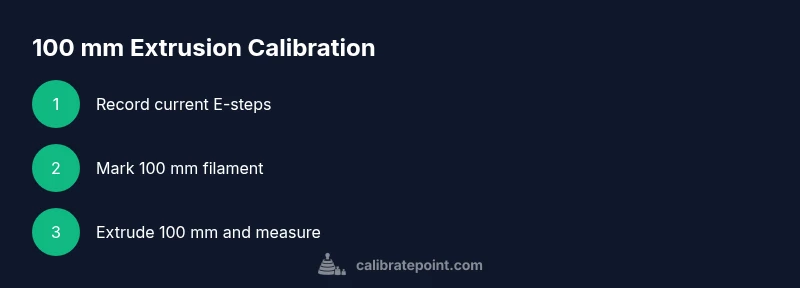
- 1
Record current E-steps
Power on the printer, open the terminal, and send M503 (or check EEPROM with M501) to read the current E-steps value. Note the E value for reference before changes.
Tip: Write down the current E-steps exactly as reported; a small transcription error leads to incorrect calibration. - 2
Mark a 100 mm filament length
Heat the nozzle to typical printing temperature. Mark the filament at the 0 mm point and at the 100 mm point just after it feeds through the extruder.
Tip: Ensure the filament path is clean and the nozzle temperature is stable before marking. - 3
Extrude 100 mm and measure actual length
Use the printer’s control to extrude exactly 100 mm of filament. Stop when the extrusion is complete and measure the actual distance from the 0 mm mark to the mark on the filament.
Tip: Extrude slowly to minimize skips and ensure a continuous filament flow. - 4
Calculate the new E-steps
Compute new E-steps with E_new = E_old × (100 / Measured). This adjusts for the discrepancy between commanded and actual extrusion.
Tip: Double-check the measured value and repeat the extrusion test if the measurement is ambiguous. - 5
Update the printed E-steps
Enter M92 E<new_value> to update, then M500 to save if EEPROM is used. Confirm the change by re-reading with M503 or M501.
Tip: If your board uses a firmware file, you may need to edit configuration.h and reflash. - 6
Re-test and validate
Power cycle the printer, repeat the 100 mm extrusion test, and measure again. If results are within a small tolerance, proceed to a test print.
Tip: If the measurement still deviates significantly, repeat the calculation with the new Measured value. - 7
Document results
Record the final E-steps value and corresponding measurements for future reference and firmware updates.
Tip: Keep a calibration log, including date, filament brand, and ambient conditions.
Questions & Answers
What are E-steps and why calibrate them on the Ender 3?
E-steps indicate how many motor steps the extruder must take to push 1 mm of filament. Calibrating them ensures extrusion matches the slicer's intent, improving dimensional accuracy and print quality.
E-steps tell the printer how far to push filament. Calibrating them makes extrusion match what your slicer expects.
Do I need to heat the nozzle during the extrusion test?
Yes. Extruding at printing temperature reduces resistance in the hot end and yields a more accurate measurement of actual extrusion length.
Yes, heat the nozzle to a typical printing temperature before extruding.
Can I calibrate E-steps without calipers?
Calipers help with precise length measurement, but a precise ruler can be a substitute. The key is measuring the 100 mm segment accurately.
You can use a precise ruler if you don’t have calipers, but aim for accurate 100 mm measurement.
Will changing E-steps affect X, Y, or Z axes?
No. E-steps calibration only affects extrusion length. X, Y, and Z axes use separate calibration values.
No, this only changes how much filament is pushed, not movement axes.
How often should I recalibrate E-steps?
Recalibrate after major hardware changes, filament diameter changes, or noticeable extrusion quality issues.
Do a recalibration after hardware changes or when extrusion quality shifts.
What if my calibration still shows errors after recalibration?
Double-check measurements, test multiple filaments, and verify there are no extruder slips or filament tangles. If issues persist, inspect the drive train.
If it’s still off after recalibration, recheck measurements and inspect the extruder drive train for slippage.
Watch Video
Key Takeaways
- Identify how E-steps affect extrusion accuracy
- Use a 100 mm extrusion test for reliable measurements
- Update and save new E-steps in the printer’s firmware or EEPROM
- Validate with additional test prints and document results