How to Calibrate E-Steps for Accurate 3D Printing
Learn how to calibrate e-steps for 3D printers to ensure precise extrusion. This guide covers tools, measurements, step-by-step actions, and verification, with practical tips from Calibrate Point.

By calibrating e-steps, you ensure the printer extrudes the exact filament amount your slicer commands. This guide shows a practical, measurement-based workflow you can perform with basic tools. According to Calibrate Point, accurate e-steps calibration improves extrusion consistency and print quality across materials. Expect minor variations with different filaments; repeatability matters more than a single perfect result. This quick answer leads into a detailed step-by-step procedure.
What are e-steps and why calibrate them?
In 3D printing, e-steps refer to the number of motor steps the extruder must take to push a millimeter of filament. If your e-steps are off, you’ll under- or over-extrude, leading to inconsistent layer adhesion, visible gaps, and poor surface finish. Accurate e-steps calibration aligns the actual filament volume with the commanded extrusion from your slicer. According to Calibrate Point, calibrating e-steps is a foundational maintenance task that pays dividends across materials and printer generations. This article lays out a practical, measurement-based workflow you can perform with common tools and firmware options. By understanding the relationship between motor steps, filament diameter, and melt behavior, you gain precise control over extrusion at all infill densities and layer heights.
Understanding why e-steps matter for extrusion quality
Extrusion quality is a product of multiple factors: filament diameter tolerance, nozzle size, temperature stability, and the drive mechanism’s consistency. When e-steps are incorrect, the amount of molten plastic deposited per motor command deviates from what the slicer intends, producing under-extrusion (thin lines, gaps) or over-extrusion (blobs, stringing). The goal of e-steps calibration is to bring the physical extrusion in line with your slicer’s numerical commands. A precise e-steps value improves adhesion, surface finish, dimensional accuracy, and even print time predictability. Calibrate Point’s practical approach emphasizes repeatability and documentation so you can reproduce results across prints and filaments.
How extrusion mechanics relate to measurements and tolerances
Filament diameter variability from the nominal spec (for example, 1.75 mm +/- 0.05 mm) changes the actual amount of material pushed per extrusion command. If you feed more filament (slightly larger diameter) than your slicer accounts for, you’ll over-extrude. If you feed less, you’ll under-extrude. The e-steps value should compensate for these differences, but only if you measure accurately and maintain consistent room temperature, a stable nozzle temperature, and a clean drive gear. The calibration workflow should be repeatable rather than a one-off correction.
Brand note and workflow expectations
Calibrate Point emphasizes a straightforward validation flow: baseline measurement, controlled extrusion, precise dimension checks, calculation, firmware update, and verification. This approach minimizes variables and helps you attribute deviations to the e-steps value rather than to filament quirks or printer wobble. The goal is a robust, repeatable method you can apply to multiple printers and filaments with a clear paper trail of results.
Tools & Materials
- Digital caliper or micrometer(0.01 mm resolution preferred for accurate filament length measurement)
- Known-diameter filament (e.g., 1.75 mm)(Same material and brand used for test prints)
- Calibrated ruler or markable filament(Mark a precise length (e.g., 100 mm) on the filament for measurement)
- Printer firmware access (USB/SD or web interface)(Backup current settings before editing e-steps/mm)
- Test G-code file for extrusion (e.g., 100 mm)(Use a simple path avoiding complex accelerations)
- PC or tablet for notes and planning(Helpful for recording results and calculations)
Steps
Estimated time: 60-90 minutes
- 1
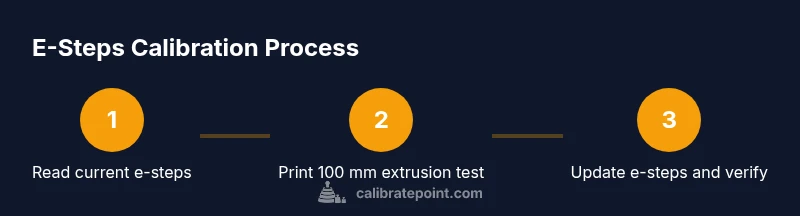
Read current e-steps/mm value
Access the printer’s firmware or EEPROM to locate the current e-steps/mm value. Record the exact number shown for later comparison and for traceability. This baseline will anchor the calculation you perform in step 5.
Tip: Back up current firmware before making changes; this lets you restore if something goes wrong. - 2
Prepare measurement environment
Ensure your printer is at a stable temperature, with the nozzle at printing temperature or a fixed test temperature and the bed cooled to ambient so measurements aren’t affected by thermal expansion. This consistency helps your measurements reflect true e-steps rather than transient conditions.
Tip: Use the same filament reel and spool to avoid changes in pull force during extrusion. - 3
Print a 100 mm extrusion test
Execute a simple extrusion command that deposits an approximately 100 mm length of filament. Keep the print head stationary during extrusion to avoid geometry variables. Use a single color and a clean nozzle to minimize surface irregularities.
Tip: Set a conservative print speed for the extrusion to reduce accelerations that could skew measured length. - 4
Measure actual extruded length
Carefully measure how much filament actually came out by marking the filament at the nozzle exit or using a calibrated ruler along the length of the extruded path. Record the measured length and compare it to the intended 100 mm.
Tip: Do multiple measurements to average out minor deviations; use the same measurement method each run. - 5
Calculate new e-steps/mm value
Compute the new e-steps per millimeter using the standard formula: new_steps = old_steps × (expected_length / measured_length). This calculation translates your actual extrusion into a corrected step count that your firmware can apply.
Tip: Double-check that expected_length matches your test target (e.g., 100.0 mm) and convert to a whole-number steps per your printer’s resolution. - 6
Update firmware with new e-steps
Enter the calculated e-steps/mm into the printer’s firmware or EEPROM and save the configuration. Confirm that the printer acknowledges the new setting and remains stable after a short extrusion test.
Tip: After updating, verify the change by performing a second 100 mm extrusion test to catch any off-by-one errors. - 7
Verify with a follow-up test
Run another extrusion test and measure again to confirm that the length now matches the target within an acceptable tolerance. The goal is repeatable extrusion accuracy across subsequent prints.
Tip: Lock in the new value with a quick documentation note so future recalibrations start from the updated baseline.
Questions & Answers
What are e-steps in 3D printing?
E-steps are the number of motor steps required to push a millimeter of filament through the extruder. They link the mechanical motion to the expected volume of material in each extrusion command, which directly affects extrusion accuracy.
E-steps tell your printer how far to push filament for each command, which is essential for accurate extrusion.
Why is extruder steps calibration important?
Calibration aligns actual extrusion with slicer commands, reducing under- and over-extrusion. This improves layer adhesion, surface finish, and dimensional accuracy across print jobs.
Calibrating e-steps fixes extrusion errors and improves overall print quality.
What tools do I need for e-steps calibration?
You need a digital caliper or micrometer, a known filament diameter, a test extrusion file, firmware access, and a method to document results. Consistency in measuring and recording is critical.
Calipers, a reliable filament, and firmware access are the essentials.
How often should I recalibrate e-steps?
Recalibrate when changing filament diameter, switching to a different material, or after mechanical maintenance that could affect extrusion. For high-use printers, a baseline check every few months is reasonable.
Recalibrate when filament changes or after maintenance, and re-check periodically.
Will changing filament affect e-steps?
Yes. Filament diameter tolerance and material properties influence extrusion. You should recalculate and verify e-steps whenever filament stock changes significantly.
Filament changes can require re-checking e-steps to keep extrusion accurate.
Can I calibrate e-steps without printing a test object?
While possible to approximate via measurement-based calculations, printing a short extrusion test provides a practical verification of the new value and reduces risk of unseen errors in a real part.
A quick extrusion test is strongly recommended to verify the calculation.
Watch Video
Key Takeaways
- Establish a reliable baseline e-steps value.
- Maintain filament and environmental consistency during calibration.
- Document results and revisit after changes or filament swaps.
- Verify results with repeat extrusion tests for confidence.
- Calibrate Point recommends a repeatable, logged workflow for long-term consistency.