Manually Calibrate Laptop Battery: A Practical Step-by-Step Guide
Learn how to manually calibrate your laptop battery to improve the accuracy of the battery indicator. This guide covers safe prep, a full discharge-recharge cycle, and verification, with practical tips for DIY technicians.

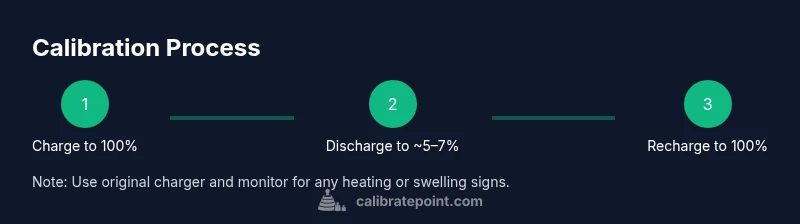
Manually calibrating your laptop battery means discharging the battery fully and then charging it back to 100% to recalibrate the system gauge. This simple cycle improves remaining-time estimates and overall reliability of battery readings. Always back up data and use the original charger before starting.
Why calibrate laptop battery gauge matters
Accurate battery gauges are crucial for anyone who relies on a laptop for work, tinkering, or on-site projects. When the operating system misreads the remaining capacity, you may be surprised by a sudden shutdown or an over-optimistic estimate that leads to interrupted workflows. Manually calibrate laptop battery procedures help align the software’s energy accounting with the actual energy content stored in the cells. This is not a magic fix for degraded cells; it’s a calibration step that ensures the gauge reflects real-world conditions after aging, firmware updates, or long idle periods. As the Calibrate Point team notes, the gauge calibration is most meaningful when a device has battery wear or after a firmware change. The process does not improve capacity, but it improves reporting accuracy, which in turn helps you plan usage, carry spare power, and avoid surprises. Keep in mind that modern lithium-ion chemistry benefits from gentle handling and that calibration should be performed on a healthy battery capable of a full cycle without risk. The aim is to restore trust in the remaining-time indicator while preserving device safety during the procedure.
-3KeywordsNoteKeyWords2-4
Tools & Materials
- Laptop with charge-discharge capability(Ensure you can fully discharge without forcing shutdowns.)
- Original charger and cable(Avoid third-party adapters; use the one that came with the laptop.)
- Backup of important data(Save work and create a restore point if available.)
- Access to battery stats or BIOS (optional)(Can help verify gauge after calibration.)
- Timer or clock(Helpful for tracking discharge duration and time windows.)
Steps
Estimated time: 2-3 hours
- 1
Prepare workspace and back up data
Save all active work, close unsaved files, and back up essential data to an external drive or cloud. This minimizes the risk of data loss if something goes wrong during the cycle. Verify you have the original charger ready and a comfortable workspace with good ventilation.
Tip: Backups are non-negotiable; calibration involves full-discharge cycles that can spike power usage unexpectedly. - 2
Charge to 100% with the original charger
Plug in the charger and allow the battery to reach a full 100%. If your laptop displays a health warning or heat, pause and wait for it to stabilize before starting the discharge. Do not unplug during this step unless the device explicitly instructs otherwise.
Tip: Use the original charger to ensure accurate charging behavior and avoid erroneous gauge readings caused by third-party adapters. - 3
Discharge the battery completely
Use the laptop normally or set it to run some representative tasks until the battery indicator reaches approximately 5–7%. Do not force a forced shutdown; allow the system to reach a natural cut-off. This deep but safe discharge helps map the gauge to actual energy content.
Tip: If the system enters sleep or hibernation unexpectedly, wake it and allow it to continue discharging to the target level. - 4
Charge uninterrupted back to 100%
Reconnect the charger and let the battery charge uninterrupted to 100%. Avoid using heavy applications or gaming during this phase to minimize voltage fluctuations that could skew the gauge reset. Once at full, leave the device plugged in for an additional 30–60 minutes for stabilization.
Tip: Disabling aggressive power-saving features during the charge can help stabilize the readings. - 5
Power on and verify gauge accuracy
Turn the laptop on and observe the remaining-time estimate. Compare it to actual usage over the next hour or two to see if the gauge aligns with real-time consumption. Note any persistent discrepancies for future calibration decisions.
Tip: Document the observed remaining time to assess calibration effectiveness after a few cycles. - 6
Document results and monitor over time
Record the results of the calibration and monitor the gauge for the next several days of typical use. If the indicator still seems off, you may repeat the cycle once more. Consider contacting support if gauge inaccuracy persists.
Tip: Calibrations are not a substitute for battery health checks; track capacity fade separately.
Questions & Answers
Is manual calibration required for every laptop?
No. Many modern laptops do not require routine calibration. Use calibration only if you notice the gauge drift or after firmware changes. If the gauge appears accurate, avoid unnecessary cycles.
Calibration isn't always necessary; do it only when you see gauge inaccuracies or after firmware changes.
How often should I calibrate my laptop battery?
Calibrating should be event-driven, not routine. Calibrate after major software updates, battery replacements, or when you notice persistent inaccuracies. Avoid frequent cycles to minimize wear.
Calibrate when needed, not on a fixed schedule.
Can calibration harm modern Li-ion batteries?
When done carefully and within normal discharge levels, calibration does not damage modern Li-ion cells. Avoid deep discharges if the battery shows swelling or excessive heat.
If you’re careful and avoid swelling or heat, calibration is safe.
Do OS or firmware automatically calibrate the battery gauge?
Most operating systems do not automatically calibrate the battery gauge. Calibration is typically a manual process used to correct gauge reporting after aging or firmware changes.
There’s usually no automatic calibration; you perform it when needed.
What if the gauge is still off after calibration?
If inaccuracies persist, repeat the calibration cycle once more and monitor results. If the problem continues, consider seeking professional service to check the battery health.
Try the cycle again, and if needed, seek service for a deeper diagnosis.
Watch Video
Key Takeaways
- Calibrate when the gauge seems inaccurate
- Back up data before starting patience and time are required
- Use the original charger for reliable results
- Document outcomes to track gauge improvements