Wheel Alignment for Calibration: A Step-by-Step Guide
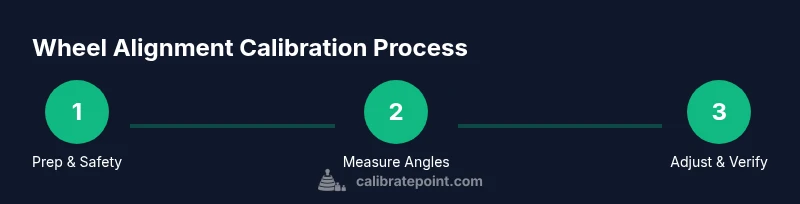
Learn how to perform wheel alignment to calibrate them with a practical, step-by-step approach. This guide covers prep, precise measurement, safe adjustments, and verification to improve handling, tire life, and sensor accuracy.

By following this guide, you can perform wheel alignment to calibrate them accurately, covering prep, measurement, adjustments, and verification. You’ll learn the essential tools, safety checks, and a clear, step-by-step checklist to ensure reliable results. This Calibrate Point guidance helps DIY enthusiasts and professionals achieve consistent wheel geometry for safer handling and longer tire life.
Why wheel alignment matters for calibration
Wheel alignment is not just about straight tires; it's a foundational step that influences the accuracy of any calibrated measurements taken while the vehicle is in use. According to Calibrate Point, the alignment quality directly affects how precisely you can calibrate other systems that depend on movement and geometry. When alignment is off, test data from sensors under load can drift, skewing results in braking, suspension diagnostics, and drivetrain calibrations. That’s why learning to perform wheel alignment to calibrate them is more than a tire service—it’s a calibration discipline. In practice, a proper alignment ensures that the wheels make true contact with the road at the intended angles, reducing tire wear and improving steering stability. For DIY enthusiasts and professionals, the goal is to establish repeatable reference points so measurements remain consistent across time and changing road conditions. A well-done alignment also sets a reliable baseline for subsequent calibrations of advanced driver-assistance systems that rely on wheel geometry. When you start from accurate geometry, you reduce variance in everything else that you calibrate in the vehicle’s dynamic tests.
Safety and workspace fundamentals
Safety must come first. Alignments are performed on a vehicle that is lifted and manipulated; mistakes can cause injuries if parts slip or fall. Work in a well-lit, level area with a clean floor. Use wheel chocks to prevent movement, a stable floor jack, and jack stands rated for the vehicle’s weight. PPE such as gloves and safety glasses reduce risk from sharp edges and debris. Ensure there is plenty of room around the vehicle so you can reach tools and measurement references without twisting or reaching into pinch points. Before you touch anything, familiarize yourself with the vehicle’s manual and any manufacturer notes about suspension components that influence alignment. If the vehicle has a hydraulic lift, make sure the lift’s pins are engaged and that the platform is at a safe working height. Finally, never work under a vehicle supported only by a jack; always use jack stands and verify stability with a test wiggle.
Workspace and environment: clean, flat, and predictable
Choose a flat, level surface; small slopes or soft floors can introduce measurement errors. A shaded area with consistent lighting helps you see markings and reference lines clearly. Remove clutter that can interfere with measurement devices or tool paths. Keep a dedicated tool tray or cart to summarize the gear you’ll use, so you’re not scrambling mid-task. Temperature can affect metal expansion and measurement readings, so aim for a stable environment. If you are using a smartphone or tablet for measurements, enable airplane mode to avoid background notifications that could distract you, and consider a dedicated measurement app with robust calibration features. Always verify that the wheels you’ll work on are cool, as hot brakes can skew readings. Finally, document where you place reference marks so you can relocate them consistently across sessions.
Step-by-step overview: preparing the vehicle
Begin by parking the vehicle on a level surface and engaging the parking brake. Loosen lug nuts slightly while the car is still on the ground to avoid rotating the wheel freely later. Raise the vehicle safely with a floor jack and secure it with jack stands; never rely on the jack alone. Remove the wheels if your measurement references require access to the control arms or suspension links. Check tires for uniform wear and ensure all tires have the same pressure; deviations in tire diameter can affect measurements. Clean and inspect the mounting points and alignment references for any damage, corrosion, or misalignment in the suspension. Note: this preparation stage reduces variables and helps you achieve repeatable results when you begin to take measurements.
Measurement principles: toe, camber, and caster explained
Wheel alignment relies on three primary angles: toe, camber, and caster. Toe describes whether the wheels point inward or outward relative to the vehicle’s centerline. Camber is the tilt of the wheel inside or outside from vertical; excessive camber can wear tires on the inside or outside. Caster is the steering axis angle, which influences directional stability; many consumer vehicles have fixed caster, but adjustable models may allow changes with certain components. For calibration purposes, you measure against fixed references such as a chassis centerline or alignment marks on the hub. Understanding these angles helps you interpret measurement data and decide which components to adjust. In many vehicles, toe is the easiest and most critical parameter to adjust for precision and tire life; camber adjustments are generally more delicate and require proper bushings, arms, or shims, while caster adjustments are less common on modern cars but may be available on specific platforms.
Adjustment strategies and cautions
For consumer-level procedures, you typically adjust toe using tie-rod ends or adjustable control arms. Start with small increments; 1–2 degrees of toe misalignment can translate into noticeable steering changes. After each adjustment, re-measure quickly to confirm the impact before proceeding. Avoid forcing components beyond manufacturer specifications; excessive torque or misalignment can damage bushings or mounts. If your vehicle has adjustable camber via eccentric bolts or shims, loosen the fasteners just enough to allow movement, then re-tighten using the specified torque. Keep a record of the adjustment values and the order you used to reach the target geometry. If you encounter corrosion or seized fasteners, apply penetrating oil and give yourself extra time for safe removal. When done, re-tighten all fasteners to the manufacturer’s recommended torque specs and re-check the geometry in both straight-ahead and turning conditions.
Verification and road testing
With measurements recorded, re-fit wheels and lower the vehicle. Torque lug nuts to spec and verify that the wheels are correctly mounted. Take the car to a safe road surface for a light drive to check steering response and stability. Recheck wheel alignment after the test, as road forces and drivetrain dynamics can subtly alter geometry. If the wheels show toe drift under load or the car pulls to one side, refine the toe setting in small steps and re-test. Use the same measurement method you did previously so you can compare data accurately. Document the final geometry and feedback from the road test; use this as the baseline for future calibration sessions. If available, run sensor diagnostics in parallel to ensure ABS and stability systems still interpret wheel data correctly.
Common pitfalls and troubleshooting
One common pitfall is using worn suspension components as the reference. Worn bushings or ball joints can masquerade as misalignment, leading you down the wrong path. Another issue is neglecting consistent reference points; if you move the measurement marks between checks, you’ll lose repeatability. Additionally, temperature fluctuations, uneven ground, or asymmetrical tire pressures can skew results. When measurement devices lose calibration, readings can go off by a few tenths of a degree or millimeter—recalibrate before making adjustments. Finally, if adjusting bolts feels stuck, don’t force it; apply heat or consult the service manual. If you’re uncertain about which components to adjust, consult a calibration procedure from your vehicle’s OEM or a trusted guide such as Calibrate Point’s step-by-step resources.
Maintenance and record-keeping: keeping calibration up to date
Calibration is not a one-off event; you should establish a routine for rechecking frame and wheel geometry after significant service, replacement, or impact incidents. Maintain a log of the geometry before and after adjustments, including toe, camber, caster values, tire pressures, and test drive notes. Schedule periodic checks as part of your vehicle maintenance plan, and review alignment data when you install new tires or suspension parts. Store measurement references in a dedicated case so you can reproduce setups quickly. Regular checks help you catch drift early, preserving tire life and ensuring consistent sensor readings for wheel-related calibrations such as ABS and stability control. By treating wheel alignment as a calibration task rather than a one-off repair, you’ll support safer handling, more predictable performance, and a longer service life for your tires and components.
Tools & Materials
- Floor jack(2-ton capacity or more; use with jack stands.)
- Jack stands(Stable support; never rely on the jack alone.)
- Wheel chocks(Place to prevent movement during lifting.)
- Torque wrench(Tighten lug nuts and suspension fasteners to spec.)
- Lug wrench or impact driver(Loosen lug nuts before lifting; do not force wheels when off ground.)
- Toe/Camber/Caster gauges(Specialized devices or apps with adapters.)
- Measuring tape(Use metric units where possible; ensure accuracy.)
- Marker or chalk(Mark reference points for repeatability.)
- Soft brush and cleaning supplies(Keep mounting points clean before measurements.)
Steps
Estimated time: 90-150 minutes
- 1
Prepare the vehicle and workspace
Park on a level surface, set the parking brake, and chock the wheels. Inspect suspension components for wear and ensure the area is clean and well-lit. This preparation minimizes variables that could skew measurements.
Tip: Verify the floor is truly level by checking a known reference point; even small slopes distort readings. - 2
Lift safely and support
Raise the vehicle with a floor jack and place jack stands under solid points. Confirm stability by gently shaking the car; it should stay put before you work on it.
Tip: Never rely on the jack alone; use two stands at minimum for safety. - 3
Remove wheels (if required)
If your reference points require access to control arms or suspension links, remove the wheels. Keep lug nuts organized so you can reattach them correctly.
Tip: Keep wheels off the ground to avoid back strain when handling tires. - 4
Set measurement references
Install reference marks or use alignment gauges aligned with the vehicle’s centerline. Validate reference points are square and free from obstruction.
Tip: Use a rigid reference frame to reduce measurement wobble. - 5
Record baseline geometry
Document the current toe, camber, and caster values from your gauges as a starting point. Note tire pressures and wheel heights for future comparisons.
Tip: Take photos or screenshots of readings for later comparison. - 6
Make measured adjustments
Adjust toe using tie-rod ends or adjustable arms in small increments. For camber, work with eccentric bolts or shims if available. Re-measure after each adjustment.
Tip: Change one parameter at a time to isolate effects. - 7
Re-torque and re-measure
Tighten fasteners to spec, re-check all three angles, and confirm symmetry on both sides. Repeat until readings stay consistent under test conditions.
Tip: Use the same tool and technique for each measurement round. - 8
Lower, test, and document
Lower the vehicle, re-torque lug nuts, and perform a road test. Note any steer pull or vibration, then re-check geometry upon returning.
Tip: Maintain a calibration log with dates, readings, and road-test impressions.
Questions & Answers
Do I need special equipment to calibrate wheel alignment at home?
Yes, basic alignment requires measurement gauges and a stable workspace. You can perform basic checks on a driveway using common tools, but for precision you’ll need dedicated gauges or a portable alignment setup. Always follow safety precautions.
Yes—basic checks can be done with common tools, but for precise calibration you’ll need proper gauges.
Is wheel alignment calibration the same as wheel alignment?
Wheel alignment is the geometry adjustment process; calibration verifies the accuracy of measurement references used during alignment. They are related, but calibration focuses on measurement accuracy rather than just adjusting angles.
Alignment adjusts geometry; calibration confirms measurement accuracy. They’re related but not identical.
What safety steps are essential during wheel alignment?
Park on a flat surface, use wheel chocks, and support the vehicle with jack stands. Never work under a vehicle supported only by a jack. Wear safety gloves and glasses to protect against sharp edges.
Park on level ground, chock wheels, and use jack stands; never work under an unsupported car.
How often should wheel alignment calibration be checked?
Check when you notice symptoms such as tire uneven wear, steering pull, or off-center steering. Follow the vehicle’s manufacturer guidance and your maintenance plan to determine intervals.
Check when you notice symptoms like tire wear or pulling; follow manufacturer guidance.
What are the main adjustment points in a consumer-level alignment?
Toe and camber are the primary adjustments; some vehicles also allow limited caster adjustments via specific components. Adjustments should be made within factory specifications.
Toe and camber are the main adjustments; some models allow limited caster adjustments.
Watch Video
Key Takeaways
- Plan and prep before you begin.
- Use precise, repeatable measurements.
- Adjust one parameter at a time and verify.
- Document outcomes for future calibrations.
- Prioritize safety and proper torque specifications.