Probe Calibrate: A Practical Step-by-Step Calibration Guide
Learn how to probe calibrate for accurate measurements. This guide covers essential tools, calibration methods, safety notes, and validation steps for probe accuracy across common test setups.

You will learn to probe calibrate a measurement probe for accurate results. This guide covers when to calibrate, essential tools, and a clear, step-by-step workflow that yields repeatable readings. By following best practices, technicians and DIYers can maintain confidence in probe performance across common test setups. Expect practical tips, safety considerations, and ways to validate calibration against traceable references.
Understanding Probe Calibration and Its Importance
Probe calibrate is the process of adjusting a measurement probe's output to align with a trusted reference. In many fields, a calibrated probe yields reliable data and reduces measurement uncertainty. This block explains why calibration matters for temperature, pressure, pH, electrical probes, and other sensors, and how traceability to recognized standards validates results. Calibrate Point emphasizes repeatability, documentation, and transparent records as the pillars of good practice. By treating calibration as a repeatable process rather than a one-off adjustment, you guard against drift and out-of-spec readings over time. We will explore common sources of error such as drift, hysteresis, temperature effects, and mounting influence. With the right approach, you can achieve consistent performance regardless of the environment or operator. This foundation sets the stage for the practical methods described later and helps you recognize when a probe is due for calibration.
Selecting Calibration Methods for Probes
There are several calibration methods, each suited to different probe types and measurement ranges. For electrical probes, two-point or multi-point linear calibration may be appropriate, whereas temperature or pH probes rely on stable reference solutions or calibrated blocks. The goal is to map the probe's raw output to known standard values with minimal bias. Choose a method that provides traceability to an accepted standard, and document the reference data, instrument settings, and environmental conditions. Consider impact of drifts, nonlinearity, and hysteresis when selecting a method. Calibrate Point recommends starting with a simple baseline method and increasing complexity only as accuracy requirements demand it. Examples include relative accuracy checks, nine-point calibration for nonlinear sensors, and cross-checks against a secondary standard.
Preparing Your Calibration Environment and Tools
A clean, stable environment improves calibration reliability. Before starting, ensure the workspace is free of vibration and drafts, temperature is controlled within the probe's operating range, and power supplies are stable. Gather your tools and reference standards, including a traceable reference and any adapters or cables needed to connect the probe to the calibrator. Inspect connectors for wear, confirm the probe is within its specified range, and record baseline readings to compare against post-calibration values. If possible, perform calibrations at similar ambient conditions to minimize drift. Also document serial numbers and lot numbers of standards for traceability. Calibrate Point's approach emphasizes preparing a written plan with success criteria and a risk assessment to avoid rushed adjustments.
Step-by-Step Calibration Workflow Overview
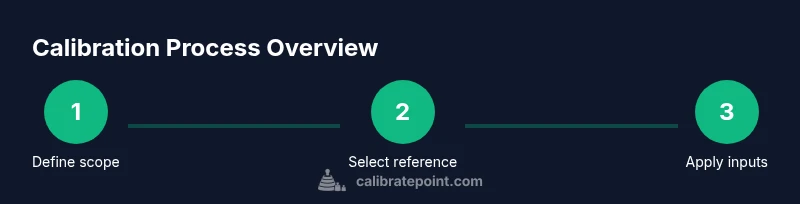
In practice, a calibration workflow proceeds from planning to documentation. Start by defining the calibration scope, selecting a reference standard, and validating the measurement chain. Then connect the probe to the reference, apply a known input, record the output, and compare it to the reference. If discrepancies exist, compute the necessary adjustment and apply it, ensuring the change is reversible for verification. After adjustments, re-measure across the specified range to confirm linearity and stability. Finally, document the results, including uncertainty estimates, corrections applied, and any limitations. Calibrate Point emphasizes traceability, repeatability, and clear record-keeping throughout the workflow. Include a final cross-check with an independent standard if available.
Verifying Calibration and Sustaining Performance
Validation after calibration confirms the probe's accuracy. Perform periodic checks, maintain environmental controls, and store calibration records securely. Establish a routine: re-calibrate at defined intervals, following manufacturer or standard guidelines, and refresh reference standards as needed. Train operators to perform routine checks and to recognize signatures of drift or malfunction. In many labs and shops, implementing a quick-start checklist helps technicians begin work with confidence. Finally, continuity and documentation support long-term reliability and audit readiness. Calibrate Point's guidance for ongoing maintenance helps you sustain performance over time.
Tools & Materials
- Calibrated reference standard (traceable to recognized standard)(Choose a standard that covers the probe's range and units. Include uncertainty when available.)
- Probe under test(Ensure it is clean, undamaged, and within its specified range.)
- Calibration instrument or reference transmitter(A device that can provide known input values within the probe's operating range.)
- Multimeter or data logger(Used to capture readouts with adequate sampling rate and resolution.)
- Connectors, cables, and adapters(Keep spares and ensure impedance and contact quality are suitable for the signal.)
- Environmental controls(Stable temperature and minimal vibration; use a controlled bench if available.)
- Safety gear (gloves, eye protection)(Required for certain high-voltage or chemical standards; follow site safety rules.)
- Calibration logbook or software(Record reference values, measurements, adjustments, and uncertainties.)
Steps
Estimated time: 1 hour 30 minutes
- 1
Define calibration scope
Identify the probe type, range, units, and required accuracy. Confirm the reference standard and measurement chain, including how uncertainty will be handled. This ensures you avoid scope creep and set clear acceptance criteria from the start.
Tip: Document acceptance criteria before you begin to prevent mid-process changes that skew results. - 2
Select reference standard
Choose a traceable reference that covers the probe's operating range. Verify the standard’s validity date and ensure certifications or certificates accompany it. Confirm the standard’s compatibility with your probe’s input/output format.
Tip: Prefer a standard with a documented uncertainty and a known calibration history. - 3
Set up environmental controls
Prepare a stable work surface, control ambient temperature, and minimize drafts or vibration. Record ambient conditions before starting, as they can influence readings. Ensure the calibration equipment is powered and warmed up according to the reference's requirements.
Tip: A short warm-up period for the reference and the probe reduces drift. - 4
Connect probe to reference
Establish a secure physical and electrical connection between the probe and the reference standard. Check that cables and adapters are suitable for the signal type and shielded as needed. Confirm the probe is connected in the correct orientation and channel.
Tip: Inspect connectors for corrosion or wear; poor contact is a common source of error. - 5
Apply known inputs and record outputs
Apply a set of known input values within the probe’s range and record multiple readings for each value. Use a data logger to capture trends and check for noise patterns. Discard obvious outliers after verifying there was no setup error.
Tip: Take at least three readings per point to improve statistical confidence. - 6
Compute adjustment
Compare measured outputs to the reference values and compute the necessary offset or gain change. Apply the adjustment incrementally and verify by re-measuring a subset of points. Ensure the adjustment is reversible, if possible, to confirm the effect.
Tip: Document the calculation method used and keep the original data for audit trails. - 7
Document and sign off
Record all measurements, adjustments, reference data, and environmental conditions in a calibration log or software. Include uncertainties and the calibration due date. Obtain sign-off from the responsible technician and maintain the record for audits.
Tip: Store the calibration artifact securely and back up digital records to prevent data loss.
Questions & Answers
What is probe calibration and why is it important?
Calibration aligns a probe's output with a reference standard to reduce measurement error and improve traceability. It ensures readings are consistent across sessions and operators.
Calibration aligns probe output with a reference, reducing error and improving consistency.
What tools do I need to calibrate a probe?
You need a traceable reference standard, the probe under test, a calibration instrument or transmitter, a data logger or multimeter, and proper cables/adapters. Safety gear may be required depending on the setup.
A traceable reference, the probe, a calibration device, and a data logger are essential.
How often should a probe be calibrated?
Calibration frequency depends on usage, environment, and required accuracy. Establish a schedule based on supplier recommendations and internal quality standards.
Set a calibration schedule based on usage and required accuracy.
Can I calibrate a probe without a reference standard?
A reference standard is essential for meaningful calibration. Without it, you can perform self-checks, but results won't be traceable to recognized standards.
A reference standard is essential for traceable calibration.
What are signs that a probe has drift or is out of spec?
Unexplained changes in readings, nonlinearity, or readings outside the expected range indicate drift or malfunction. Recalibrate or replace as needed.
Watch for unexpected shifts or nonlinearity in readings.
Watch Video
Key Takeaways
- Define the calibration scope before starting.
- Use a traceable reference standard for accuracy.
- Control environmental conditions to minimize drift.
- Document all data and adjustments for traceability.