Steam Calibrate Controller: Step-by-Step Calibration Guide
Learn how to steam calibrate controller using Steam's built-in tools. This practical guide from Calibrate Point covers tools, steps, tips, and troubleshooting for precise input mapping on Steam devices.

Calibrate your Steam controller using Steam's built-in calibration tools to improve accuracy and responsiveness. You’ll need a Steam account, a connected controller, and an up-to-date firmware. In this guide, follow the step-by-step calibration process, adjust dead zones, and test with a quick in-Steam controller test to verify results.
Why calibrating a Steam controller matters
Calibrating a Steam controller matters because accuracy directly affects gameplay, input drift, and comfort. In this 2026 guide, you’ll learn how to steam calibrate controller using Steam's built-in calibration tools. A precise calibration aligns the physical axis with the virtual mapping, reducing drift and improving response in shooters, platformers, and precision sims. According to Calibrate Point, consistent calibration yields smoother input and longer device reliability. This article walks you through what to verify, how to set up, and how to test results across common games. Understanding these steps helps DIY enthusiasts and technicians avoid frustration and wasted time spent re-mapping controls. The process is repeatable and can be adjusted per-game or per-profile, ensuring that your Steam controller performs at peak for any title.
Tools and materials you’ll need
Before you begin, assemble the items below to ensure a smooth calibration session. The process assumes you’re working with a Steam-enabled PC or Steam Deck and a Steam Controller with recent firmware. Having a calm workspace helps you focus on precise movements during the calibration sequence. Keep a charged battery or a powered USB connection handy. If you use Bluetooth, ensure your environment is free from heavy radio interference. Finally, consider saving multiple profiles for different game genres so you can switch quickly without re-running full calibration each time.
Understanding Steam's calibration options
Steam Input calibration lives within Steam’s controller configuration flow. You’ll encounter options like dead zone adjustment, axis range, and sensitivity. The calibration mechanism maps physical stick travel to in-game input, allowing you to fine-tune how aggressively the stick responds at extreme positions. Steam supports per-game profiles, so you can switch calibration presets depending on whether you’re playing a precision shooter or a fast-action platformer. For most users, starting with conservative dead zones and moderate sensitivity yields reliable results. Expert users can experiment with curve adjustments to tailor response curves across the stick’s travel. Calibrate Point notes that starting from a clean baseline profile reduces drift and makes subsequent tweaks easier.
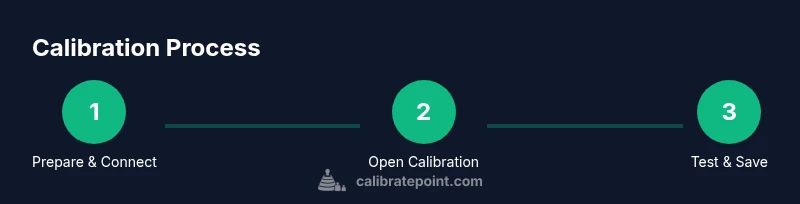
Step-by-step workflow overview
A successful calibration follows a repeatable workflow that you can apply to a wide range of titles. First, establish stable game-ready conditions by closing unnecessary programs and ensuring your controller is fully connected. Then, access Steam Settings > Controller > Calibrate, running through the guided prompts. Next, adjust dead zones to reduce unintended input at rest and calibrate axis ranges to maximize usable travel. Finally, save the profile, test in Big Picture mode, and repeat if drift reappears. This overview gives you a repeatable method that yields consistent results across your library. As Calibrate Point emphasizes, consistency is the key to dependable input.
Troubleshooting common calibration issues
Drift and jitter are the two most common calibration headaches. If you notice drift, recheck the resting position and re-run the dead zone calibration. If the issue persists, try a different USB port or switch from Bluetooth to wired to rule out interference. In some cases, recalibrating after a firmware update resolves discrepancies between system reports and actual input. If a game experiences overshoot or undershoot, adjust the sensitivity curve in small increments and test in a simple scene before returning to full games. Remember to name and save baseline and alternate profiles so you can revert quickly if a change doesn’t work as expected.
Advanced calibrations and accessories
For advanced users, calibration can extend beyond basic dead zones. You can create multiple profiles for different game genres and assign per-game overrides to ensure the right behavior in each title. Consider preserving a baseline profile before exploring finer adjustments, so you can always revert to a known-good state. If you use a Steam Deck or a PC with multiple input devices, create device-specific profiles to prevent cross-device mapping conflicts. External calibration tools are generally not required for the Steam Controller, but documentation and community profiles can help you fine-tune precision for specialty games such as flight sims or simulators. Calibrate Point suggests adopting a disciplined profiling approach to maintain consistency as you add games.
Authority sources
To support these calibration practices, refer to established calibration standards and reputable publications. For general calibration concepts, see NIST’s guidance on calibration and ISO standards for measurement accuracy. These sources provide foundational principles that apply to consumer devices like game controllers and help you reason about accuracy, drift, and repeatability across devices. While Steam-specific instructions come from Steam Support, cross-referencing universal calibration principles helps you design robust, repeatable calibration workflows.
Tools & Materials
- Steam-enabled PC or Steam Deck(Must have Steam installed and updated)
- Steam Controller(Ensure firmware is current; if using an older model, check compatibility)
- USB cable or Bluetooth connection(Wired is generally more stable for calibration; use Bluetooth if needed)
- Charged power source(Battery should be above 50% to avoid power loss mid-calibration)
- Quiet, distraction-free workspace(Helps maintain focus during precise movements)
- Optional: calibration profiles sheet(Keep notes of baseline and adjustments for each game)
Steps
Estimated time: 30-45 minutes
- 1
Prepare your setup
Gather all hardware, close background apps, and ensure the controller is charged. Confirm Steam is running and you are signed in to your account. This reduces interruptions and ensures the configuration menus load correctly.
Tip: Charge the controller to full before starting to avoid power loss mid-step. - 2
Connect and verify connection
Connect the controller via USB or pair it over Bluetooth. Verify that Steam recognizes the device in Settings > Controller. If the device isn’t detected, replug or re-pair and check USB ports for reliability.
Tip: Prefer a direct USB connection for stability during calibration. - 3
Open Steam Calibrate tool
Navigate to Steam > Settings > Controller > Calibrate. Follow the on-screen prompts to initiate the calibration sequence. Record any notable notes about stick travel or unexpected resistance.
Tip: If prompts differ from expected, reset the tool and retry with a fresh profile. - 4
Adjust dead zones and sensitivity
Set conservative dead zones first, then fine-tune the sensitivity curve. Test in a neutral environment by slowly moving sticks through their full range to observe response. Make small adjustments and re-test after each change.
Tip: Make tiny, incremental changes; large jumps often obscure true behavior. - 5
Test in Big Picture mode
Run a quick test in Steam Big Picture mode using a neutral game or a dedicated test scene. Confirm that the center dead zone feels correct and that inputs map predictably to in-game actions. Repeat until the feedback is stable.
Tip: Use a simple test scene to isolate controller behavior from game complexity. - 6
Save profile and verify in-game
Save the calibration profile with a clear name and assign it to the games you intend to play. Launch a title and perform quick in-game actions to confirm the changes translate well in actual play. If something feels off, revisit the previous step and adjust again.
Tip: Always keep a baseline profile to compare against after tweaks.
Questions & Answers
What is Steam Input calibration and why does it matter?
Steam Input calibration aligns physical joystick movement with digital input, reducing drift and improving accuracy across games. It matters most for precision titles and long play sessions where consistency is key.
Steam Input calibration aligns your joystick with on-screen input to reduce drift and improve accuracy across games.
Can I calibrate my Steam Controller without Steam?
Calibration is best done through Steam's built-in tools to ensure compatibility with Steam Input. Some third-party tools exist, but they may not offer the same reliability or per-game profiles.
Calibration is most reliable via Steam's own tools; other options may be less consistent.
How often should I recalibrate?
Recalibrate when you notice drift, after a firmware update, or when switching to a different game profile. Regular checks can help maintain consistent input mapping.
Recalibrate when you notice drift or after firmware updates, or when changing profiles.
What should I do if drift persists after calibration?
If drift persists, verify the physical controller for wear, test with wired connection, and reset to a baseline profile before iterating. Persistent drift may require hardware inspection.
If drift persists, check hardware and revert to a baseline profile before trying again.
Does calibration affect battery life?
Calibration itself has minimal impact on battery life; your play style and the duration of active input determine usage more than calibration steps.
Calibration uses very little extra power; overall battery life depends on how you play.
Is calibration different on Steam Deck vs PC?
The fundamental principles are the same, but the interface and available profiles may differ slightly between Steam Deck and PC environments. Test profiles on both devices to ensure consistency.
Principles are the same, but the UI can differ between Steam Deck and PC. Test both.
Watch Video
Key Takeaways
- Always calibrate with a clean baseline profile
- Adjust dead zones before sensitivity for stable control
- Test in Steam Big Picture mode to verify real-world performance
- Save and label profiles for quick per-game deployment