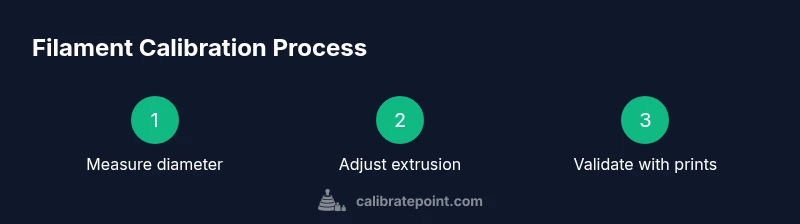
Steps to Calibrate Filament for Accurate 3D Printing
A comprehensive, step-by-step guide to calibrating filament for reliable 3D prints, covering diameter measurement, extrusion tuning, temperature and speed adjustments, and validation with calibration prints.

This guide will walk you through the essential steps to calibrate filament for reliable 3D prints. You’ll measure filament diameter, adjust extrusion, and tune temperature and speed. Start with precise diameter data, print a calibration cube, measure wall widths, and iterate until the actual dimensions align with the model within a small tolerance.
Why calibrate filament matters
Calibrating filament is not a cosmetic task; it directly affects dimensional accuracy, surface finish, and part strength. When you calibrate filament properly, you reduce under-extrusion that leaves gaps and over-extrusion that thickens walls. For 3D printing enthusiasts and professional shops, a solid calibration routine translates to fewer failed prints and more predictable results. This is where the Calibrate Point team places emphasis on repeatability: the same measurements, the same test prints, and the same analysis method every time. The core idea behind the steps to calibrate filament is simple: first, establish a dependable diameter measurement, and then align your extrusion and printer settings to that diameter. With consistent inputs, you can expect tighter tolerances, better layer adhesion, and more consistent color and finish across batches. Remember, calibration is an ongoing process, not a one-off event, and it pays off in fewer print retries and improved trust in your workflow.
Filament diameter measurement: the foundation
Your diameter data drives every subsequent adjustment. Filament comes in slightly different thicknesses from spool to spool, and even within a spool you may see variation. By measuring diameter at multiple points along a short length you build a robust dataset to base extrusion decisions on. The aim is not a single perfect value but a consistent average with minimal variance. With that, you can compute how much material the nozzle should lay down for a given coordinate. The steps to calibrate filament rely on the assumption that diameter consistency will produce consistent extrusion and predictable prints. Keep the filament steady, avoid bending the strand during measurement, and work in a calm workspace to minimize measurement noise. Calibrate Point emphasizes repeatable procedures over ad hoc tweaks.
How to collect reliable diameter data
To collect reliable diameter data, anchor the filament with one hand and slide the caliper jaw gently across the exposed strand. Record measurements at three to five positions along approximately 100 mm of filament. Repeat on a second section to verify consistency. Discard any measurements taken when the filament is under tension or deformed by the caliper. Compute the average diameter and note the range. Use this average as the basis for the extrusion flow in your slicer. The goal of this step to calibrate filament is to create a dependable input for the rest of the process.
Calculating extrusion multiplier: from diameter to flow
Extrusion multiplier, or flow rate, translates the diameter data into printer behavior. The logic is simple: if your actual filament is slightly thinner than nominal, the slicer should push slightly more material; if thicker, push less. Use your favorite slicer to adjust the extrusion multiplier based on the diameter average you just collected. Before you commit to a new multiplier, print a small calibration cube at standard height and measure its wall thickness with a caliper. If the measured width is larger than the target, decrease the multiplier; if smaller, increase it. The steps to calibrate filament here rely on iterative testing rather than guesswork. Small increments and repeated prints will converge on the right setting without overcomplicating the workflow. Calibrate Point cautions against relying on a single print as the sole validation.
Temperature, speed, and material behavior
Filament behavior is affected by temperature and speed. For many common filaments, higher temperatures can cause drooping and oozing, while lower temperatures can lead to under-extrusion. Similarly, print speed interacts with flow and heat transfer, so calibrating one factor without considering the others can mask the true state of your extrusion. Use a moderate speed and a temperature within the filament manufacturer’s recommended range, then adjust based on the observed print quality. This step helps ensure that your steps to calibrate filament remain valid across different printing scenarios. The goal is stable extrusion across layers and consistent surface finish.
Running calibration prints: test geometry and measurement
With the extrusion multiplier and temperature profile set, print a calibration cube or a simple test model. Measure wall thickness and overall dimensions with your caliper, comparing against the model’s nominal size. If dimensions deviate, adjust the extrusion multiplier a little and reprint. Document the results for traceability and to guide future calibrations. The philosophy behind the steps to calibrate filament is to verify consistency through practical geometry rather than relying solely on raw measurements. Repeat tests with slight variation in height or features to ensure the calibration holds under typical printing conditions.
Verify across filaments and batch consistency
Different filaments, even from the same manufacturer, can require slightly different calibration parameters. After establishing a baseline with one filament, repeat the process with other filaments to determine if separate profiles are necessary. If you print a part that requires a different material, update the calibration and revalidate with a test print. The goal is to maintain consistent dimensional accuracy across multiple spools and batches. This is where a disciplined workflow helps maintain quality across production runs and DIY projects alike. Calibrate Point recommends documenting material-specific profiles and batch numbers to support repeatability.
Common mistakes and how to fix them
Rushed measurements, failing to trim the filament, or measuring while the filament is bent can introduce errors that propagate through the entire calibration. Avoid measuring near the spool rim, where diameter can differ from the main strand. Do not rely on a single test print to judge extrusion quality; use multiple tests with different geometries. Keep the printer and bed clean and level; a tilted bed can masquerade extrusion issues as calibration errors. If you see inconsistent results, revisit diameter measurements and confirm the nozzle is clean. These checks form part of the steps to calibrate filament that yield reliable, repeatable results.
Authority references and further reading
For foundational concepts in metrology and calibration practices, consult authoritative sources such as national standards and university-based tutorials. - https://www.nist.gov - https://ocw.mit.edu - https://www.nature.com
Tools & Materials
- Digital caliper(Accurate to 0.01 mm; measure at 3-5 points along a 100 mm length)
- Filament sample (length of at least 100 mm)(Trim cleanly and avoid burrs; keep the scale free of dust)
- Test print files (calibration cube or XYZ cube)(Use standard calibration geometry)
- Printer with a reliable extrusion profile(Ensure nozzle is clean before tests)
- Marker or tape measure(For marking measurements on printed parts)
- Optional: micrometer or secondary caliper(Cross-check diameter readings)
- Digital scale (optional)(For density checks if needed)
- Cleaning tools (scissors, cutter)(Trim filament safely)
Steps
Estimated time: 90-150 minutes
- 1
Measure filament diameter accurately
Start by cutting a clean 100 mm length of filament. Use the digital caliper to measure the filament diameter at 3-5 positions around the strand. Record each measurement and compute the average diameter. This data becomes the foundation for all subsequent extrusion decisions and the steps to calibrate filament.
Tip: Pro tip: rotate the filament as you measure to catch any diameter variation along the length. - 2
Establish a baseline extrusion
With the printer hot and a known nozzle size, extrude a short segment of filament onto a quiet bed. Compare the extruded length to the intended length to identify initial over- or under-extrusion. This baseline tells you whether the filament is flowing as expected under current settings.
Tip: Pro tip: keep the nozzle at printing temperature during this check to avoid thermal expansion skewing results. - 3
Adjust extrusion multiplier in your slicer
Using the measured diameter, adjust the extrusion multiplier (flow rate) in your slicer to align actual extrusion with the designed width. Print a calibration cube at 100% flow and measure its walls; repeat until measurements align with model dimensions within a small tolerance.
Tip: Pro tip: make small adjustments (±0.05) and reprint instead of large jumps. - 4
Tune printing temperature and speed
Filament behavior shifts with temperature and speed. Try a moderate temperature within the filament’s recommended range and a safe printing speed. Print again and evaluate layer bonding, stringing, and surface texture. The goal is stable extrusion across layers.
Tip: Pro tip: allow the hotend to reach thermal equilibrium before evaluating prints to avoid drift. - 5
Run a second calibration cube
Print another calibration cube using the updated extrusion settings. Measure outer dimensions and wall thickness with your caliper. Small variances indicate you’re converging on the correct extrusion multiplier.
Tip: Pro tip: measure multiple faces to detect any anisotropy in the print. - 6
Finalize profile and verify consistency
Save the calibrated extrusion multiplier and temperature/speed settings as a profile. Run a second print with a different geometry to confirm repeatability across designs. Document batch and filament lot for future traceability.
Tip: Pro tip: maintain a calibration log to track changes over time.
Questions & Answers
What is filament calibration and why is it important?
Filament calibration aligns the material with the printer's extrusion, ensuring dimensional accuracy and reliable layer adhesion. It reduces print defects caused by inconsistent filament diameters or flow. Regular calibration helps maintain consistent quality across prints.
Filament calibration aligns material with the printer to ensure accuracy and consistency.
How do you measure filament diameter accurately?
Use a digital caliper to measure the filament at multiple points along a short length, rotate the filament for even pressure, and average the results. Record measurements and use that average in your slicer settings.
Measure diameter with a caliper at several points and average the results.
Extrusion calib w/o tools?
A basic extrusion calibration can start with manual extrusion checks and test prints, but using a caliper and a proper extrusion multiplier in your slicer yields reliable, repeatable results.
You can start with simple extrusion checks, but precision requires tools.
Calibration frequency?
Calibrate whenever you change filament material, diameter, supplier, or batch. If you notice dimensional drift or inconsistent layer quality, re-check diameter and extrusion settings.
Recalibrate when you switch materials or see drift in prints.
Filament type effect?
Different filaments have varying shrinkage, moisture sensitivity, and flow properties. You may need separate extrusion multipliers and temperatures for PLA, PETG, or specialty materials.
Different materials behave differently; expect separate calibration needs.
Why are test prints needed?
Test prints reveal how changes in diameter, flow, and temperature affect real geometry. They provide a practical check beyond single-point measurements.
Test prints show how the changes translate into actual parts.
Watch Video
Key Takeaways
- Measure diameter accurately before adjustments
- Calibrate extrusion using measured diameter
- Validate with multiple test prints
- Document profiles for repeatability