VRChat Calibrate: Step-by-Step Peripheral Calibration Guide
Learn how to calibrate VRChat peripherals for precise tracking, comfortable play, and reliable avatar interactions with practical, safety-first steps.

By the end of this guide, you will know exactly how to calibrate VRChat peripherals for precise avatar alignment, improved tracking, and comfortable play sessions. We cover common headsets, motion controllers, and facial/avatar tracking basics, plus a repeatable calibration workflow you can reuse after updates or new hardware. Follow the steps, check results, and adjust as needed for reliable in-game interactions.
Why VRChat Calibration Matters
Calibration is the foundation for accurate avatar alignment, natural hand gestures, and comfortable play in VRChat. When your tracking drifts or your avatar lags behind your movements, immersion suffers and fatigue increases. According to Calibrate Point, precise calibration reduces drift and improves avatar fidelity across common headset-and-controller combos. The Calibrate Point team found that a repeatable calibration routine helps you reproduce the same results after updates or new hardware. In this section, we explore why calibration matters, what to measure, and how to set a baseline you can improve on over time. Keep in mind that VRChat calibration is not a one-off task; it’s an ongoing practice that pays off in smoother social interactions and more reliable world interactions. Start with a clean play space, verify that your sensors are unobstructed, and commit to the six-step workflow described later in this guide.
Understanding VRChat Peripheral Calibration
VRChat relies on several hardware inputs: the headset, motion controllers, and optional tracking peripherals (full-body trackers, facial capture, etc.). Calibration aligns digital avatar movements with real-world inputs. The goal is to minimize latency, improve pose reproduction, and reduce drift between the headset's seen space and the virtual world. Baseline calibrations involve sensor alignment, center point checks, and ensuring room lighting doesn't interfere with tracking. For most users, starting with a standard headset and two controllers is enough to get reliable results; advanced users can extend the process for facial tracking and full-body rigs.
Hardware, Setup, and Best Practices
Choose a dedicated play space with clear boundaries and good lighting. Keep USB cables and sensors tidy to avoid accidental movement during calibration. Update your headset firmware and VRChat client before starting, then connect controllers and trackers in a known order. Follow a consistent, repeatable workflow so results are comparable across sessions and hardware revisions. Remember to document baseline settings, including room lighting, sensor placement, and any accessories used.
Calibration Workflow Overview
This article presents a repeatable six-step workflow designed to minimize drift and improve avatar fidelity in VRChat. The steps cover space preparation, firmware updates, environment setup, and precise alignment of headset, controllers, and optional trackers. While the process is straightforward, small inconsistencies can compound into noticeable errors. Use a calm environment, take your time with each step, and test frequently within VRChat to confirm improvements before moving on.
Maintenance and Recalibration Schedule
Calibration is not a one-time task. Regular maintenance—especially after firmware updates, hardware changes, or noticeable drift—helps preserve accuracy. Establish a lightweight schedule: quick checks monthly, full recalibration after major hardware changes, and a post-update verification whenever a new VRChat build is released. Keeping a simple log of changes and outcomes aids troubleshooting and ensures you can revert to known-good settings if something goes wrong.
Tools & Materials
- VR headset compatible with VRChat(Check model compatibility and firmware version)
- Motion controllers(Ensure batteries are fresh and tracking LEDs are unobstructed)
- PC or console with VRChat installed(Keep software up to date)
- USB extension cable(Useful if sensors are far from the PC)
- Clear play space or calibration mat(Minimize reflective surfaces and clutter)
Steps
Estimated time: 40-60 minutes
- 1
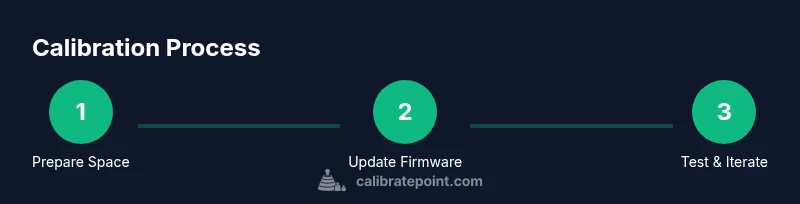
Prepare your play space
Clear a safe area, remove obstacles, and mark boundaries so you don’t cross tracking zones. Ensure lighting is stable and not flickering. This creates a reliable baseline for subsequent steps.
Tip: Measure distance to walls and keep a consistent center position for repeatability. - 2
Update firmware and software
Check for the latest headset firmware and VRChat version. Install updates before calibrating to reduce compatibility issues and improve sensor data quality.
Tip: Restart devices after updates to ensure a clean boot state. - 3
Launch VRChat calibration mode
Open VRChat and navigate to the calibration or safety setup area. Enable any diagnostic overlays that help visualize tracking accuracy during the session.
Tip: Turn on debug visuals if available to spot misalignment early. - 4
Align headset with reference markers
Ensure the headset sits snugly and the eye relief is consistent. Verify that the headset center aligns with your natural forward direction and that forward vectors match the in-game avatar direction.
Tip: Use a centered reference object in the room to verify horizon line alignment. - 5
Calibrate controllers and tracking
Point controllers toward the camera and perform the standard pose checks. Validate grip buttons, trigger responses, and joystick centering to minimize drift in hand gestures.
Tip: Document any controller dead zones for later fine-tuning. - 6
Test and iterate
Enter VRChat with a simple avatar pose, test facial expressions if supported, and perform gesture tests. If anything feels off, adjust the focal points and re-run the relevant steps.
Tip: Keep a short log of adjustments and outcomes for future calibrations.
Questions & Answers
What devices are supported for VRChat calibration?
VRChat calibration supports most common headsets and controllers. Ensure compatibility with your device's firmware and VRChat version. If you use facial tracking or full-body tracking, follow the extended steps.
VRChat calibration works with popular headsets and controllers; check compatibility and update firmware before starting.
How long does calibration take?
Time varies by hardware and setup, but a thorough six-step process typically takes about twenty to forty minutes.
Calibrating usually takes about twenty to forty minutes, depending on equipment.
What should I do if tracking drifts after calibration?
Re-check sensor alignment, re-run the relevant steps, and verify that lighting and tracking surfaces are stable.
If drift happens, redo the calibration focusing on the drifted axis.
Can I calibrate while wearing the headset?
Yes, some steps can be performed with the headset on, but avoid moving during critical alignment phases.
You can, but avoid movement during critical alignment stages.
How often should calibration be redone?
Recalibrate after hardware changes, firmware updates, or noticeable tracking changes; otherwise, a quarterly check is a good baseline.
Do a recalibration after any hardware or firmware update, and check periodically if you notice drift.
Is facial tracking required for calibration?
Facial tracking is optional; the core calibration focuses on headset, controllers, and overall tracking fidelity.
Facial tracking isn't required for core calibration; it's optional for improved avatars.
Watch Video
Key Takeaways
- Establish a consistent play space baseline.
- Follow the six-step workflow for reproducible results.
- Recalibrate after hardware or firmware changes.
- Document settings and outcomes for future sessions.