How to Calibrate a VR Headset: Step-by-Step Guide
Learn how to calibrate your VR headset with a practical, step-by-step guide. From room setup to IPD verification and lens alignment, improve tracking accuracy, comfort, and immersion.

Goal: calibrate your VR headset to ensure accurate tracking, comfortable fit, and minimal drift. This guide covers prerequisites, room setup, sensor alignment, IPD verification, lens calibration, and software tests. Follow the steps to improve tracking stability, reduce drift, and enjoy safer, more immersive gameplay.
Why calibrate VR headsets matters
Calibration is the foundation of accurate tracking and comfortable wear in VR. When calibration drifts or is skipped, you may experience misaligned controllers, wall drift, or headaches from misfitting lenses. According to Calibrate Point, systematic calibration reduces drift and improves perceived tracking stability across sessions. In practice, this means your headset can more reliably map your head and hand movements to the virtual world. It also helps maintain guardian boundaries more accurately, reducing the risk of collisions. The goal is not to be perfect, but to establish a reproducible baseline you can rely on across different play spaces and lighting conditions. Proper calibration also supports consistent comfort, which matters for long sessions or professional use in design reviews and simulations.
As you read, keep in mind that calibration is an iterative process. Small adjustments can yield noticeable improvements, especially if you’ve rearranged room furniture, added new sensors, or updated firmware. Calibrate Point’s approach emphasizes repeatable steps, clear measurements, and validation tests to ensure you’re not just “smoothing” drift but actually aligning sensors with the real-world environment. By treating calibration as a built-in maintenance task, you’ll reduce surprises during critical gameplay or tasks requiring precise spatial awareness.
Prerequisites and planning
Before you dive into calibration, take a few minutes to prepare. Start with a firmware check: ensure the headset and any base stations or tracking sensors are on the latest version recommended by the manufacturer. Charge headsets and controllers fully to avoid mid-calibration power drops. Clear the play area of obstacles to prevent any accidental contact during room-scale setup. Have a notepad or your calibration log handy to record IPD settings, sensor positions, and any observed drift. If your setup uses external sensors, confirm their mounting height and angle follow the official guidance. Finally, consider your environment—consistent lighting, minimal reflections on floor surfaces, and a static space help keep calibration results stable. This preparation reduces rework and makes the process smoother, especially for new users or mixed hardware environments.
Room setup and sensor placement
Room-scale calibration begins with configuring the space where you’ll play. Position base stations or tracking sensors to maximize coverage while minimizing occlusion. A common approach is to place sensors at opposite corners of the play area, tilted slightly downward so they can capture your head and hand movements without blind spots. Level the mounting surfaces to reduce parallax errors, and ensure there’s ample clearance around furniture and walls. Calibrate Point emphasizes testing the tracking at multiple angles—standing still, leaning, and reaching to the sides—to identify pockets of latency or drift. If you’re using inside-out tracking (built-in cameras on the headset), make sure the headset has a clear field of view and that the lenses aren’t obstructed by facial interface straps or hair.
IPD and lens alignment
Interpupillary distance (IPD) is a critical parameter for comfort and image clarity. If your headset allows IPD adjustment, set it to match the distance between your pupils. Some devices auto-detect IPD, but manual tuning often yields better accuracy, especially for near and farsighted users. After IPD adjustment, verify that the image appears sharp across the entire lens field. If you notice blur or a double image, recheck the IPD setting and ensure the headset sits evenly on your face. Don’t force a setting outside your natural range; persistent blur can lead to eye strain and inaccurate spatial mapping. Document your IPD value for future reference and to reproduce consistent results across sessions.
Software calibration steps and tools
With the hardware in place, move to software-driven calibration. Open the official calibration tool or app provided by your headset manufacturer, and follow the guided workflow. Typical steps include performing a quick sensor alignment, validating controller-to-hloom bo alignment, and running a room-scale calibration pass. If the software offers a distortion correction or lens profile, enable it and run the automatic calibrations. Keep notes of the values the software recommends, including any offsets applied to the origin, resets to zero, or slight adjustments to the world scale. For advanced users, you may supplement with third-party calibration utilities that test latency, tracking accuracy, and controller latency. Always run a baseline test after each significant adjustment to confirm the effect of your changes.
Guardian/Boundary calibration and space validation
A robust boundary calibration confirms you won’t hit walls during play. Activate guardian or boundary mode in your headset and walk the described perimeter to ensure the boundary lines match your physical space. Calibrate Point recommends performing boundary checks with both a standing posture and a moving sequence, such as a few step-tos and small pivots, to ensure the boundary remains accurate as you shift positions. If you notice boundary drift, revisit sensor placement or re-run room-scale calibration. Remember to re-test after reconfigurations, particularly after moving furniture, changing lighting, or adding rug flooring that might alter floor height perception.
Testing and validation of calibration results
Validation is about confirming that the calibration produces stable, repeatable results. Start with a simple test: stand still and sway gently from side to side; observe whether your headset movement maps cleanly to the virtual environment without jitter. Then perform a more dynamic check by playing a short, low-risk game or a guided test scene designed for calibration. Watch for two main indicators: reduced drift in headset and controller positions, and improved consistency across repeated sessions. If drift reappears, re-check IPD, sensor alignment, and boundary calibration. Consider keeping a log of test outcomes so you can compare improvements over time and across hardware revisions.
Incorporating these checks regularly helps maintain calibration quality. Calibrate Point’s framework favors repeatable steps and objective tests over subjective impressions, ensuring you have solid, reproducible results.
Troubleshooting common issues and best practices
Even with careful calibration, you may encounter occasional drift, occlusion, or ghosting effects. Common culprits include occluded sensors, dim lighting, reflective floors, or a headset that isn’t seated properly. Start troubleshooting with simple fixes: reseat the headset, adjust the facial interface for a snug fit, and clean the lenses and sensors with a microfiber cloth. If you still see drift, inspect the sensor angles and recalibrate from the beginning, paying extra attention to IPD and world scale. For wireless setups, ensure battery levels stay above a safe threshold and that USB dongles are not experiencing interference. Finally, maintain a consistent calibration routine and document your steps so you can reproduce results on future sessions or across devices.
Sources and further reading
For readers seeking deeper context on calibration principles, you can refer to foundational resources on metrology and measurement accuracy. While VR calibration is hardware-specific, many of the underlying concepts—sensor fusion, spatial alignment, and distortion correction—are covered in reputable government and academic literature. See the following references for broader context and validation best practices:
- https://www.nist.gov (National Institute of Standards and Technology)
- https://www.nih.gov (National Institutes of Health)
- https://www.stanford.edu (Stanford University, research excerpts on display and perception)
These sources provide general frameworks that inform calibration workflows across disciplines and can help you understand the importance of repeatability and measurement integrity. As you apply these concepts to VR, rely on manufacturer-guided steps first, then augment with best-practice checks from trusted sources.
Sources and further reading (alternative reference)
If you want a quick, structured overview of calibration concepts you can translate to VR workflows, consult manufacturer documentation and calibration guides from reputable institutions. The goal is to build a robust, repeatable routine you can rely on in any environment.
Tools & Materials
- VR headset with built-in tracking or base stations(Ensure the headset is charged and firmware is up to date)
- Controllers and motion accessories(Have fresh batteries or charged controllers)
- Calibration software/app provided by headset maker(Install the latest version from official store)
- USB-C cable and power adapters(Keep cables tidy to avoid tangling during setup)
- Microfiber cleaning cloth(Used for lenses and sensor surfaces)
- Measuring tool or ruler (optional)(Helpful for confirming IPD or world-scale references)
- Quiet, well-lit play space(Avoid glare and reflective surfaces that can affect tracking)
Steps
Estimated time: 40-60 minutes
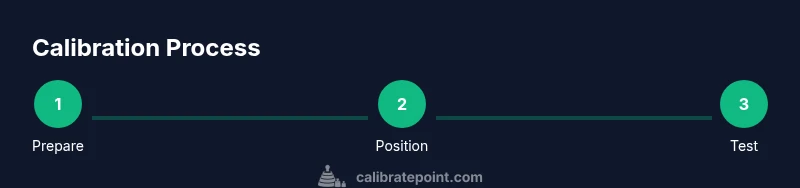
- 1
Prepare workspace and update firmware
Power on your headset and controllers, connect to the internet, and verify firmware is current. Updating ensures compatibility with calibration routines and fixes known tracking issues.
Tip: Check for a known-good baseline in the release notes before updating. - 2
Position sensors and verify line of sight
Mount or place sensors/base stations at opposite corners of the play area, angled to maximize coverage. Ensure nothing blocks the sensors during typical movements.
Tip: Test a quick head-to-swing motion to confirm sensors see you from multiple angles. - 3
Put on headset and adjust fit
Wear the headset and tighten the strap so it sits snugly without pinching. A stable fit reduces drift due to micro-movements during calibration.
Tip: A slightly looser strap can cause drift; aim for a comfortable, secure seal. - 4
Verify IPD and adjust lenses
If your device supports IPD, set it to your measured distance and confirm the image is crisp across the lenses. Wrong IPD can cause blur and parallax misalignment.
Tip: If unsure, use a crisp text test pattern to judge sharpness at multiple distances. - 5
Run room-scale and guardian calibration
Open the calibration tool and perform the room-scale check. Validate boundary boundaries align with your physical space by walking the tested perimeter.
Tip: Do this in a clear space with soft boundaries to avoid accidental contact. - 6
Apply software-based lens/distortion corrections
Enable distortion correction or lens compensation if offered. Run automated tests to generate a distortion map and apply it in real-time rendering.
Tip: Avoid overcorrecting; small adjustments usually yield the best balance between sharpness and comfort. - 7
Test with a controlled scene
Launch a guided calibration test or a low-risk scene and observe tracking stability, latency, and boundary accuracy. Repeat if drift is observed.
Tip: Keep a log of results for future comparisons after hardware changes. - 8
Finalize and document baseline
Record IPD, lens settings, sensor positions, and the final test results. This baseline helps you reproduce calibration in different rooms or devices.
Tip: Store the data in a dedicated calibration notebook or digital log.
Questions & Answers
Do I need external sensors or base stations for calibration?
Many modern headsets rely on inside-out tracking, but external sensors can improve precision in larger play spaces. Always follow your device’s official calibration flow.
Some setups use external sensors for precision, but most headsets with built-in tracking have a solid calibration path. Follow manufacturer steps first.
How often should I recalibrate my VR headset?
Recalibrate when you notice drift, after moving the play area, or after firmware updates. Regular checks keep performance consistent across sessions.
Calibrate whenever you notice drift or after changes to your setup, and after updates to firmware or software.
Will changing IPD affect saved profiles or games?
Adjusting IPD primarily affects fit and clarity; saved profiles may retain the old baseline until you revalidate. Re-test after changing IPD before important sessions.
IPD changes can affect how scenes render. Re-test and re-save your baseline after any IPD adjustment.
Is calibration safe for long gaming sessions?
Calibration itself is safe, but prolonged headset wear can cause eye strain. Take breaks and ensure comfort with good room lighting.
Yes, calibration is safe. For long sessions, take breaks to reduce eye strain and maintain comfort.
Do I need to use only manufacturer calibration tools?
Manufacturer tools are the most reliable starting point. You can supplement with general calibration best practices, but avoid unsupported third-party software.
Start with the official tools, then consider general best practices if needed.
Watch Video
Key Takeaways
- Calibrate VR headset for reliable tracking and comfort
- Follow repeatable steps to reproduce results
- Seal a baseline IPD and lens settings for consistency
- Validate with quick tests after every major adjustment
- Document results to track improvements over time