Xbox 360 Calibrate Controller: Step-by-Step Guide
Learn how to calibrate an Xbox 360 controller on Windows or with console settings. This expert guide covers when calibration is needed, essential tools, step-by-step Windows and console methods, troubleshooting tips, and test methods to fix drift and dead zones.

This guide shows you how to calibrate an Xbox 360 controller to fix drift and unresponsive inputs. Whether you’re on Windows or the original console, you’ll learn the built-in calibration options, required tools, and a clear, step-by-step process to reset axes, triggers, and dead zones. Follow the steps to nail precise control in your games.
Why calibrate an Xbox 360 controller?
Calibrating the Xbox 360 controller helps restore accurate input when you notice drift, jitter, or an unresponsive stick. In practice, calibration aligns the physical analog inputs with what the game reads on screen, reducing dead zones and improving precision in shooters, racing titles, and platformers. According to Calibrate Point, a systematic calibration routine can prevent long-term input drift and prolong controller performance by ensuring inputs map correctly to in-game actions. This is especially helpful for players who rely on precise aim or steady throttle in competitive titles.
When to calibrate: common scenarios
You should consider calibrating when you notice any of the following: drifting sticks that slowly move the cursor or camera without input, a trigger or button registering late, or inconsistent input across sessions. Calibration is also useful after a system update, after swapping batteries or a battery pack, or when moving the controller between PC and console setups. Regular checks help maintain consistent control, particularly in fast-paced games where precision matters.
Understanding inputs and dead zones
An Xbox 360 controller maps physical movement to digital input through axes and buttons. The most important areas to calibrate are the left and right sticks, the D-pad, and the triggers. Dead zones are the neutral areas where minor deviations don’t register as movement. If the dead zone is too large, you’ll feel sluggish responsiveness; if it’s too small, tiny unintentional movements cause input. Calibration helps reset these zones so that full range of motion corresponds to expected in-game movement.
Tools and setup you’ll need
Before calibrating, ensure you have a reliable PC or console setup. For Windows calibration, you may need a USB connection or the Xbox 360 Wireless Gaming Receiver if you’re on a wireless controller. Have a fully charged controller and, if possible, a wired connection for stability during calibration. A quiet testing environment is helpful to observe input changes without interference.
Step-by-step calibration on Windows (PC)
This section covers the standard Windows calibration method using the Game Controllers settings. You’ll test each axis and adjust dead zones to ensure neutral input maps to zero movement. The process is straightforward but may vary slightly by Windows version. Follow the steps in order and use the test window to verify each input reads correctly as you move sticks, press triggers, and tap the D-pad.
Step-by-step calibration on the Xbox 360 console (in-game options)
The original Xbox 360 console does not include a universal hardware calibration tool. Instead, you calibrate indirectly through in-game settings or dead-zone adjustments in specific games. If your goal is consistent input across titles, you may need to adjust per-game dead zones and sensitivity settings. For some titles, in-game tutorials include calibration prompts you can follow for better precision.
Troubleshooting common issues after calibration
If you still experience drift or inconsistent input after calibration, re-check connections, update drivers on Windows, and ensure the Wireless Receiver or USB cable is functioning properly. Re-run calibration steps focusing on the axis that exhibits the problem. In rare cases, controller hardware wear or battery issues can cause lasting drift; replace batteries or consider a controller health check.
What to expect after calibration and how to test
After calibration, test your controller in a few quick scenarios: a first-person shooter for aim accuracy, a driving game for steering precision, and a platformer for movement responsiveness. Use a test profile or a neutral game scene to confirm there is no unwanted drift and that inputs map cleanly to on-screen actions. Regular monitoring helps maintain consistency across gaming sessions.
Tools & Materials
- Xbox 360 controller (wired or wireless)(Wireless requires a compatible Wireless Gaming Receiver for Windows.)
- Windows PC with Game Controllers settings access(Windows 10/11 are common; Windows 7/8 may also work.)
- USB cable or Wireless Gaming Receiver(Only needed for wireless controllers on PC.)
- Fully charged batteries or controller charge(Keep power stable during calibration.)
- Quiet testing area(Helps observe input changes without distractions.)
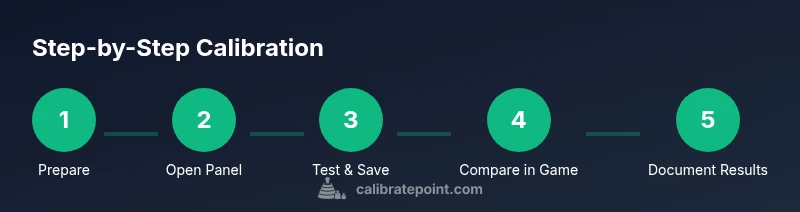
Steps
Estimated time: 40-60 minutes
- 1
Prepare your setup
Connect the controller to your PC or console and ensure it is powered. If using Windows, connect via USB or the wireless receiver and verify the device shows up in your system. A stable connection prevents calibration errors.
Tip: Charge or replace batteries before starting to avoid power dropouts. - 2
Open the calibration panel
On Windows, open Control Panel > Hardware and Sound > Devices and Printers > right-click the Xbox 360 Controller for Windows > Game Controller Settings > Properties. This is where you will test axes and adjust values.
Tip: Use a wired connection if possible to minimize signal interference during calibration. - 3
Test and reset axes
Move each stick to its extremes (fully left/right, up/down) and return to center. Note any offset at rest. Use the reset or calibrate option if available to re-sync neutral positions.
Tip: Do not rush; small, deliberate movements produce clearer readings. - 4
Calibrate the triggers and D-pad
Gently press the triggers to verify full range from rest to full pull. Test the D-pad in all directions. If readings are uneven, adjust the sample range or re-run calibration.
Tip: Hold input at mid-range briefly to observe mid-point stability. - 5
Save and retest
Save any changes and run the test again to confirm neutral positions map to zero input. Confirm there is no unwanted drift when the sticks rest in the center.
Tip: Document any persistent drift for later game-specific dead-zone adjustments. - 6
Test in a game
Launch a game with a neutral control scene and verify accurate movement. If needed, fine-tune dead zones per game in its settings.
Tip: Some games override system calibration; adjust per-game settings as needed. - 7
Document and store results
Record the final dead-zone values and axis ranges for future reference. This helps you reproduce the setup if calibration drifts over time.
Tip: Keep a small note with your controller model and calibration date.
Questions & Answers
Will calibration fix drifting sticks on an Xbox 360 controller?
Calibration can reduce drift by aligning inputs with the actual analog movement. If drift remains, check connections, battery health, and consider a hardware inspection.
Calibration can reduce drift, but if it persists, check connections and battery health, and consider hardware inspection.
Can I calibrate an Xbox 360 controller on Windows 10/11?
Yes. On Windows 10 and 11 you can calibrate via the Game Controllers settings. Use the Properties and Calibrate options to test axes and adjust dead zones.
Yes, Windows 10 and 11 have a calibration path in the Game Controllers settings.
Do wireless Xbox 360 controllers require a special setup on PC?
Wireless controllers require the Xbox 360 Wireless Gaming Receiver for PC to connect. After pairing, calibrate like a wired controller.
Wireless controllers need the Wireless Gaming Receiver to connect, then you calibrate as usual.
How long does calibration typically take?
A typical calibration session takes about 20 to 60 minutes depending on how thorough you are and whether you test across multiple games.
Most calibrations take about 20 to 60 minutes depending on thorough testing.
What if calibration doesn’t help? Is the controller bad?
If calibration doesn’t help, the issue may be hardware wear, a faulty cable, or deeper internal drift. Consider servicing or replacing the controller.
If calibration doesn’t help, it could be hardware wear or a faulty cable. Consider service or replacement.
Is calibration safe for the controller?
Calibration is safe when performed with proper steps and using official settings. Avoid forcing inputs beyond normal ranges and disconnect during maintenance if unsure.
Yes, calibration is safe when done through official settings and with normal input ranges.
Watch Video
Key Takeaways
- Calibrate when drift or unresponsiveness appears
- Windows calibration is the most straightforward path
- Test across multiple games to ensure consistency
- Document final settings for future reference
- If issues persist, hardware health may be the limiting factor