How to Calibrate a Controller for Yuzu Emulator
Learn how to calibrate your gamepad for the Yuzu emulator with precise axis mapping, dead zones, and button profiles. This Calibrate Point guide walks you through setup, testing, and verification for consistent input across titles.

Learn how to calibrate a controller for the Yuzu emulator by mapping axes, setting dead zones, and binding buttons. This guide covers testing inputs, creating a repeatable profile, and validating accuracy in games. Follow the step-by-step actions to ensure responsive, consistent control across titles and controller types. Whether you use a wired gamepad or a Bluetooth device, this method keeps inputs predictable.
Understanding Yuzu Controller Calibration
Calibrating a controller for the Yuzu emulator is not about fixing hardware faults. It's about aligning how your physical inputs translate into in-game actions. In Yuzu, the calibration process encompasses axis mapping, dead zones, sensitivity, and button bindings. The goal is to create a reliable, repeatable control profile that feels natural across different games and control schemes. A well-tuned profile reduces drift, minimizes dead zones, and prevents accidental inputs during rapid actions. For DIY enthusiasts and technicians, this step ensures your setup behaves consistently whether you are playing racing sims, platformers, or action-adventure titles. Remember that every controller has its own quirks, so the exact values you choose should reflect your device and your playing style. Throughout this guide, we treat calibration as a performance optimization task rather than a one-time tweak.
Tools and prerequisites for accurate calibration
Before you begin, ensure your environment is ready. A clean OS install with up-to-date drivers helps Yuzu read inputs reliably. Confirm that the emulator recognizes your controller and that there are no conflicting inputs from other software (Steam, Virtual Xbox/DS4, etc.). A stable test game or demo ROM in Yuzu lets you validate mappings in real-time. Having a dedicated USB port for the controller reduces disconnections and jitter. Finally, back up any existing configurations so you can revert if needed.
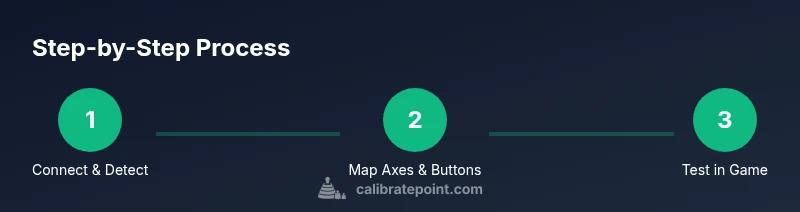
Step-by-step calibration workflow overview
A clear workflow keeps calibration focused and repeatable. Start by confirming device recognition, then map axes and buttons, adjust dead zones and sensitivity, and finally validate with live gameplay. Each stage should be documented so you can compare results across sessions. This overview keeps you aligned with best practices and makes it easier to reproduce results on another PC or for a different controller in the future.
Fine-tuning dead zones, axes, and bindings
Dead zones define the range where a stick input is ignored. If too small, you’ll see drift or jitter; if too large, you’ll lose precision. For triggers and axes, calibrate each input to match the natural range of motion for your device. Bindings should be logical and consistent: map the primary actions to buttons you press intuitively, and keep shoulder or stick inputs consistent across titles. Document your mappings so you can quickly reproduce them later.
Validation and testing in Yuzu and games
Validation means real-world testing, not just screen prompts. Load a simple game and perform controlled actions: move a character, aim, and execute combos. Watch for drift, stuck inputs, or delayed responses. If issues appear, adjust the corresponding axis curve, dead zone, or button binding, then retest. Repeating these tests across a few games confirms the profile remains robust in different contexts.
Common issues and advanced tips
Emulation input can be sensitive to driver conflicts, conflicting input devices, or Steam Input interference. If your controller isn’t detected, check device manager (or system preferences) to ensure it’s active, then rebind in Yuzu. For wireless setups, ensure a stable connection and consider using a dedicated adapter if you experience jitter. Advanced users can export profiles, compare axis curves, and re-import calibrated templates to speed up device swaps.
Adapting calibration for different controllers
Every controller model has unique axis scales and button layouts. When switching devices, repeat the calibration steps with fresh notes on axis orientation, binding logic, and dead zones. A universal approach—apply a consistent naming scheme, test with multiple games, and save presets per device—minimizes rework when you rotate between hardware.
Tools & Materials
- PC or laptop with Yuzu emulator installed(Windows 10/11 or macOS; ensure Yuzu is up to date)
- Controller (USB wired or Bluetooth)(Test across input types; ensure OS detects it)
- USB-C or micro-USB cable(Prefer a snug fit; keep a spare cable)
- Stable USB port or Bluetooth setup(Avoid hubs; direct connection recommended)
- A test game or demo ROM in Yuzu(Used for live input validation)
- Optional: controller driver utilities(Install only if needed for your device)
Steps
Estimated time: 30-60 minutes
- 1
Connect and verify detection
Plug in the controller and confirm the OS recognizes it. Open Yuzu and verify the device appears in the input settings. If it doesn’t show, troubleshoot drivers or try another USB port.
Tip: Use a direct USB port rather than a hub to reduce dropouts. - 2
Open Yuzu input settings
Navigate to Options > Input to access the controller bindings. Ensure the correct device is selected for the active profile. Create a new profile for calibration to avoid overwriting defaults.
Tip: Label the profile with the device name for easy identification. - 3
Map axes and buttons
Assign each axis (X, Y, Z, RZ, etc.) to the corresponding sticks or triggers. Bind essential actions to intuitive buttons, keeping consistency across games.
Tip: Map primary actions to the most comfortable buttons you press repeatedly. - 4
Set dead zones and sensitivity
Configure dead zones so minor stick drift isn’t interpreted as input. Tune sensitivity for each axis to match your play style and device range.
Tip: Start with small dead zones (0.05–0.15) and adjust in 0.05 increments. - 5
Create and save a calibration profile
Save the configuration as a profile, and back it up. If you install drivers or switch devices, you can re-import quickly.
Tip: Export the profile to a safe location or cloud storage. - 6
Test in a simple game
Launch a basic game and perform standard actions to verify responsiveness. Watch for drift, delayed input, or misbinding.
Tip: Use a non-critically timed game to speed up testing. - 7
Tweak based on feedback
If issues appear, adjust the axis curve or dead zones for the affected input and retest. Iterate until the experience feels natural.
Tip: Document exact values used for future reference. - 8
Document and adapt for other devices
Record settings per device. When you switch controllers, apply the corresponding profile to maintain consistency.
Tip: Maintain a shared note with mapping schemes for quick setup.
Questions & Answers
Can I calibrate any controller for Yuzu?
Most HID input devices recognized by your OS can be mapped in Yuzu. Some controllers may require additional drivers or middleware for full functionality.
Most HID controllers can be calibrated in Yuzu, though some devices may need extra drivers.
What if Yuzu doesn’t detect my controller after calibration?
Verify device recognition in the OS, reselect the device in Yuzu, toggle the input binding, and restart Yuzu if necessary. Check for conflicts with other input software.
First check your OS, then rebind in Yuzu and restart if needed.
Do I need to recalibrate after a Yuzu update?
Calibration profiles are stored with Yuzu settings, but major emulator updates can alter input handling. Recheck bindings after updates and adjust as needed.
Recheck your bindings after major updates to be safe.
Can I share calibration profiles across computers?
Yes. You can export/import profile files from the Yuzu input settings. File locations depend on your OS and Yuzu version.
Profiles can be exported and imported between machines.
Is calibrating safe for hardware?
Calibration is software-based and safe. Misconfiguration won’t damage hardware, but it can cause input lag or unexpected behavior until corrected.
Calibrating won’t harm hardware; fix issues promptly if they occur.
Watch Video
Key Takeaways
- Map inputs consistently across profiles
- Validate with real gameplay to confirm accuracy
- Back up and note device-specific settings
- Recalibrate after hardware or driver changes