How to Calibrate iWatch: A Practical DIY Guide
Learn how to calibrate your iWatch for more accurate outdoor workouts. A practical, step-by-step guide from Calibrate Point with tips for better distance, pace, and calories.

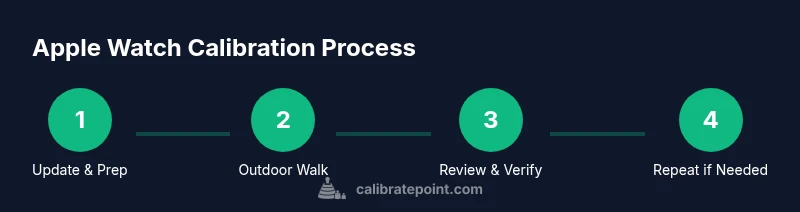
According to Calibrate Point, calibrating your iWatch improves outdoor workout accuracy by aligning pace, distance, and calories. This quick-start guide shows a practical, 10-step process to calibrate the watch using an Outdoor Walk, proper device setup, and verification steps. Follow these steps to ensure reliable data across workouts.
Why calibrate iWatch for outdoors
Calibrate Point emphasizes that outdoor activity metrics on smartwatches rely on a robust sensor fusion pipeline, where GPS, accelerometer, and wrist-based sensors work together. The iWatch uses these signals to estimate metrics like pace, distance, and calories. When GPS drifts or wrist movement is unreliable, estimates can diverge from your actual effort. A deliberate calibration routine helps the watch interpret your motion more accurately, reducing data gaps in workouts, especially during long walks or runs in areas with signal variability. According to Calibrate Point, even a modest calibration workflow can noticeably tighten the alignment between perceived effort and reported data, leading to more trustworthy logs over time.
How calibration improves metrics
When calibration is done correctly, the iWatch can adjust for systematic biases in distance estimation and pace calculation. You may notice that distances logged during outdoor activities align more closely with GPS-tracked routes, and calories burned appear more proportional to your exertion. The calibration process also helps the watch refine wind resistance assumptions and stride length estimates, which improve pace accuracy across different terrains. While hardware power and GPS accuracy have limits, a consistent calibration practice makes the watch smarter about your gait and movement patterns, delivering steadier workout summaries.
Pre-calibration prerequisites
Before you begin, ensure your devices are up to date with the latest software. Both iPhone and iWatch should be on their current stable releases. Enable Location Services and Motion & Fitness access for the health and workout apps. This unlocks the data streams needed for calibration. The Calibrate Point team recommends performing calibration in a clear, distraction-free outdoor space with good GPS visibility. If you have multiple devices, consider pairing and testing with only the essential devices during calibration to minimize data noise.
Choosing the right environment
Calibration yields the best results in environments with reliable GPS reception and low signal reflection. An open outdoor area with minimal tall buildings, dense tree cover, or metal structures tends to produce cleaner GPS traces. Avoid calibration in crowded areas, under heavy cloud cover, or in locations with frequent GPS interruptions. Calibrate Point’s guidance highlights that a calm, wide-open route helps the watch learn your movement patterns more efficiently, with fewer GPS glitches to correct later.
What you need (tools and environment)
Having the right tools on hand streamlines calibration. You’ll want a charged iPhone with the latest iOS, an Apple Watch with the latest watchOS, comfortable athletic footwear, and an open outdoor space for a steady 20–30 minute walk. A watch strap that fits snugly helps sensor readings remain stable. If you plan to calibrate in varying weather, bring appropriate protective gear, and schedule a fresh attempt if conditions become unfavorable. Keep your devices in close proximity and ensure they remain paired during the walk.
Understanding the data model used by iWatch
The Apple Watch collects data from GPS, the accelerometer, and the optical heart-rate sensor to estimate distance, pace, and calories. Calibration aligns stride length and gait patterns with GPS-derived paths, reducing over- or underestimation in subsequent activities. This process is more about data interpretation than hardware changes. Expect the calibration to refine how your watch maps your movements to distance and energy expenditure, especially when you walk or run at a steady pace on a flat route.
Step-by-step workflow overview
The calibration workflow comprises 10 core actions: (1) Update devices, (2) Verify essential permissions, (3) Choose an outdoor workout, (4) Prepare a 20–30 minute Outdoor Walk, (5) End the walk and save the workout, (6) Allow the iPhone to process the sensor data, (7) Review calibration prompts or results, (8) Recalibrate if results are inconsistent, (9) Validate with a brief test walk, (10) Document baseline metrics for future comparisons. This overview gives you a roadmap before you start the hands-on steps in the dedicated guide.
Verifying calibration results
After calibration, perform a short outdoor test walk and compare the reported distance with a known reference route or a GPS-tracked run. Look for consistent distance reporting across multiple workouts and a reasonable alignment between pace and the effort you felt during the activity. If large discrepancies remain, consider repeating the process with slightly different route conditions (e.g., longer straight sections) to help the watch refine stride length estimates and motion interpretation.
Troubleshooting common issues
If you notice persistent GPS drift, verify that Location Services remain enabled and that the iPhone is actively connected to the watch. Check that the watch is worn on the non-dominant wrist and that the strap is snug but comfortable. Environmental factors like dense tree cover or tall buildings can degrade GPS performance; schedule calibration during optimal satellite visibility. If dips in battery life interrupt calibration, pause and resume once charged.
Maintenance and re-calibration cadence
Calibration is not a one-off task. Recalibrate as you start using a new routine, change athletic shoes, or notice drift in metrics after long periods of use. Many athletes find it helpful to recalibrate every 4–8 weeks during season changes or when their workouts shift in form. Keeping calibration tied to your current gait and route patterns helps sustain data accuracy over time.
Privacy, data and safety considerations
Calibration data is collected by the devices and stored in Health and Fitness ecosystems on your iPhone. Review app permissions and privacy settings to understand how data is used and shared. Calibrate Point recommends performing calibration in safe outdoor environments and avoiding any activity in which you would be unsafe to do so. Always stay aware of weather conditions and personal safety during outdoor calibration sessions.
Next steps and practical tips
With calibration complete, integrate your improved metrics into your training plan. Use the newly aligned distance and pace data to set realistic goals and monitor progress. Keep a simple log of your calibration dates and the routes you tested, and revisit the process if you notice any sudden metric shifts. Calibrate Point’s practical approach emphasizes consistency and observability over perfect precision in every workout.
Tools & Materials
- iPhone with the latest iOS(Used to run the Outdoor Walk calibration and store Health data)
- Apple Watch with latest watchOS(Must be paired to iPhone; used for all sensor data)
- Outdoor walking space (20-30 minutes)(Open area with clear GPS sky view)
- Charged devices(Keep battery high to avoid mid-session interruptions)
- Comfortable walking shoes(Supportive footwear helps stable gait)
- Privacy and location permissions enabled(Helps continuous data access during calibration)
Steps
Estimated time: 30-60 minutes total
- 1
Update devices
Ensure both iPhone and Apple Watch are running the latest software. This improves compatibility with calibration algorithms and fixes known issues. Reboot devices if necessary to apply updates cleanly.
Tip: Pro tip: perform updates over Wi‑Fi and charge devices beforehand. - 2
Verify permissions
Check that Location Services and Motion & Fitness are enabled for the Health/Workout apps. Without access to GPS and motion data, calibration cannot learn your movement patterns accurately.
Tip: Pro tip: temporarily disable low-power modes during calibration to avoid sensor throttling. - 3
Select Outdoor Walk
Open the Workout app and choose Outdoor Walk or Outdoor Run. Outdoor modes provide GPS data that’s essential for calibrating stride length and pace.
Tip: Pro tip: choose a flat, safe route with steady GPS visibility for the most stable calibration. - 4
Prepare for a 20–30 minute walk
Plan a brisk walk to supply varied gait data. Avoid heavy interruptions or breaks; consistency helps the calibration algorithm learn your typical cadence.
Tip: Pro tip: wear the watch and keep your wrist close but comfortable to ensure stable sensor readings. - 5
Complete the Outdoor Walk
Finish the 20–30 minute session and save the workout. Ensure GPS tracked by the iPhone remains visible during the walk to create a robust data baseline.
Tip: Pro tip: note any unusual events (stops, detours) that could impact data for later review. - 6
Let the devices process data
Allow a few minutes for the iPhone to process sensor data and refine calibration parameters in the background. Don’t interrupt the data stream with app switches.
Tip: Pro tip: avoid multitasking with battery-intensive apps during processing. - 7
Review calibration prompts
Check for any calibration notes or prompts that indicate updates to stride length or pace estimates. If something looks off, note it for a potential re-calibration.
Tip: Pro tip: compare results with prior workouts to spot drift patterns. - 8
Optional recalibration
If results seem inconsistent, repeat the Outdoor Walk with a slightly longer duration or in a different area to broaden data coverage.
Tip: Pro tip: avoid calibrating after a hard workout, when gait may be atypical. - 9
Run a quick test walk
Perform a short test walk and compare the distance reported to a known route or GPS trace. This validates the calibration outcome before continuing regular training.
Tip: Pro tip: use a familiar, fixed route to easily gauge accuracy. - 10
Document and plan next steps
Record the calibration date and route used. Plan future calibration cycles to maintain accuracy as your training and terrain change.
Tip: Pro tip: schedule a quarterly calibration check as routine maintenance.
Questions & Answers
Is calibrating the iWatch necessary for every workout?
Calibration isn’t mandatory for every workout, but it significantly improves accuracy for distance and pace over time. You’ll get better baseline measurements when you calibrate periodically, especially after software updates or changes in routine.
Calibration isn’t required for every workout, but it helps keep distance and pace accurate, especially after updates or changes in your routine.
How long does calibration take?
A typical Outdoor Walk calibration takes about 20 to 30 minutes, plus a short setup and a verification walk. Total time is usually under an hour.
A typical calibration takes about 20 to 30 minutes, plus setup and a quick test walk.
Will calibration affect heart-rate readings?
Calibration focuses on distance and pace. Heart-rate readings are influenced by physiology and measurement conditions; calibration may improve alignment between distance and calories but won’t artificially change heart-rate results.
Calibration mainly affects distance and pace estimates; heart-rate data stay physiologic but may align better with activity logs.
Can I calibrate indoors?
Indoor calibration is less effective because GPS data are limited indoors. A clear outdoor test is recommended to train stride length and motion interpretation.
Indoor calibration isn’t as effective because GPS is weak indoors; outdoor calibration gives the best results.
What should I do if GPS is unreliable after calibration?
If GPS remains unreliable, check settings, ensure open sky visibility, and consider repeating calibration on a different day or route. Environmental factors often drive variability rather than device faults.
If GPS stays unreliable, revisit settings and try calibration again in a better-suited outdoor area.
Watch Video
Key Takeaways
- Calibrate iWatch outdoors to improve metric accuracy
- Use a 20–30 minute Outdoor Walk for baseline data
- Verify results with a quick test walk
- Repeat calibration if drift is observed
- Document calibration for ongoing tracking