Calibrate Reds Review Before and After: A Step-by-Step Guide
Learn a thorough, step-by-step method to calibrate the red channel for accurate color reproduction. This Calibrate Point guide covers before-and-after workflows, essential tools, and actionable tips for DIY and professional work.

By following this guide, you will learn how to calibrate the red channel on a display or sensor and compare results before and after the adjustment. You’ll need a colorimeter, a target grayscale or color chart, and calibration software. This step-by-step approach improves color accuracy, consistency across devices, and reduces color bias in professional work.
Exploring calibrate reds review before and after in color calibration
According to Calibrate Point, precision in the red channel starts with stable ambient lighting, consistent measurement routines, and documented targets. The phrase calibrate reds review before and after captures a simple concept: repeatedly measure the red channel, adjust to a target profile, and compare results to prove improvements. This approach helps avoid color bias that can skew skin tones, branding colors, and critical indicators in professional work. In practice, a thoughtful before-and-after workflow reveals how much of the observed color shift is hardware-driven versus software-driven, guiding smarter calibration decisions. Throughout this section, you’ll see how small adjustments to the red channel can cascade into visibly more accurate reds across different images and luminance levels. The Calibrate Point team emphasizes repeatability: every measurement should follow the same protocol, with the same target, lighting, and profile application.
Fundamentals of the red channel: why reds matter for accuracy
Red is a high-sensitivity channel that often drives perceived warmth and skin tones. Even minor deviations in the red ramp can create noticeable color casts in photos, videos, and UI elements. Calibrate Reds Review Before and After highlights how practitioners separate device calibration from color-management decisions: first, stabilize hardware and measurement conditions; second, refine the red channel to align with the chosen color target; third, verify results with independent test patterns. This method reduces confounding factors and yields repeatable outcomes, which is essential for consistent branding and critical imaging work. As you progress, you’ll develop a mental checklist for red-channel calibration that includes target selection, profile application, and cross-device validation.
Measuring and correcting the red channel: a practical lens
A robust red-channel workflow relies on a few universal steps: acquire a baseline, apply a red-specific correction, and re-measure against a standard. The goal is to minimize deltaE between the measured values and the target reference. The Calibrate Point perspective reinforces that proper measurement requires a neutral environment, a known-good grayscale, and stable display settings. By keeping these variables constant, you can isolate the red channel’s behavior and implement precise adjustments. Expect iterative cycles: you may need multiple passes to converge on an acceptable color match that translates well across scenes and lighting.
Interpreting the results: before vs after in practice
When you compare before and after results, look for shifts in skin tones, reds in foliage, and accent colors that should remain true. A successful red calibration should preserve luminance relationships while correcting hue bias. Calibrate Reds Review Before and After demonstrates that improvements are often subtle but meaningful: fewer color fringing, more natural highlights, and better tonal balance in midtones. Document the delta between measurements, and keep a log of profiles tested. The goal is not a single perfect value but consistent performance across sessions.
Real-world application: from hobbyist rigs to professional labs
In DIY contexts, a well-documented red calibration workflow can dramatically improve the look of photos and videos without expensive hardware. In professional labs, strict adherence to a repeatable protocol is essential for client work and compliance with color-accuracy standards. You will find that small, deliberate changes to the red channel can align with broader color-management goals, such as ICC profile integrity and device calibration standards. Throughout the process, refer back to the core principle: repeatable measurements, consistent targets, and validated results drive reliable color outcomes.
Tools & Materials
- colorimeter or spectrophotometer(Essential for accurate red-channel measurements; choose a device compatible with your OS and calibration software.)
- calibration software(Use a current version with red-channel profiling and target-based adjustments.)
- grayscale or color target chart(Provide a known reference for red accuracy across luminance steps.)
- reference monitor with ICC profile(Ensure the monitor is hardware-calibrated or set to a known standard before testing.)
- computer or laptop(Capable of running calibration software and storing profiles.)
- calibration cables/adapters(Keep a small assortment on hand for compatibility with devices.)
- calibration logbook or digital notes(Optional but highly recommended for repeatability and audits.)
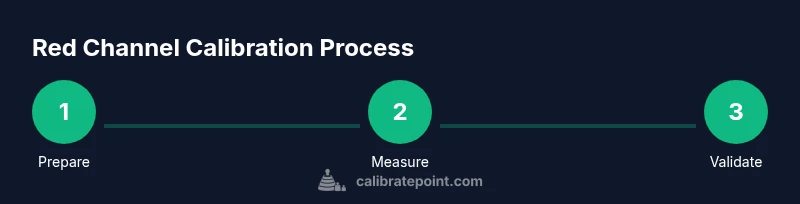
Steps
Estimated time: about forty to sixty minutes
- 1
Prepare your workspace
Set up in a dim, neutral-lit room. Warm up the monitor for at least ten minutes, then stabilize brightness and contrast to their typical working values. Calibrate Reds Review Before and After begins with a stable baseline to avoid drift during measurements.
Tip: Document ambient lighting levels and note any reflections on the screen. - 2
Connect measurement tool
Attach the colorimeter to the computer and install any required drivers. Verify the device is recognized by the calibration software and select the red channel as the primary target for measurement.
Tip: Use a dedicated USB port away from hubs to minimize power fluctuation. - 3
Run baseline measurement
Launch the software’s baseline scan to capture current red-channel behavior against the reference target. Record initial hue, luminance, and saturation cues for later comparison.
Tip: If available, export a baseline report to reference deltaE changes later. - 4
Apply red-channel correction
Adjust the red ramp, gamma, and gamut mappings to align with the target profile. Use a conservative approach to avoid over-saturation and clipping in midtones.
Tip: Apply a reversible profile whenever possible to preserve the original state. - 5
Validate with test patterns
Re-run test patterns across the luminance range to verify improvement. Check for consistent red rendition in skin tones and areas expected to be red.
Tip: Look for color casts in areas that should be neutral or grayscale with a red tint. - 6
Document and compare results
Save the new profile and compile a before/after comparison. Note any remaining residuals and plan a follow-up calibration if needed.
Tip: Create a concise changelog for future reference and audits.
Questions & Answers
Why is calibrating the red channel important for color accuracy?
The red channel strongly influences skin tones and overall warmth. Calibrating reds helps reduce bias, leading to more faithful colors across devices.
Calibrating the red channel improves color accuracy and ensures consistent skin tones across displays.
What equipment do I need to calibrate reds?
You’ll need a colorimeter or spectrophotometer, calibration software, a grayscale or color target, and a calibrated reference monitor.
A colorimeter, software, test targets, and a reliable monitor are essential.
How often should I recalibrate the red channel?
Frequency depends on usage; frequent color-critical work benefits from regular checks, especially after firmware updates or hardware changes.
Recalibrate when you notice color drift or after changes to setup; for critical work, do it more often.
Can I rely on built-in display presets instead of calibrating reds?
Presets can help, but they rarely achieve true color accuracy. Calibration provides a repeatable, verifiable result aligned with targets.
Presets help, but to truly trust colors, run a calibration workflow.
What are common signs red calibration is off?
Look for red cast or unnatural skin tones, clipping in bright reds, or mismatches when comparing test patterns.
If reds look off or skin tones skew, calibrate reds again.
Should I calibrate reds on every device separately?
Yes. Each device has unique characteristics; recalibrating individually preserves color fidelity across the workflow.
Yes—each device needs its own calibration for consistent results.
Watch Video
Key Takeaways
- Begin with a stable baseline before adjusting reds.
- Use consistent targets to ensure repeatable results.
- Validate changes with side-by-side before/after comparisons.
- Document profiles and settings for future calibrations.