How to Calibrate Subwoofer: Step-by-Step Guide for Accurate Bass
Learn how to calibrate your subwoofer for tight, balanced bass that blends with your main speakers. This practical guide covers measurement tools, crossover and phase alignment, and room considerations to achieve repeatable, professional results.

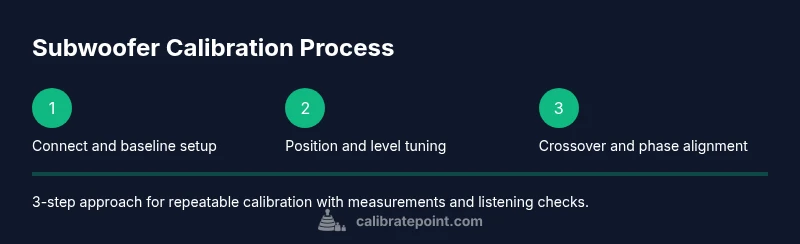
Calibrating a subwoofer involves setting levels, adjusting crossover and phase, and verifying bass balance at the listening position. Follow this step-by-step guide to achieve consistent, natural bass that integrates with your main speakers. This approach uses measurement tools, practical adjustments, and careful listening to avoid common pitfalls.
Why calibrate subwoofer for balanced bass
Calibrating your subwoofer is essential for accurate bass response and integration with your main speakers and the room. A well-calibrated sub fills out the low end without overpowering dialogue, cymbals, or midrange instruments. According to Calibrate Point, the most consistent results come from a structured process that uses measurement tools and repeatable steps. In practice, calibration helps you control bass extension, keep bass from dominating the mix, and reduce room-induced peaks and dips. This approach yields natural, musical bass that supports the overall soundstage rather than drawing attention to itself. Throughout this guide, you’ll learn a practical workflow that translates measurements into listening improvements, with tips for common room layouts and system configurations. The goal is a balanced low end that enhances any film, game, or music you enjoy. The Calibrate Point team emphasizes repeatable steps and careful listening to ensure you can reproduce results in future setups or after room changes. Calibrate subwoofer with intention, and you’ll hear a more coherent, immersive listening experience.
Understanding room acoustics and bass modes
Bass behaves differently than midrange and treble because it interacts strongly with room dimensions and surface materials. Small changes in subwoofer placement, listening position, or furniture can cause peaks (boomy bass) or dips (dead spots). Room modes are frequency-specific and can create reinforcement or cancellation at the listening seat. Effective calibration recognizes these effects and uses measurements to identify problem frequencies. The aim is to smooth the bass response across the essential listening area, not just at one seat. When calibrating, consider the symmetry of your room, the distance to walls, and whether to treat first-reflection points with absorptive materials. A careful approach reduces the guesswork and makes adjustments more predictable for future setups.
Tools and measurement basics
Successful calibration starts with the right tools. A calibrated SPL meter or a trusted smartphone app can provide objective measurements. Pink-noise or test-tone tracks guide you through level matching and frequency checks. An AV receiver or amplifier with a dedicated sub-out (LFE) makes it easier to apply consistent levels. You’ll also need appropriate cables to connect the sub to your receiver, a tape measure for quick room estimates, and a quiet listening environment during measurements. Understanding the basics of SPL, frequency response, and phase alignment will help you interpret the numbers and correlate them with what you hear. This section also covers common measurement mistakes, such as measurement at the wrong seat or during noisy conditions, and how to avoid them. The goal is to generate a reliable baseline you can refine later.
Baseline setup: initial subwoofer position and gains
Start with a simple, repeatable baseline. Place the subwoofer near the front left corner or along a wall, depending on room characteristics and speaker layout. Set the sub’s gain to a moderate level and the crossover to a conservative starting point (e.g., lower than your mains’ high-pass frequency). This baseline serves as a neutral reference to compare against as you optimize. If your room favors a different placement, test a few positions (wall, corner, or a few feet from walls) while keeping other variables constant. Record the level and crossover settings to maintain consistency across listening sessions and future calibrations. Remember to avoid overloading the room with bass early in the process; it’s easier to overcorrect than to undercorrect.
Crossover and phase alignment explained
The crossover frequency determines where the subwoofer begins to reproduce bass frequencies relative to your main speakers. Start with a conservative crossover so the mains handle the upper bass and lows while the sub fills in the deepest frequencies. Phase alignment ensures the sub’s waveform aligns with the mains, preventing cancellations or reinforcements at specific frequencies. Small phase adjustments (even a few degrees) can dramatically affect perceived bass tightness and blending. When you adjust the crossover, re-check the phase to maintain a coherent bottom end across your listening range. This interplay between crossover and phase is a key lever for achieving smooth integration rather than a lumpy or disconnected feel.
Measuring and adjusting with SPL meter and apps
With the baseline in place, measure the bass response at the listening position. Use pink noise or a sweep test tone and compare the sub’s output level to the mains using your SPL meter. The target is a balanced mix where bass is clearly present on the listening seat but not overpowering midrange content. Record SPL readings at several points around the listening area to check for consistency. If measurements show a peak or dip, adjust the sub level, crossover, or phase in small increments and re-measure. This iterative process helps translate subjective listening into objective, repeatable changes. Calibrate Point emphasizes documenting each adjustment so you can reproduce the result in future setups.
Practical room treatment and placement tips
Placement has a larger impact on bass response than many realize. If possible, try placing the sub away from corners that create exaggerated boosts and near walls to balance output, then listen with a test track. For rooms with challenging acoustics, light room treatment such as a rug, soft furnishings, or absorptive panels at first-reflection points can significantly reduce high-frequency reflections that color the bass. When room layout prevents ideal placement, rely on measurement-based adjustments (level, crossover, phase) to compensate for the acoustics rather than chasing a “perfect” location. The idea is to create a benign acoustic environment where the bass array can behave predictably.
Verifying results with pink noise and music tracks
Verification is about confirming your results with both objective measurements and real-world listening. After you set the baseline, test with pink noise, film soundtracks, and familiar music tracks. Listen for consistency across genres and dynamic ranges. A well-calibrated sub should not overwhelm the overall mix, but it should deliver deep, controlled bass that remains musical and fast. If you notice sluggish bass during peak moments or a mismatch with the mains, revisit the crossover, phase, and sub level and re-check with measurements. Reproducibility is the goal, so keep notes and re-test after any room or equipment change. Calibrate Point advocates a methodical approach to avoid arbitrary tuning.
Troubleshooting and common pitfalls
Calibration is a balance between measurements and listening. Common pitfalls include relying solely on a single SPL reading, using a loud environment during measurement, or neglecting phase alignment. Another frequent mistake is over-boostting bass in an attempt to compensate for room modes, which often makes matters worse. If you encounter persistent issues, re-check the baseline, ensure cables are secure, and consider a slightly different placement before making large EQ changes. Incremental adjustments with careful listening and measurements yield the most reliable outcomes. The goal is robust, musical bass that remains comfortable at all listening levels.
Tools & Materials
- SPL meter or calibrated smartphone app(For measuring bass SPL at the listening position)
- Subwoofer with adjustable gain, crossover, and phase controls(Core device to calibrate)
- AV receiver or amplifier with LFE/sub-out(Provides dedicated sub signal)
- RCA/LFE cable(Connects sub to receiver)
- Calibrated pink-noise and test-tone files(Baseline measurement and verification)
- Tape measure(Quick distance checks and placement planning)
- Room treatment options (optional)(Rugs, panels, or diffusers to tame reflections)
Steps
Estimated time: 60-90 minutes
- 1
Connect subwoofer and reference signal
Power down the system, connect the sub to the receiver's sub-out using the appropriate RCA or LFE cable, and power the sub back on. Confirm LED indicators or display readouts show active input. Establish a clean baseline signal before making any adjustments.
Tip: Label the cable path to avoid confusion during later tweaks. - 2
Position subwoofer for repeatable testing
Place the sub in a repeatable position that reflects your typical listening setup. Avoid drastic placements during the calibration process. If possible, test a few strategic spots (near front wall, back wall, or near the mains) to observe how placement changes bass behavior.
Tip: Use a ruler or measuring tape to document distance from walls for future reference. - 3
Set initial crossover and phase defaults
Set the subwoofer’s crossover to a conservative starting point (lower than the mains’ bass frequency). Initialize phase at 0 degrees and verify that both channels align in timing with the mains. Small adjustments later can be made based on measurements.
Tip: If you’re unsure, start with a lower crossover and work upward in small steps. - 4
Run baseline pink-noise measurement
Play a pink-noise signal at a comfortable listening level and measure the SPL at the listening position. Note the baseline level and compare it to the mains. This baseline will guide subsequent level adjustments.
Tip: Keep the room quiet and free of incidental noise during measurements. - 5
Adjust sub level for balance at listening position
Increase or decrease the sub level so the bass integrates with the mains without drowning them. Use both listening tests and SPL readings to converge on a natural balance. Repeat measurements after each adjustment.
Tip: Make the smallest possible changes and verify with a familiar track. - 6
Fine-tune phase for room coherence
If you notice bass timing issues or a change in perceived depth when you move your head, adjust the sub’s phase in small increments while rechecking measurements and listening. Phase tweaks can dramatically alter bass tightness and integration.
Tip: Even a 5-degree shift can produce noticeable improvements. - 7
Test with music and adjust as needed
Play a few genres and familiar tracks to see how the sub supports different content. Make subtle adjustments to the crossover and EQ or a slight phase shift to preserve speed and articulation in bass notes.
Tip: Use music you know well to detect real-world differences. - 8
Document settings and verify stability
Record final crossover, gain, and phase values. Re-check measurements after a cooldown period to confirm stability. This ensures you can reproduce the result in future sessions or after changes to the room.
Tip: Keep a calibration journal for each listening position. - 9
Re-check after room or equipment changes
Any room rearrangement or new gear can alter bass behavior. Repeat the measurement cycle to restore balance. Regular checks keep your system calibrated as conditions evolve.
Tip: Schedule periodic recalibration after major room changes.
Questions & Answers
Do I need an SPL meter to calibrate a subwoofer?
An SPL meter or a calibrated smartphone app greatly helps by providing objective measurements. While you can calibrate by ear, measurements make adjustments repeatable and less subjective.
An SPL meter helps you measure bass levels objectively, though you can start with careful listening if you don’t have one.
Can I calibrate without room treatment?
Yes, you can calibrate without room treatment, but room acoustics will influence results. Use measurement-driven adjustments and keep expectations realistic about achieving a perfectly flat response without treatment.
You can calibrate without room treatment, but the room will shape the bass; measurements help guide adjustments.
What is an acceptable SPL at the listening position?
Aim for a balanced sound where bass remains musical and does not override dialogue or instruments. There isn’t a universal SPL; adjust relative to mains and room volume while staying comfortable for listening.
There isn’t a universal SPL; balance with the mains so bass stays musical and non-distracting.
How often should I recalibrate after changes?
Recalibrate after significant room changes, new gear, or noticeable shifts in bass. Regular checks help maintain a consistent sound over time.
Recalibrate after big room changes or gear updates to keep the bass balanced.
What’s the difference between phase and time alignment?
Phase alignment adjusts how the sub’s waveform lines up with the mains. Time alignment is similar but focuses on arrival timing at the listening position; both affect perceived bass tightness and integration.
Phase alignment lines up waveforms; timing alignment ensures bass hits in sync with the rest of the system.
Can I rely on bass boost to solve poor room acoustics?
Relying on bass boost often worsens room interactions. Use measured adjustments, not big boosts, to improve coherence and avoid overwhelming other frequencies.
Bass boost can mask room issues; use measured, incremental adjustments for better coherence.
Watch Video
Key Takeaways
- Calibrate subwoofer using measured, repeatable steps
- Balance crossover and phase for seamless blending
- Verify results with both pink noise and familiar tracks
- Document settings to ensure reproducibility
- Consider room layout and optional treatment for consistency