How to calibrate a monitor for photo editing
Learn how to calibrate your monitor for photo editing with a repeatable workflow covering hardware, color spaces, ICC profiles, ambient light, and validation.

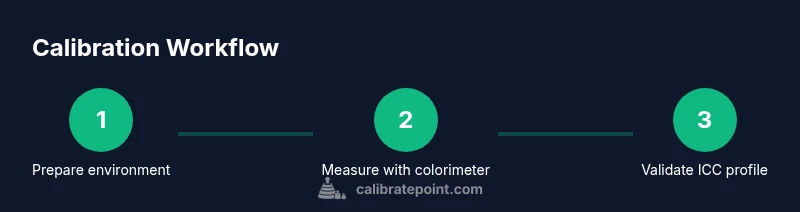
Goal: calibrate your monitor for precise photo editing by building a repeatable workflow: select compatible hardware, run a colorimeter or spectrophotometer, profile the display, choose a standard color space, and validate results with target images. Keep ambient light constant and document every setting. According to Calibrate Point, start with a clean baseline and repeat the process for consistency.
What calibration achieves for photo editing and why it matters
Calibration aligns your monitor's output with a known standard so the colors you edit reflect real-world results. When you ask how to calibrate a monitor for photo editing, this means establishing a repeatable workflow: measure hardware, profile the display, select an editing color space, and validate with test images. A calibrated screen reduces color shifts between viewing conditions and helps ensure print fidelity, web accuracy, and overall color consistency across devices. According to Calibrate Point, starting from a clean baseline and documenting settings is essential for long-term reliability. The implications are practical: you’ll save time in post-processing, avoid soft-proofing surprises, and communicate color intent more accurately to clients or printers. The guidance in the following sections translates theory into actionable steps for DIY enthusiasts and professionals alike.
Core concepts: color spaces, gamma, and luminance
Color spaces define how numeric color values map to perceptible colors. For photo editing, you typically work in a wide-gamut space (Adobe RGB or ProPhoto RGB) while delivering final images in sRGB for web. Calibrate with target white point (approximately 6500K) and a gamma curve around 2.2, though some workflows prefer 2.4 for print. Understanding luminance (brightness) targets is crucial: most editors prefer around 120-140 cd/m2 for editing in neutral lighting conditions; adjust to your typical viewing environment and printer requirements. The ICC profiles created during calibration encode these settings and allow software across your system to translate colors consistently. Also, consider luminance uniformity; some displays may have brighter corners or tint shifts. If you notice deviations, you may need to create a local calibration map or use dithering to reduce perceptual differences. Keep in mind that color perception is influenced by ambient light; calibrating under a consistent light level is essential. In this section, we outline the core concepts you must know before starting calibration to avoid common missteps and ensure your workflow remains robust.
Hardware and software you need
Calibration begins with the right tools. A colorimeter or spectrophotometer is essential for measuring on-screen colors; choose a device compatible with your operating system and monitor type. Pair it with calibration software that supports ICC profiling, ambient light measurement, and perceptual rendering intents. A stable computer and a blank, non-reflective display surface help reduce measurement noise. It’s helpful to have reference test images or a simple test pattern library to validate results. If your workspace experiences frequent lighting changes, an ambient light meter can help you decide when to recalibrate. Finally, keep at least one color space profile loaded (e.g., sRGB for web or Adobe RGB for print) and a written calibration log to track changes over time.
Validation and test targets: how to verify results
Calibration isn’t complete after the first pass; you must validate that the profile behaves as expected. Use grayscale steps and color patches to verify neutral gray remains neutral and that color patches render correctly. Open a few standard photographs and examine skin tones, fabrics, and greens. A deltaE value below 2 in color-managed software indicates good color fidelity for most editing tasks; larger values suggest you need to re-run the calibration. Export a test image to both print and web, compare against a known reference, and adjust if necessary. Document the profile name, color space, target white point, luminance level, and ambient lighting conditions to reproduce results later. For professionals, version control of ICC profiles is a best practice. The key is to test across several typical scenes and lighting to ensure stability.
Maintaining calibration in changing light conditions
Ambient lighting dramatically affects perceived colors; calibrate in a controlled setup and adjust room lighting to about 100-140 lux for typical editing tasks. Turn off automatic brightness and HDR features; use a consistent color temperature. Recalibrate when hardware changes (new monitor, GPU, or OS update), after screen replacement, or if you notice color drift in a few weeks. For multi-monitor setups, calibrate each display individually and then use a shared ICC profile across the suite to maintain consistency. Regular checks with baseline test images keep your workflow reliable and predictable.
Common mistakes and how to avoid them
Common mistakes include calibrating in a bright or fluctuating room, not warming up the monitor long enough, and leaving dynamic display features turned on during calibration. Disable adaptive brightness and any automatic gamma adjustments. Always apply the ICC profile system-wide and verify in the primary editing apps. Finally, avoid skipping validation by relying solely on software previews; use real photos to confirm the results. The antidote is a fixed routine: set lighting, allow warm-up, calibrate, validate with tests, and log results for future reference.
Practical studio workflow and color management across apps
In a professional studio, consistency matters across all editing tools. Configure your operating system’s color management to use the calibrated ICC profile by default, and ensure your editing software (e.g., a RAW processor and a non-destructive editor) honors embedded profiles. When exporting, use the intended destination color space (sRGB for web, Adobe RGB or ProPhoto for print) and embed the profile where possible. Create a repeatable end-to-end workflow: capture RAW, edit in your chosen space, soft-proof in the target space, export with embedded profile, and archive the profile along with your project files. The more you document, the more predictable your results will be.
Practical studio workflow and color management across apps (continued)
Tip: Maintain a dedicated calibration routine and calendar reminders to recalibrate every few weeks or after any hardware change. Use consistent test images that reflect your typical editing subjects (skin tones, fabrics, greens). Album and client work benefit from a steady color baseline; it reduces back-and-forth and ensures your final outputs are faithful to your intent.
Tools & Materials
- Colorimeter or spectrophotometer(Handheld device measuring on-screen colors; ensure OS compatibility)
- Calibration software(ICC profiling, ambient light measurement, rendering intents)
- Target color space profiles (ICC profiles)(Import for sRGB, Adobe RGB, ProPhoto RGB as needed)
- Ambient light meter (optional but recommended)(Helps maintain consistent room lighting during calibration)
- Test images or pattern library(Used to validate results with real-world content)
- Stable computer with updated OS(Necessary for running calibration software and applying profiles)
Steps
Estimated time: 60-120 minutes
- 1
Prepare your workspace
Set up the editing area with consistent, subdued lighting. Remove glare from the screen and close nearby bright sources. Plan for at least 15–20 minutes of warm-up time after any display changes before you start measurements.
Tip: Use a dim, neutral-colored wall behind the monitor to minimize ambient reflections. - 2
Connect and install calibration hardware
Plug in the colorimeter or spectrophotometer and install any required drivers. Launch the calibration software and verify device recognition before proceeding. Ensure cables are tidy to avoid measurement interference.
Tip: Restart the computer if the device isn’t detected on the first try. - 3
Choose the target color space
Decide whether your workflow centers on web (sRGB) or print (Adobe RGB or ProPhoto RGB). Set this choice as the primary profile and plan to embed or convert correctly at export.
Tip: If you edit both web and print, consider calibrating twice with a workflow switch between spaces. - 4
Warm up the monitor and set baseline brightness
Power on the monitor and allow it to warm up for at least 15 minutes. Set the room to a stable lux level and avoid any dynamic brightness settings during calibration.
Tip: Document the initial brightness setting and target luminance for future reference. - 5
Run measurements and generate the ICC profile
Follow the software prompts to measure color patches and adjust the display settings to match the target white point, gamma, and luminance. The software will create an ICC profile for the monitor.
Tip: Inspect the deltaE reports; a deltaE below 2 is typically good for most editing tasks. - 6
Apply the profile system-wide
In your operating system, set the calibrated ICC profile as the default color profile for the display. Ensure your editing software uses the monitor profile and respects embedded ICCs.
Tip: Test across multiple apps to confirm color consistency. - 7
Validate with test images
Open a set of test images representing skin tones, greens, and neutrals. Verify that neutrals stay gray and colors render realistically across the spectrum.
Tip: Use soft-proofing to compare intended print colors against on-screen previews. - 8
Document and archive
Save the ICC profile with a descriptive name, log the target settings, ambient conditions, and calibration date. Store project-related color profiles alongside your work.
Tip: Create a calibration diary to track changes over time and justify recalibration intervals.
Questions & Answers
What is monitor calibration and why is it important for photo editing?
Monitor calibration establishes a standard reference for color output so your edits translate accurately to prints and devices. It involves profiling the display, choosing a color space, and validating results with test images. This reduces color drift across viewing conditions and improves consistency in client work.
Calibration sets a color standard for editing so your photos look the same on different screens and printers. It's the foundation of accurate color in post-production.
Do I need a colorimeter or can I calibrate manually?
A colorimeter or spectrophotometer is strongly recommended for objective measurements. Manual calibration can be inconsistent due to human perception and lighting, so a device helps reproduce reliable results across sessions.
A colorimeter provides objective measurements that keep color consistent over time.
Can I calibrate my laptop display?
Yes. Laptop displays can be calibrated, but ensure you calibrate in a stable environment and disable battery-saver modes that affect brightness. It’s best to calibrate the primary editing workstation and extend profiles to portable devices when needed.
You can calibrate a laptop, but keep the environment steady and be aware of brightness variability.
How often should I recalibrate?
Recalibration frequency depends on usage and hardware changes. Recalibrate after a monitor replacement, OS or driver updates, or if you notice color drift. Regular checks every 4–8 weeks keep results reliable.
Recalibrate after changes or drift, and check colors every month or so.
Which color space should I use for web vs print?
Use sRGB for web delivery to ensure compatibility across devices. For print, work in Adobe RGB or ProPhoto RGB if your workflow supports it, and convert to the printer’s profile when exporting.
Web uses sRGB; print often benefits from Adobe RGB or ProPhoto RGB depending on printers.
Will calibration fix all color issues in software?
Calibration improves color accuracy on the display but color management within apps and profile embedding also matters. Ensure your software is color-managed and that embedded profiles are respected during export.
Calibration helps display accuracy; software color management also plays a crucial role.
Watch Video
Key Takeaways
- Calibrate with a repeatable, documented workflow.
- Choose color spaces that match your output goals.
- Validate results with real test images and profile logs.
- Control ambient light to stabilize measurements.
- Archive ICC profiles and calibration notes for consistency.