How to Calibrate an Epson Projector
Learn how to calibrate your Epson projector with practical, step-by-step guidance from Calibrate Point. Achieve accurate colors, grayscale, and geometry for optimal image quality.

By following this how-to, you will calibrate an Epson projector to improve color accuracy, grayscale, brightness, and geometry. The process covers baseline setup, color temperature, gamma, white balance, and alignment using built-in modes and test patterns. A colorimeter or trusted software can help, along with a controlled viewing environment and the right test patterns.
Why calibrate an Epson projector
According to Calibrate Point, precise projector calibration is essential for consistent color and grayscale reproduction. The Calibrate Point team notes that ambient light, source quality, and misaligned geometry can all degrade image fidelity. This guide walks you through a practical, repeatable calibration workflow for an Epson projector, combining built-in picture modes with targeted adjustments and, when available, measurement tools. By investing a little time, you can unlock truer skin tones, richer greens, and more neutral grays, which in turn improves movie, gaming, and presentation experiences. Remember: calibration is not a one-off task, but a routine you repeat as lamps age or room lighting changes.
What you gain is consistency across content and devices, making your projector a reliable reference display for critical work and leisure alike. Throughout, we reference safe operating practices and avoid uncommon jargon to keep the workflow approachable for DIY enthusiasts and technicians alike. Calibrate Point’s guidance emphasizes repeatable steps and clear measurement criteria so you can reproduce results later.
Understanding color spaces and gamma for projectors
Projectors don’t display the same color space as most computer monitors, so color management requires a practical understanding of how spaces map onto the screen. In typical home theater setups, Rec.709 (HDTV standard) is the target color space for most content, while some Epson models can emulate sRGB for desktop work. Gamma describes how midtone brightness is represented; most projectors use a gamma curve around 2.2 for balanced contrast and detail. When calibrating, start with a neutral color profile, then validate grayscale performance using test patterns to identify any bias in the shadows or highlights. By aligning color temperature with a neutral point (often around D65 in many workflows), you reduce color tints across the brightness range. This section lays the groundwork for precise adjustments that follow in the step-by-step section.
Tools and environment you’ll need
A controlled viewing environment is key to repeatable results. Light-controlled rooms, a clean screen, and a stable projector setup prevent stray reflections from skewing measurements. Common tools include test patterns (ITU-R BT.709 or SMPTE color bars), a measurement instrument (colorimeter or spectrophotometer), and access to your projector’s calibration controls or software. If you don’t have a hardware colorimeter, you can still achieve strong results by relying on built-in projector modes and grayscale tests, but a colorimeter will improve repeatability. Finally, a reliable HDMI source and high-quality cables help maintain color accuracy from source to screen. This section outlines the setup essentials to establish a solid baseline before making fine adjustments.
Baseline image quality and test patterns
Before making fine adjustments, you need a stable baseline. Set your Epson projector to a neutral picture mode such as Cinema or Reference and disable dynamic iris and frame interpolation. Use a standard test pattern to verify grayscale steps from black to white without clipping. Monitor brightness to achieve a comfortable white level without crushing shadows, and ensure the screen is clean and free of wrinkles that could distort test patterns. Record the baseline values in a notebook or calibration log so you can compare future results and track changes after lamp aging or room modifications. This baseline is your reference for all subsequent steps.
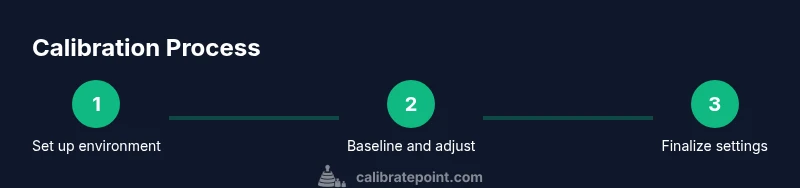
Step-by-step calibration workflow (overview)
This section provides a high-level roadmap of the calibration process. It covers image-mode selection, grayscale and color temperature, gamma, color management, and geometric alignment. You’ll perform measurements and adjust values step by step, validating each change with test patterns. The process relies on a mix of built-in controls and optional external tools. The goal is repeatability and traceability: you should be able to restore a prior state if necessary and document the settings that produced the best results. The following steps (in the STEP-BY-STEP block) break this into concrete actions you can perform in one sitting.
Basic picture adjustments: brightness, contrast, and sharpness
Brightness and contrast set the overall luminance window of the image, but improper values can flatten or clip detail. Start with a neutral brightness that preserves detail in the darkest areas of the test pattern. Then adjust contrast to bring the brightest white without losing highlight detail. Sharpness is intentionally kept low to avoid edge halos that distort test patterns. After these tweaks, revalidate with grayscale patterns to ensure there’s no banding or tint emerging in midtones. This stage establishes a stable luminance framework for color calibration.
Color temperature and grayscale calibration concepts
Color temperature defines the overall warmth or coolness of whites. Calibrating grayscale means ensuring all steps between 0% and 100% reflect true grayscale without color shifts. Use a white balance pattern to measure the bias in red, green, and blue channels across the gray ramp. Target a neutral balance where the grayscale steps are visually gray rather than tinted. Even subtle shifts can affect skin tones and overall color accuracy, so work in small increments and re-check after each adjustment. Where possible, use a colorimeter to quantify RGB gains and set white point accordingly.
Gamma and color management for Epson projectors
Gamma describes how midtones map to brightness. A typical target gamma around 2.2 provides a pleasing balance for most content, but some rooms or content types benefit from a slightly different curve. You’ll adjust the gamma ramp so midtones display detail without washing out highlights or crushing shadows. Color management involves refining saturation and hue for primary colors using color test patterns. If your projector supports CMS (color management system) adjustments, you can fine-tune primaries (red, green, blue) and secondaries (cyan, magenta, yellow) but avoid overcorrection, which introduces color clipping in bright areas.
Geometry and alignment: keystone, lens shift, and focus
Geometric accuracy is critical for a sharp, undistorted image. Start with horizontal and vertical alignment by centering the image on the screen and ensuring edges are straight using a test grid. If your projector offers lens shift or keystone correction, use it to maintain rectangular geometry without excessive distortion. Keystoning can degrade sharpness at the edges, so apply minimal correction and re-confirm with test patterns. Focus is often best adjusted with the projector at the exact throw distance specified in the manual; minor deviations can cause soft edges that obscure detail in test patterns.
Advanced calibration options: using test patterns and software
If you have access to calibration software or a colorimeter, you can quantify deviations rather than relying on visual judgments alone. Reference-grade test patterns from ITU-R BT.709 or SMPTE can guide color, grayscale, and gamma adjustments with measurable targets. In software-assisted workflows, you’ll read RGB deltas, verify grayscale uniformity, and map gamma to the intended curve. For many users, manual adjustments via built-in picture modes provide excellent results, while colorimeter-assisted workflows offer repeatability and documentation for professional use. This section highlights when to upgrade from manual tweaks to measurement-based calibration.
Common pitfalls and troubleshooting
Be mindful of ambient light: a bright room hides errors in color balance and grayscale. Lamp aging can shift color and brightness, so calibrate periodically and after lamp replacement. If colors look oversaturated or washed out, revisit color temperature and gamma values, and ensure there’s no unintended image processing enabled (noise reduction, dynamic iris, or frame interpolation). Recheck the basic setup (distance, screen surface, and throw) to rule out geometric misalignment. When in doubt, revert to baseline values and re-test from scratch to identify where the issue began.
Authority sources
Projector calibration benefits from standards and research maintained by reputable sources. For reference, see: NIST (National Institute of Standards and Technology) for measurement guidelines, ITU (International Telecommunication Union) color standards, and SMPTE (Society of Motion Picture and Television Engineers) color and gamma guidelines. These sources provide foundational concepts that support practical calibration workflows. Practical calibration should combine these standards with your projector’s specific features and the content you most frequently view. Access to authoritative sources helps you document the process and justify settings when sharing results with others.
How to document your calibration and plan for maintenance
Keep a calibration log with your baseline values and any subsequent adjustments, along with the date and lamp hours. This makes it easier to judge when lamp aging or room changes require re-calibration. Schedule routine checks every 6–12 months or after major environment changes. If you rely on a colorimeter, save profiles for different content types (movies, presentations, gaming) so you can switch between them without repeating the full process. Documentation ensures repeatability and helps you reproduce the best results in the future.
Tools & Materials
- Remote control and user manual(To access the projector’s calibration menus and reset options.)
- Test patterns (ITU-R BT.709/SMPTE color bars)(Essential for grayscale, color, and gamma checks.)
- Colorimeter or spectrophotometer (optional)(If available, improves repeatability and documentation.)
- Quality HDMI source and cables(Ensure color data is transmitted without compression or loss.)
- Neutral screen or matte white wall(Flat surface prevents reflections from skewing readings.)
- Calibrated lighting control (blackout curtains, dimmable lamps)(Keeps ambient light constant during measurements.)
- Notebook or calibration software(Document values and track changes over time.)
Steps
Estimated time: 60-120 minutes
- 1
Position the projector and prepare the viewing environment
Place the projector on a stable surface at the recommended throw distance. Ensure the room is relatively dark and the screen is clean and flat. Confirm all mounting hardware is secure and the projector is level to avoid geometric distortion.
Tip: Use a tape measure for throw distance and confirm lens elevation with a quick test image before proceeding. - 2
Select a neutral picture mode
Set the projector to a neutral or reference mode (Cinema/Reference) and disable features like dynamic iris and motion smoothing that alter luminance and color response. This gives you a stable baseline to measure from.
Tip: Disable any auto image corrections that could change line-to-line luminance during testing. - 3
Reset to baseline image settings
Restore brightness, contrast, color, and sharpness to midpoints and log the initial values. This makes it easier to see the impact of each adjustment and reduces the risk of compounding changes.
Tip: Take a photo of the initial onscreen values for reference. - 4
Calibrate grayscale and white balance
Using grayscale test patterns, adjust RGB balance to neutral gray across steps. Verify white balance against a target white point (e.g., near D65 in many workflows) and adjust color temperature accordingly.
Tip: Make small adjustments and test after each change to avoid overshoot. - 5
Tune color temperature and saturation
Fine-tune color temperature to minimize color cast in mid-tones. Use color-bars to check RGB saturation levels and avoid oversaturation that compromises skin tones or realistic saturation.
Tip: Keep skin tones natural by prioritizing neutral midtones first. - 6
Set gamma for consistent midtones
Adjust the gamma curve to achieve a balanced distribution of midtones without crushing shadows or blowing out highlights. Validate with midtone test patterns and a variety of content.
Tip: If your projector offers multiple gamma presets, start with 2.2 and adjust from there based on the results. - 7
Align geometry and keystone
Projector geometry should align squarely to the screen. Use horizontal and vertical alignment controls, then apply minimal keystone corrections if necessary. Check edges with a grid pattern to ensure straight lines.
Tip: Minimal corrections preserve edge sharpness; avoid heavy keystone adjustments if possible. - 8
Adjust focus and lens shift
Ensure the image is in sharp focus across the entire screen. If your model supports lens shift, use it to center the image before final KDE adjustments. Recheck edge sharpness after any shifts.
Tip: Take a high-contrast test image to spot soft edges quickly. - 9
Color management or CMS calibration
If available, refine primary and secondary colors using CMS controls. Make small, incremental adjustments and test with color patterns to avoid clipping.
Tip: Document CMS values so you can revert if needed. - 10
Source and content verification
Confirm source settings (resolution, color bit depth) align with your calibration goals. Reducing source compression and ensuring the content is color-accurate helps validate calibration results.
Tip: Use native resolution content with high-quality sources for best results. - 11
Validate results with test patterns
Re-run grayscale, color bars, and uniformity tests to confirm you achieved the intended targets. Compare readings with initial baselines to verify improvements and stability.
Tip: Keep a calibration log of the final values for future reference. - 12
Document and schedule maintenance
Record final settings, lamp hours, and room conditions. Plan re-calibration after lamp replacement or significant room changes and keep notes to replicate or revise the process.
Tip: Set a reminder to revisit calibration every 6–12 months or after major changes.
Questions & Answers
Can I calibrate using only the projector’s built-in modes?
You can start with built-in modes for a solid baseline, but for repeatable, high-precision results, use test patterns and, if available, a colorimeter or calibration software.
You can begin with built-in modes, but for repeatable precision, add test patterns and measurement tools.
Do I need calibration hardware like a colorimeter?
A colorimeter is not strictly required, but it improves accuracy and repeatability, especially in professional or presentation-heavy setups.
A colorimeter isn’t required, but it helps a lot with accuracy and repeatability.
How long should calibration take?
For a thorough calibration, plan about an hour or more depending on the model and environment. If you’re new to it, allow extra time for learning the controls.
Plan around an hour or more, depending on your setup and familiarity.
Which test patterns are best for calibrating a projector?
Use ITU-R BT.709 or SMPTE color bars for color and grayscale references. Include grayscale ramps and a color-accuracy pattern to verify hue and saturation.
ITUR BT.709 or SMPTE color bars are great for color and grayscale references.
Should I recalibrate after moving the projector or changing lamps?
Yes. Reassess after any significant changes to lighting, throw distance, or lamp hours to maintain image fidelity.
Yes, recalibrate after major changes to lighting, distance, or lamp hours.
What if colors look washed out after calibration?
Recheck color temperature and gamma, verify that CMS adjustments aren’t clipping color, and confirm that ambient light isn’t skewing perception.
Recheck color temperature and gamma, and verify ambient light isn’t skewing perception.
Watch Video
Key Takeaways
- Calibrate with a neutral baseline to ensure accurate color and grayscale.
- Use grayscale and color test patterns to drive precise adjustments.
- Document final settings and schedule regular re-calibration.
- Consider a colorimeter for repeatable, measurable results.
- Maintain a controlled environment to avoid measurement drift.