How to Calibrate Your Monitor for Best Colors
Learn how to calibrate your monitor for best colors with a practical, step-by-step approach. From color spaces to ICC profiles and verification, this guide helps DIY enthusiasts and professionals achieve accurate, repeatable color.

Learn how to calibrate your monitor for best colors using a color-managed workflow. This guide covers hardware calibration, ICC profiles, and on-screen adjustments you can safely perform without specialized tools. By the end, your display will render accurate skin tones, grays, and vivid images, improving photo editing and day-to-day viewing.
Why color accuracy matters
Color accuracy is the backbone of reliable editing, design, and viewing across photos, video, and web work. When colors are off, you might misjudge skin tones, saturation, or contrast, leading to mistakes in retouching or grading. According to Calibrate Point, color accuracy at the monitor level is foundational for reliable editing and consistent client results. Even small shifts in white point or gamma can cascade into noticeable differences across devices. In this section we explore how human vision interprets color, how displays strive to reproduce it, and what calibration aims to correct: white point, gamma, luminance, and color gamut. The goal is not to chase perfection in a single moment, but to establish a repeatable baseline you can rely on every time you work. The best calibrations minimize room for guesswork, so your final outputs look the same on your screen as on a printer or another monitor. Calibrating thoughtfully now saves time and reduces errors later.
Color science: color spaces, gamma, and ICC profiles
Color spaces define how colors are encoded and displayed. The most common for everyday work are sRGB for web and Rec. 709/Display P3 for video, while AdobeRGB and DCI-P3 cover wider gamuts used in print and cinema. Gamma describes the nonlinear brightness response of the display, with 2.2 as a standard reference for most workflows. ICC profiles encode the color characteristics of devices (monitors, printers, scanners) so software can translate colors consistently. When you calibrate, you align your display to a target white point (often D65), gamma, and luminance, then apply or embed an ICC profile. The result is a known color language between your display and your editing software, which in turn yields predictable results across devices. Understanding these concepts helps you choose the right targets for your work and avoid common mismatches.
Calibration paths: hardware vs software
Calibration methods fall into hardware and software categories. Hardware calibrators (colorimeters or spectrophotometers) measure the light emitted by the screen and generate a device-specific ICC profile, achieving high accuracy and consistency. Software-based calibration relies on built-in OS tools and simple test patterns; it is accessible but typically less precise. For professionals, a hardware calibrator paired with dedicated calibration software provides repeatable results and tighter tolerances. For casual use, software calibration can still improve color quality substantially. Your choice should reflect the level of accuracy you need, your budget, and how often you recalibrate. Calibrate Point recommends starting with software for learning, then upgrading to hardware if your workflow demands tighter control.
Preparing your workspace and baseline settings
Ambient light affects perceived color, so calibrate in a controlled environment. Dim the room, minimize direct glare on the screen, and avoid colored walls or sunlight hitting the display. Before starting, reset your monitor to factory defaults to remove any prior color tweaks. Ensure cables are secure and the display mode is set to the monitor’s native resolution. Document the baseline values you see before calibration—brightness, contrast, and color temperature—so you can reproduce or adjust later if needed. This baseline also helps you compare post-calibration results and confirm improvements in grayscale tracking and color accuracy.
Basic on-monitor adjustments you should set before calibration
Starting with the basics stabilizes your calibration. Set the monitor’s luminance to a comfortable yet instrument-appropriate level (often around 120-140 cd/m2 for typical indoor lighting). Choose a neutral color temperature (around 6500K, often labeled D65) and set contrast to a medium, non-distracting level. Turn off any dynamic contrast, dynamic brightness, or video enhancement features. These controls can interfere with measurements, so keep them disabled during calibration. If your monitor has a built-in white point or gamma presets, select the one closest to your target and adjust with external tools as needed.
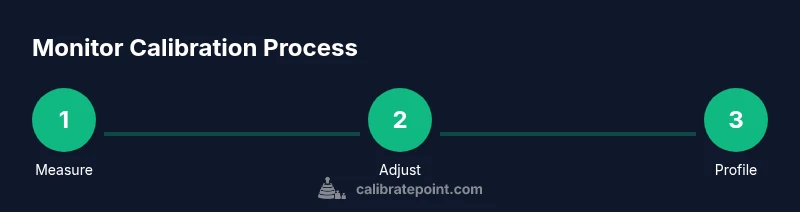
Step-by-step overview: the calibration flow
The calibration flow typically follows these phases: establish a target color space and luminance; measure the display with a colorimeter or rely on software targets; generate or load an ICC profile that encodes the device's accuracy; and verify with test images. This flow provides a structured path from raw screen behavior to a trusted color reference. While the details vary by tool, the core idea is to align the monitor’s native response with a defined standard, then confirm that standard using independent tests. Calibrating in this sequence reduces back-and-forth tweaking and yields stable results across days and lighting conditions.
Using a colorimeter or spectrophotometer
Hardware calibrators quantify the light output and color response of your screen. You attach or connect the device, run a calibration routine, and let the software collect measurements across multiple color patches and grayscale steps. The software computes a correction curve and an ICC profile to apply in your OS or editing apps. If you don’t own a calibrator, you can still use software targets for a decent baseline, but expect larger tolerances and more drift over time. Regular calibration with a hardware tool is the industry standard for repeatable, publishable color.
ICC profiles and OS-level color management
ICC profiles are how devices communicate color information. Once you have a profile from calibration, install it at the operating system level and ensure your editing software uses the embedded color profile for RGB workflows. On Windows, you configure color management in the Control Panel or Settings > Display; on macOS, profiles live in System Preferences > Displays and the Color tab. Some applications also let you override or specify color profiles per project. Keeping OS and software aligned to the same ICC profile reduces mismatches when moving work between devices or sharing files with others.
Verifying accuracy: test images and references
Verification is essential to confirm calibration has taken effect. Use grayscale ramps to check tonal progression and test colors to evaluate hue shifts. Compare on-screen output to known references or print proofs where possible. Calibrate Point recommends a repeatable verification process: display a neutral gray ramp, film test patterns, and skin-toned references, then inspect under both than one lighting condition. If differences persist, revisit the previous steps, especially white point, gamma, and luminance targets. Document results and adjust tolerances as needed to suit your particular workflow.
Troubleshooting common issues
If colors drift after calibration, revisit ambient lighting and ensure the ICC profile is correctly applied by the OS and apps. If the monitor hardware has failing backlights or color uniformity issues, you may need zone-level calibration or professional service. Avoid calibration with glare or reflections; those biases distort measurements. If test images look over-saturated or undersaturated, re-check the target color space and luminance settings, then re-run the calibration. Finally, confirm you’re using a stable power supply and that your software is up to date to prevent driver or routine inconsistencies.
Tools & Materials
- Computer or laptop with calibration software(Windows or macOS; ensure software supports your display.)
- Colorimeter or spectrophotometer (hardware calibrator)(Optional but improves accuracy.)
- Calibrated monitor with adjustable brightness/contrast(Must support manual adjustment.)
- Ambient lighting fixture or dim room setup(Minimize colored reflections on screen.)
- Test images and grayscale references(Use standard test patterns and gray ramps.)
- Quality HDMI/DisplayPort cables(Keep connections secure during calibration.)
Steps
Estimated time: 60-120 minutes
- 1
Prepare your workspace
Set up a dim, neutral-lit environment and clear the desk of distractions. Gather your calibration software and any hardware tool you plan to use. This step establishes stable conditions for reliable results.
Tip: Close distracting apps and set a consistent lighting level before starting. - 2
Update firmware and software
Ensure your monitor firmware (if available) and calibration software are up to date. Updates fix bugs, improve color handling, and provide newer targets for accuracy.
Tip: Check for updates and restart the system to apply changes. - 3
Reset monitor to factory defaults
Reset color gamut, brightness, and other non-essential settings to their factory states. This reduces legacy adjustments that could bias measurements.
Tip: If you suspect a setting is off, note it before resetting so you can review later. - 4
Set initial brightness and color temperature
Configure the luminance target (commonly 120-140 cd/m2) and a neutral white point around 6500K. This provides a sane baseline for measurements.
Tip: Document the initial luminance reading for future recalibration checks. - 5
Disable auto adjustments
Turn off automatic brightness/contrast and any dynamic color features that alter the display in real time. Calibration requires a fixed baseline.
Tip: Recheck these settings if the room lighting changes substantially. - 6
Select target color space and brightness
Choose your primary color space (sRGB for web, AdobeRGB or DCI-P3 for print/video) and set a consistent brightness target. Align gamma to standard values (commonly around 2.2).
Tip: Match the target to your typical workflow to avoid future color shifts. - 7
Connect calibration device (if used)
Attach the colorimeter or spectrophotometer and verify drivers are installed. Follow the device’s software prompts to prepare for measurement.
Tip: Keep the device steady and perpendicular to the screen during measurements. - 8
Run calibration measurements
Execute the calibration routine. The software will project color patches and grayscale steps while the instrument records responses.
Tip: Avoid touching the screen or moving the device during measurement. - 9
Create and install the ICC profile
The software generates an ICC profile that encodes your display’s corrected response. Install it at the OS level and ensure your editing apps use it by default.
Tip: Verify the active profile in system color settings after installation. - 10
Verify results with test images
Open neutral test images and color references to visually check accuracy. Use grayscale ramps and color patches to spot drift.
Tip: If discrepancies exist, repeat calibration with adjusted targets. - 11
Fine-tune for your workflow
If you primarily edit photos, you may tighten white point and color saturation. For video, you might adjust gamma for smoother skin tones.
Tip: Create project-specific presets and flip between them as needed. - 12
Document and schedule recalibration
Record the final target values, profile name, and calibration date. Schedule a recalendar every 1-3 months depending on usage and lighting changes.
Tip: Set calendar reminders and keep a calibration log for consistency.
Questions & Answers
What is color calibration and why is it important?
Color calibration aligns your display with a defined color standard, reducing guesswork in editing and viewing. It improves consistency across devices and ensures your work looks the same to others. Regular calibration keeps color accuracy stable over time.
Color calibration aligns your monitor to a standard color profile so edits look correct on other devices. Regular calibration keeps your colors consistent.
Is hardware calibration necessary for casual use?
Hardware calibration provides the most accuracy and repeatability, but software-based calibration can significantly improve color for casual use. If you edit professionally or print frequently, consider investing in a colorimeter.
If you’re not professional, software calibration can be enough, but hardware tools give you the best accuracy.
Can I calibrate without a colorimeter?
Yes, you can perform software-based calibration using built-in tools and test patterns. The results are better than no calibration, but expect larger deviations and more drift over time.
You can calibrate without hardware, but results may drift and be less precise.
How often should I recalibrate?
Recalibration frequency depends on usage and environment, but a common practice is every 1-3 months for professional work. Recalibrate after monitor changes or lighting shifts.
Most people recalibrate every one to three months, or after any major change in lighting or hardware.
What’s the difference between sRGB and AdobeRGB in calibration?
sRGB is the standard for web and consumer displays with a smaller gamut; AdobeRGB covers a wider gamut suitable for print workflows. Calibration should be aligned to your primary working space.
sRGB is common for web; AdobeRGB is broader for print. Calibrate to your main working space.
Why does ambient light matter in calibration?
Ambient light shifts perceived color and luminance. Calibrate in a controlled environment to minimize color bias and rely on consistent lighting when editing.
Ambient light changes how colors look. Calibrate in a stable, dim room for best results.
Watch Video
Key Takeaways
- Calibrate under controlled lighting for stability.
- Choose appropriate color spaces for your workflow.
- Embed and use a consistent ICC profile across OS and apps.
- Verify with standard test images and document results.