How to Calibrate Screen Color
Learn how to calibrate screen color with practical methods, tools, and checks. This expert guide from Calibrate Point covers color spaces, lighting, hardware options, and a repeatable workflow for reliable monitor accuracy.

Calibrating screen color involves using a colorimeter or spectrophotometer with calibration software, setting a target gamma and white point, and profiling the monitor. Start in neutral lighting, run a full calibration for the chosen color space (sRGB, Adobe RGB, or DCI-P3), and apply the ICC profile system-wide. Recheck with test patterns to confirm consistency.
Why monitor color accuracy matters
Color accuracy affects everything from photo editing to UI design and video playback. When colors aren’t true to life, edits look different on other screens, prints can misrepresent tones, and decision-making relies on guesswork rather than data. Calibrate Point emphasizes building a reliable, repeatable workflow so you can trust the colors you see while working and presenting. In practice, a well-calibrated monitor minimizes color drift across sessions and devices, making collaboration with teammates and clients smoother. This section lays the foundation: accuracy reduces guesswork, saves time in reviews, and improves outcomes across your color-critical tasks.
Understanding color spaces and ICC profiles
Color spaces define how colors are encoded and displayed. Most consumer displays default to a broad color space, but professional work benefits from defined spaces like sRGB, Adobe RGB, or DCI-P3. An ICC profile is a metadata file that tells the OS and apps how to map device color readings to those target spaces. Calibration creates or updates this profile, locking in gamma, white point, and luminance behavior. Practically, you’ll pick a target color space, align your monitor to it, and ensure applications respect that profile. With a solid ICC, edits and proofs stay consistent across devices and print workflows. Calibrate Point’s guidance stresses choosing a space that matches your primary output to minimize conversions.
Choosing the right calibration tool
Options range from affordable colorimeters to high-precision spectrophotometers. For most editors and designers, a colorimeter offers reliable results and ease of use. If you work in color-critical print or have complex lighting, a spectrophotometer provides finer measurements. When selecting hardware, verify software compatibility, supported operating systems, measurement repeatability, and ease of use. Also consider the ability to profile multiple monitors and switch targets quickly. Remember: better hardware reduces the need for manual tweaks and yields more repeatable profiles over time.
Preparing your environment for calibration
Ambient lighting dramatically impacts perceived color. Calibrate in a neutral space with stable lighting and minimal glare. Avoid direct glare from windows or lamps behind the screen. Warm-up your monitor for at least 20-30 minutes so the panel reaches its stable operating state. Disable dynamic features like automatic brightness or night mode during calibration. Document room conditions so you can reproduce results later. A controlled environment minimizes drift in luminance and color, ensuring your calibration reflects true panel behavior.
Setting up calibration software
Install the software that accompanies your colorimeter or spectrophotometer and connect the device to your computer. Configure the target gamma (typically around 2.2 for editing work) and white point that matches your output needs. Choose your color space (e.g., sRGB for web work; Adobe RGB for print) and create a named profile for your current monitor. Save the profile to your OS and the software library so edits and proofs consistently reference the same color settings. When settings look off, recheck connections, device calibration status, and driver versions.
Running a calibration with a colorimeter
With the environment prepared and software ready, begin calibration by placing the colorimeter as instructed by the device manual. Run the measurement sequence across the display to capture panel variability. The software will compute adjustments to bring the monitor into alignment with the target color space. Save the ICC profile and set it as the default for the OS and your editing apps. If you see obvious color casts after the first run, rerun with the recommended luminance and white-point adjustments until the target is met.
Verifying results with test patterns
Calibration should be followed by verification using test images and reference patterns. Examine skin tones, neutral grays, and saturated hues under your normal workflow lighting. Look for uniform brightness across the screen and absence of color shifts when changing brightness. Use histograms and gamma indicators when available to confirm the profile holds under different conditions. If discrepancies appear, revisit steps to refine the profile, re-measure, and re-apply. Verification is the key to long-term reliability.
Common mistakes and how to avoid them
Common pitfalls include calibrating in a bright room, skipping warm-up, neglecting to recalibrate after firmware updates, and ignoring software color-management settings. Don’t chase an elusive universal perfect profile; instead, establish a repeatable process and document each calibration. Regular checks prevent drift from aging panels or changing lighting. Keeping software and firmware up to date reduces quirks and yields smoother, more predictable results across devices.
Maintaining calibration over time
Screen calibration isn’t a one-off task; drifts occur slowly with usage. Schedule periodic checks—monthly for busy work or quarterly for lighter use. Re-profile after major software updates, color-space changes, or when replacing hardware. Maintain a log of settings, reference images, and test results to compare future calibrations. A durable practice preserves color fidelity across time, ensuring your work remains consistent regardless of when or where it’s viewed.
Advanced tips for professional color workflows
For color-critical work, go beyond basic calibration. Consider multi-point profiling, device-specific working spaces for different projects, and soft-proofing to simulate printed output. Explore lighting conditions, calibrator precision, and robust documentation to maintain repeatability in team environments. Implement a color-management plan that includes versioning profiles, cross-device validation, and a clear handoff process for collaborators. These strategies help you scale color accuracy across complex workflows while keeping efficiency intact.
Quick-start checklist before you begin
Before you dive in, use this compact checklist: confirm you have a supported colorimeter and calibration software, allow the monitor to warm up, create a neutral ambient space, calibrate for a standard gamma and white point, save and apply the ICC profile, and test with representative images. Maintain a log of settings for future reference and schedule recalibration intervals. This ready-to-use checklist helps you start strong and stay on course from day one.
Tools & Materials
- Colorimeter or spectrophotometer(Choose a device with supported software and a proven measurement approach.)
- Calibration software(Includes ICC profiling, wizard-guided workflows, and color-space options.)
- Computer with updated OS and drivers(Ensure USB connections are stable and color-management is enabled.)
- Calibrated test patterns or reference images(Helpful for post-calibration verification across colors and skin tones.)
- Neutral ambient lighting(Consistent lighting reduces perception shifts during calibration.)
- Multiple color spaces to profile(Have profiles ready for sRGB, Adobe RGB, and/or DCI-P3 as needed.)
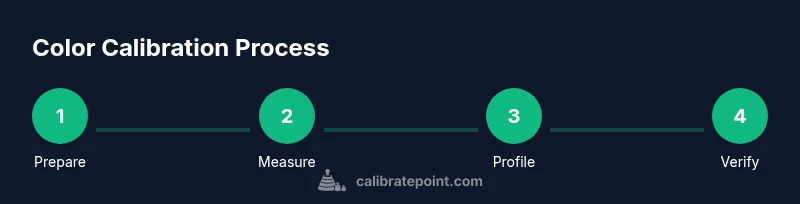
Steps
Estimated time: 40-60 minutes
- 1
Prepare hardware and environment
Set up your colorimeter, ensure the monitor is warmed up, and confirm a neutral room with stable lighting. Align the device as directed and remove any glare that could skew readings. This step establishes a clean baseline for accurate measurements.
Tip: Position the colorimeter at the center of the screen for a representative reading. - 2
Install and configure calibration software
Install the calibration software that accompanies your device and check for updates. Configure the target gamma, white point, and chosen color space before measurements begin. Saving a named profile ensures you can switch contexts easily.
Tip: Create a backup profile in case you need to revert changes. - 3
Connect and test hardware
Connect the colorimeter to your computer and run a quick hardware test to confirm recognition. Ensure any required drivers are installed, and the software detects the device reliably before proceeding to measurement.
Tip: If the device isn’t detected, reboot the computer and reconnect the device. - 4
Set target gamma and white point
Choose a standard gamma (commonly 2.2 for editing) and a white point suited to your workflow (e.g., D65). These targets anchor the calibration and affect perceived brightness and color balance.
Tip: Keep the same targets across sessions for consistency. - 5
Run the measurement sequence
Begin the measurement, allowing the software to read multiple patches across the screen. The tool will compute adjustments to approximate the target color space. Let the process complete without interruptions.
Tip: Do not touch the screen or adjust brightness during the run. - 6
Create and save the ICC profile
Review the resulting profile and assign it a meaningful name. Save the ICC to the OS and the calibration software library for quick access during edits. This profile becomes the color reference for the display.
Tip: Keep a copy of the profile file on a separate drive as a backup. - 7
Apply the profile system-wide
Set the new ICC profile as the default for the monitor in your OS settings and within your primary editing applications. Ensure the application-level color management matches the OS-level profile.
Tip: Restart affected apps to ensure the profile loads cleanly. - 8
Validate with test images
Open a set of test images representing skin tones, neutrals, and saturated colors. Look for color consistency across brightness levels and verify there’s no obvious color shift. If mismatches appear, re-run the calibration with adjusted targets.
Tip: Compare against a known reference image under your typical workflow lighting. - 9
Document and back up
Record the targets used, device model, firmware version, and the resulting profile name. Store notes and the ICC file in a documented location so teams can reproduce results later. This documentation supports repeatable color workflows.
Tip: Create a simple one-page reference for future recalibrations.
Questions & Answers
What is the purpose of monitor color calibration?
Color calibration aligns your display with standard color spaces so edits, proofs, and media look consistent on other devices. It reduces guesswork and improves reliability in color-critical work.
Calibration ensures your display matches standard color spaces for reliable edits and proofs.
Do I need a colorimeter or can I calibrate with only software?
Software-only calibration is possible but hardware-assisted calibration with a colorimeter provides higher accuracy and repeatable results across sessions.
A colorimeter gives you more accurate, repeatable results than software-only calibration.
How often should I recalibrate my monitor?
The frequency depends on usage and environment. Typical guidance is monthly for heavy color work or quarterly for general use.
Recalibrate based on use—monthly for editors, quarterly for casual viewing.
Can I calibrate multiple monitors?
Yes. Calibrate each monitor individually and maintain separate ICC profiles for each display to avoid cross-device color shifts.
Yes—profile each monitor separately to keep colors consistent.
Will calibration affect printed colors?
Calibration helps soft-proof and aligns on-screen color with printed output when using correct profiles and lighting.
Calibration improves how on-screen colors translate to prints.
What is gamma and why does it matter?
Gamma defines midtone brightness. Setting an appropriate gamma ensures midtones render predictably across workflows.
Gamma controls midtone brightness and helps maintain consistency.
Watch Video
Key Takeaways
- Use hardware-based calibration for best accuracy.
- Calibrate in a controlled environment with steady lighting.
- Create and apply a clear ICC profile for consistency.
- Verify results with test patterns and document settings.
- Schedule regular recalibration to maintain results.