How to Calibrate an OLED Monitor: A Step-by-Step Guide
Learn how to calibrate OLED monitor for accurate color, luminance, and gamma using a colorimeter and software. This practical, step-by-step guide by Calibrate Point covers setup, targets, and validation for consistent results.

To achieve accurate, consistent colors on an OLED monitor, learn how to calibrate oled monitor for white point, gamma, and luminance using built-in test patterns and an external colorimeter. This guide covers setting up hardware, choosing targets, running calibration steps, and validating results for content creators and technicians. Expect minor adjustments with brightness and color shifts between apps until you lock a stable profile.
Why OLED color accuracy matters
According to Calibrate Point, learning how to calibrate oled monitor helps ensure the colors you see on screen align with your creative intent, whether you’re editing photos, video, or UI work. OLED panels deliver deep blacks, high contrast, and vivid colors, but their luminance and color accuracy can drift with aging, content, or ambient conditions. A calibrated profile reduces color drift across applications and devices, minimizes surprises when exporting to print or web, and helps maintain consistent reference grays, skin tones, and saturation for every project. By calibrating, you create a repeatable baseline that your team can trust, regardless of the content type.
This section also outlines why a repeatable process matters: even small shifts in white point or gamma can alter how a midtone renders on skin, foliage, or blues. With OLED, the risk of perceived shifts is more pronounced if you compare a freshly calibrated display to an older profile. The goal is consistency across sessions, so you can rely on what you see during review, grading, and approvals.
OLED-specific calibration considerations
OLED panels behave differently from LCDs, so calibration must account for unique characteristics such as near-infinite contrast, potential luminance shift over time, and color stability at various brightness levels. Before you begin, ensure ambient lighting is stable and dim enough to prevent glare but bright enough to reflect typical work conditions. Turn off PWM-related flicker by selecting a fixed brightness or the monitor’s native mode if it offers such control. Remember burn-in risk: avoid displaying static full-screen content during long calibration sessions and use screensaver patterns between measurements.
Another key factor is the panel's aging process. Over months, the phosphor or organic compounds can drift, causing a warm or cool bias if the calibration isn’t refreshed. For this reason, calibrations should be repeated periodically or after any major hardware or lighting change. Finally, because OLEDs can oversaturate in certain color regions, you’ll want to verify color accuracy with test patterns that probe primary colors and gray ramps across the entire screen.
Target values and color management basics
A solid calibration starts with color management fundamentals. Use ICC profiles to ensure your software and hardware share a common language for color. Start with a neutral white point and a standard gamma that matches your typical workflow; for web and general content, a standard sRGB workflow is common, while photo and video editors may benefit from a wider gamut profile. When choosing targets, prefer profiles that the content will be delivered in, and keep a named ICC profile for easy reuse. After creating a profile, export it and load it into your operating system and editing apps to guarantee consistent rendering across tools.
Also ensure your calibration software supports OLED-specific considerations, such as measuring luminance at a chosen mid-brightness level and validating uniformity patches. The aim is a stable, repeatable profile that yields natural skin tones, accurate grayscale, and faithful reds, greens, and blues without oversaturation or clipping. Keep notes on target values, test patterns used, and environmental conditions to guide future calibrations.
Common pitfalls and how to avoid
A frequent mistake is skipping ambient lighting control, which makes measurements unstable. Calibrations performed in bright rooms or near reflective surfaces produce biased results. Another pitfall is relying on built-in display presets or automated “auto-calibration” features, which often don’t align with your workflow. Always start from a neutral, non-dynamic picture mode and disable features like dynamic contrast that can skew measurements.
Inadequate warm-up time leads to measurements taken before the panel has stabilized, causing drift in white point and luminance. Ensure the monitor has been powered on for at least 15 minutes, with a stable room environment. Finally, forgetfulness about profile management—store, name, and back up your ICC file after calibration so you can reproduce results or revert if needed.
Before you start: setup checklist
- Confirm your calibration tools are up to date and properly connected.
- Prepare a dim, stable room with controlled ambient lighting.
- Have reference test patterns or images ready for measurement.
- Set the monitor to a neutral mode, disable auto-brightness, and allow for a warm-up period.
- Install and configure calibration software that supports OLED measurements and ICC exports.
- Create a folder to store the final ICC profile and a short calibration log for future reference.
Following a consistent pre-check routine helps ensure reliable results and makes future calibrations faster and more reproducible.
Tools & Materials
- Colorimeter or spectrophotometer(Choose a device compatible with your calibration software; handheld sensors work if properly positioned at the center of the screen.)
- Calibration software(Look for OLED-friendly targets, white point and gamma control, and ICC export.)
- Test pattern images(Preload standard grayscale, color targets, and ramp patterns for measurement.)
- Ambient lighting control(Ensure a stable, low-contrast environment to minimize measurement variability.)
Steps
Estimated time: 45-75 minutes
- 1
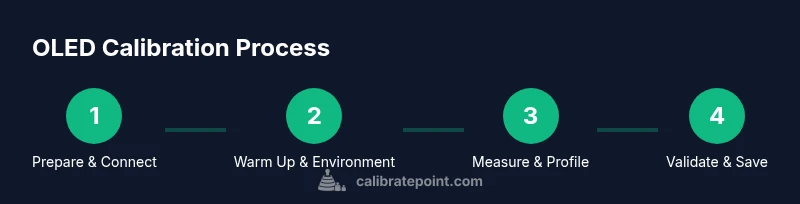
Connect hardware and start software
Connect the colorimeter to the computer and launch your calibration software. Start a new session and select OLED/monitor calibration as the workflow. This step links the sensor to the target profiles and ensures the software can read measurements from the device.
Tip: Verify the sensor is detected before proceeding to avoid misreadings. - 2
Warm up the display and establish environment
Power the monitor on and let it warm up for at least 15 minutes in a dim, stable room. Close unnecessary apps and minimize ambient light changes that can affect readings. Document the room lighting level for reference.
Tip: Use a consistent lamp position and avoid direct reflections on the screen. - 3
Set baseline display mode and load targets
Set the monitor to a neutral SDR mode with static brightness. Load standardized test targets for grayscale, color, and gamma to establish a baseline. Disable dynamic brightness and any automatic color adjustments.
Tip: Use standard grayscale and color targets to ensure repeatable results. - 4
Measure white point and luminance
Follow the software prompts to capture readings from a white patch across the screen. Take multiple readings to assess uniformity, then average the results. Record any noticeable hotspot or cold spot for later correction.
Tip: Keep the sensor at screen center and perpendicular to the screen for accurate results. - 5
Apply target values and generate ICC profile
In the software, select the target white point and gamma, then generate and save the ICC profile. Name the file clearly (e.g., OLED_profile_2026) and choose a location for easy reuse.
Tip: Export the profile and back it up in your project folder. - 6
Validate results with patterns and adjust if needed
Re-run the test targets and compare with the expected values. If deviations occur, apply minor adjustments and re-save the profile. Confirm grayscale, color patches, and uniformity meet your acceptance criteria.
Tip: Document final test results and store the profile version for future reference.
Questions & Answers
Do OLED burn-in and image persistence affect calibration results?
Burn-in is a form of image persistence that can bias measurements if static patterns are left on the screen during calibration. It won’t invalidate a calibration immediately, but you should avoid prolonged static content during calibration and recheck after meaningful content changes.
Burn-in can bias measurements if you calibrate with static images. Avoid long static displays during calibration and recheck after content changes.
Can I calibrate OLED without a colorimeter?
You can use software-based presets, but a colorimeter or spectrophotometer provides objective measurements that improve accuracy. Without a sensor, results are less reliable and harder to reproduce over time.
You can attempt without a colorimeter, but expect less reliable results; a sensor gives you objective measurements.
What white point and gamma targets should I aim for?
Aim for a neutral white point consistent with standard viewing conditions and a standard gamma around 2.2. Use a color-managed workflow and choose a profile that matches your content delivery needs.
Aim for a neutral white point and standard gamma around 2.2, matching your content needs.
How often should I recalibrate an OLED monitor?
Recalibrate when you notice color drift, after hardware changes, or when ambient lighting conditions change significantly. Establish a regular schedule if you work with color-critical content.
Recalibrate when you notice drift or after hardware or lighting changes; set a regular schedule for color-critical work.
Should I calibrate for SDR or HDR content?
Calibrate primarily for your typical workflow. SDR calibration is the baseline; HDR requires separate targets and may need different profiling and display controls.
Calibrate for your common workflow; use HDR calibration only if HDR content is a frequent part of your work.
Is built-in OLED calibration sufficient for professional work?
Built-in calibration can be convenient but rarely provides the precision needed for professional work. For critical tasks, use an external colorimeter and ICC workflow.
Built-in calibration is convenient but often insufficient for professional work; use external tools for accuracy.
Watch Video
Key Takeaways
- Calibrating OLED monitors improves color accuracy.
- Use a colorimeter and ICC profiles for repeatable results.
- Control ambient lighting and avoid static content during calibration.
- Document final values and keep backup profiles.