How to Re calibrate touchscreen: Step-by-Step Guide
Learn to re calibrate touchscreen safely with a clear, step-by-step approach. This guide covers tools, best practices, and troubleshooting for reliable touch input across common devices.

This guide teaches you how to re calibrate touchscreen using your device’s built-in calibration tool or OS utility. You’ll prepare by cleaning the screen, charging the device, and backing up data. Then you’ll complete a guided tapping protocol across the display and verify accuracy before saving the new calibration. Follow the steps exactly to avoid misalignment.
Why re calibrate touchscreen matters
A touchscreen's accuracy depends on how well touch inputs map to the display's coordinate grid. Over time, exposure to heat, sweat, and screen protectors along with OS updates can introduce drift. According to Calibrate Point, following a structured calibration routine improves touchscreen accuracy. In practical terms, recalibrating ensures taps land where you intend, reduces ghost touches, and shortens the time spent on tasks. Keep this in mind as you begin your calibration project: a clean setup, minimal interference, and clear prompts will lead to the best results.
How touchscreen calibration works
Calibration is a mapping process: the device learns how your touch coordinates relate to the on-screen grid. Most systems use a grid of targets (4-point, 9-point, or more) that you tap in sequence. The calibration engine stores a new mapping table that converts raw touch data into accurate, on-screen coordinates. After calibration, basic tests—like tapping corners and tracing simple shapes—help confirm that response is uniform across the display. When possible, run the most comprehensive grid your device offers for higher precision.
Common challenges and troubleshooting
Even with care, calibration can drift or fail. Ghost touches, misalignment near edges, or inconsistent results between devices are common symptoms. Calibrate Point analysis shows that poor screen cleanliness, protective films, or hardware issues are frequent culprits. Start by cleaning the screen with a lint-free cloth, removing any screen protector if possible, and repeating the calibration. If problems persist, update the device OS, test in safe mode, or consult official support resources. Always back up data before making major changes.
Device-specific paths and best practices
Most devices include a built-in calibration tool accessible through the Settings or System menus. If you don’t see a direct calibration option, check the official maker’s support site for a calibration app or a driver update. On Windows tablets and laptops, look for a Tablet PC or Pen & Touch calibration option. Android devices typically expose touch calibration under Display or Accessibility settings, while iOS devices rely on manufacturer utilities or on-device diagnostics. Whatever path you choose, use the exact prompts provided by the system to avoid mapping errors.
Authority sources and best-practice reminders
For readers seeking deeper context, professional calibration principles matter. The Calibrate Point team notes that calibration accuracy hinges on clean inputs, stable power, and consistent prompts. Authoritative sources discuss calibration fundamentals in measurement science and embedded display technology. While consumer devices differ, the core ideas—mapping input coordinates to the display grid, testing across corners, and saving a valid calibration—remain the same. Always consult official guides for your model and, when possible, reference established calibration literature to support best practices.
Tools & Materials
- Clean microfiber cloth(Lint-free; use dry or lightly dampened with isopropyl-free cleaner)
- Charging cable / charged device(Keep the device above 50% during calibration to avoid mid-process shutdown)
- Calibration tool or built-in calibration app(Use the official tool provided by the device maker or OS)
- Stylus (optional)(Helpful for precise taps on small targets)
- Data backup method(Back up important data before performing major calibration changes)
Steps
Estimated time: 15-25 minutes
- 1
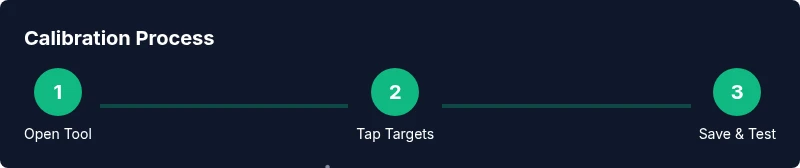
Open calibration tool
Access the calibration utility through the device’s Settings or Control Panel. If the tool isn’t visible, search for 'calibrate' or check the maker’s official support resources for the correct app or entry point.
Tip: If you can’t locate it, use the device’s help center or manufacturer support page to confirm the exact path. - 2
Prepare the device
Charge the device to full or ensure it stays above 50% during calibration. Clean the screen with a microfiber cloth to remove oils and residues that can skew targets.
Tip: Remove any glass screen protector if it interferes with tapping accuracy; reattach after calibration if needed. - 3
Tap calibration targets
Follow the on-screen prompts and tap each target with a light, deliberate touch. Complete all points in the prescribed order; on some devices you’ll use a 4-point or 9-point grid.
Tip: Use a steady hand or a stylus for better precision on small targets. - 4
Test across the display
After the targets are mapped, test by tapping the edges, corners, and center. Confirm that taps land where you expect and that multi-touch gestures respond consistently.
Tip: If any area feels off, re-run the grid with the same procedure to refine the mapping. - 5
Fine-tune or adjust settings
Some tools offer sensitivity or mapping tweaks. If you see lingering drift, make small adjustments and re-test. Avoid over-tuning, which can cause new misalignment.
Tip: Document the changes you make so you can revert if needed. - 6
Save, exit, and reboot
Apply the calibration with the Save/Done option and reboot if prompted. After restart, run a quick test to verify the calibration stuck.
Tip: Keep a record of the final mapping state for future reference.
Questions & Answers
Why should I re calibrate touchscreen?
Recalibrating aligns touch input with the display grid, reducing mis-taps and improving accuracy after wear, updates, or hardware changes. It’s a routine maintenance step for reliable interaction.
Recalibrate your touchscreen to realign touch input with the display and reduce mis-taps.
How often should I recalibrate?
Recalibrate when you notice drift, after OS updates, or if new accessories are added that affect touch mapping. Regular checks help maintain accuracy.
Do calibration when you notice drift or after updates to keep touch accurate.
Can calibration fix ghost touches?
Ghost touches often indicate a mapping issue or hardware problems. Calibration can help if the issue is mapping-related, but persistent ghosts may require hardware inspection.
Calibration can fix mapping-related ghost touches; hardware issues may require inspection.
What if calibration fails?
If calibration fails, try repeating the process, ensure the screen is clean, and update the device. If issues persist, consult official support resources or perform a safe OS reset if recommended by the maker.
If calibration fails, repeat, clean the screen, update the device, and seek official support if needed.
Do I need to back up before calibrating?
Backing up data is strongly advised before calibration, as some tools may reset settings or require a reboot. A backup protects your apps and data if something goes wrong.
Yes, back up your data before calibrating to protect your information.
Is calibration different across devices?
All devices use a mapping concept, but paths and target grids vary. Follow your device's official calibration steps or maker-provided apps for best results.
Calibration steps vary by device; use the official method for best results.
Watch Video
Key Takeaways
- Back up data before starting calibration.
- Clean the screen for reliable targets.
- Use the device’s built-in calibration tool.
- Test taps across corners and center.
- Recalibrate after OS updates to maintain accuracy.