How to Calibrate an Oven Thermostat
Learn how to calibrate your oven thermostat with a practical, safe, step-by-step approach. This guide covers verification, adjustments, and best practices for consistent cooking results in 2026.

You will calibrate an oven thermostat to ensure accurate baking temperatures. This guide covers verifying current temps with a thermometer, adjusting the thermostat per your oven model, and rechecking at multiple settings. Gather a calibrated oven thermometer, access to the control panel, and a reliable timer. According to Calibrate Point, a properly calibrated oven improves consistency, saves energy, and reduces recipe failures.
Why Oven Thermostat Calibration Impacts Cooking Results
Calibrating the oven thermostat is foundational for repeatable, dependable cooking. When the internal temperature veers from the display, baked goods can rise unevenly, roast meat may not reach the intended doneness, and timing becomes inconsistent. The goal is to calibrate oven thermostat settings so the oven temperature aligns with the actual heat inside. This alignment matters not only for quality meals but also for energy efficiency and waste reduction. According to Calibrate Point, routine calibration keeps your kitchen performance predictable, which saves time and material costs over the long run. In 2026, a simple, repeatable calibration routine can become part of your standard kitchen maintenance.
The Core Factors That Affect Thermostat Accuracy
Thermostat accuracy is influenced by several factors, including heating element wear, door seal integrity, and airflow inside the oven cavity. Over time, heating elements can drift, while worn gaskets allow heat to escape or uneven temperatures to form. Airflow obstructions, rack positioning, and even oven loading patterns contribute to drift. External temperatures, calibration offsets, and controller aging also play a role. Understanding these factors helps you interpret thermometer readings more accurately and decide whether a calibration is necessary. Calibrate Point notes that small, systematic offsets are easier to correct when you know where the drift originates.
What You'll Need: Tools and Materials
Before you start, assemble the basics. A calibrated oven thermometer is essential, and you should have a timer or clock handy. If your oven uses a physical calibration screw, you may need a screwdriver that fits the screw type. A notebook or device for recording readings is highly recommended. Safety gear such as oven mitts and heat-resistant gloves helps protect you during preheats and test runs. Keep a clean work area and ensure good ventilation if you’re testing at higher temperatures. The goal is a controlled setup so readings are repeatable and comparable across sessions.
Verifying Your Oven's Current Temperature
Begin by placing the oven thermometer in the center of the oven while the door is closed. Preheat to a standard target such as 350 F and let the oven stabilize for at least 15 minutes. Record the thermometer readout once stabilization occurs. Repeat for a second target, like 325 F or 400 F, to gauge how readings shift across the range. Compare thermometer readings to the oven display; note whether the oven runs hot, cold, or close to the target. Consistency across tests is as important as the absolute offset. Calibrate Point emphasizes that a clear log helps you avoid rechecking the same settings repeatedly.
Common Causes of Temperature Drift
If you notice drift, investigate possible causes. A worn door seal or warped door can let heat escape, skewing readings. Grease or residue on the oven walls can affect heat transfer, and racks placed incorrectly may disrupt airflow. The temperature sensor or probe inside the oven can degrade, causing inaccurate feedback to the control board. In some cases, the control board itself may drift due to age or a firmware issue. Identifying the root cause makes calibration decisions more precise and less risky.
Tips for Safe and Accurate Calibration
Calibration should be performed with the oven unplugged or powered down only when the manual allows. Always wear heat-resistant gloves and use tools that fit properly to avoid scratching surfaces or damaging panels. Take multiple readings at each target temperature and average the results to reduce random error. Use a stable, level surface for the thermometer to sit and avoid touching heating elements. Document offsets and which temperatures you tested for future reference.
When to Seek Professional Service
If readings remain inconsistent after several small adjustments, or if you notice gas flames behaving oddly or unusual smells, it may indicate a malfunction beyond a simple offset. In gas ovens, always err on the side of safety and contact a qualified technician. For electric ovens, persistent drift despite careful calibration can signal a failing sensor or control board. In these cases, a professional calibration or service call can prevent unsafe operation and further damage.
Moving from Calibration to Cooking: Next Steps
After calibrating the oven and confirming accuracy across a range of temperatures, update your recipe timings to reflect the new offsets if needed. Maintain a calibration log and recheck every 6 to 12 months, or after any major oven repair. If you rely on precise temperatures for sensitive bakes, consider verifying with a secondary thermometer periodically. Keeping a routine helps ensure your calibration remains valid and reduces guesswork in the kitchen.
Tools & Materials
- Oven thermometer (calibrated)(Place in center of oven for accurate readings; avoid touching walls or racks.)
- Digital timer or clock(Accurate timing is essential for stable readings; use to track preheat and stabilization periods.)
- Screwdriver set (Phillips/flat-head as needed)(Only if your model uses a calibration screw behind the control panel.)
- Oven-safe test pan or rack(Supports thermometer without blocking air flow; keep pan centered.)
- Notepad or digital note-taking device(Record readings, offsets, and dates for future reference.)
- Oven mitts or heat-resistant gloves(Protect hands during preheat and adjustments.)
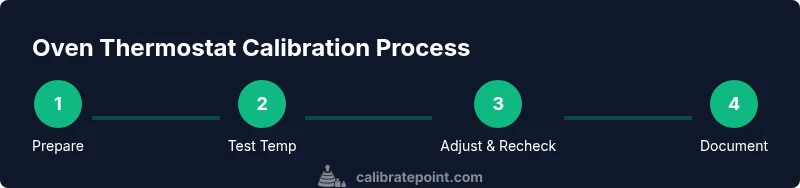
Steps
Estimated time: 60-90 minutes
- 1
Review the manual and safety steps
Read your oven manual to understand the correct calibration method for your model. Gather safety gear and confirm the oven is cool before starting. This prevents accidents and ensures you follow the intended procedure.
Tip: If the manual shows a panel-based calibration, note the exact menu path before starting. - 2
Place the thermometer and prep the oven
Insert the oven thermometer into the center of the oven cavity, away from walls and racks. Close the door and set up a steady preheat process. Wait for stabilization before taking readings.
Tip: Keep the thermometer away from racks to avoid false lower readings due to air flow obstruction. - 3
Preheat to test temperatures
Preheat to a standard target such as 350 F and another target like 325 F, allowing at least 15 minutes for stabilization at each setting. Record the thermometer readings when stable.
Tip: Use a timer to ensure you compare readings at the same stabilization point each time. - 4
Compare readings with the oven display
Note the offset between the display temperature and the thermometer. Consistent offsets indicate a calibration need; inconsistent offsets suggest multiple issues like heat loss or sensor drift.
Tip: Write offsets for each temperature to detect drift patterns reliably. - 5
Adjust the thermostat
If your model uses a calibration screw, make a small adjustment and recheck. If it uses a digital control, apply the recommended offset in the calibration menu or factory defaults, then retest.
Tip: Make small changes (about 5–10 degrees at a time) and verify across at least two temperatures. - 6
Re-test at multiple temperatures
Repeat the stabilization and reading process at several target temperatures to ensure the adjustment holds across the range. Document results and confirm the new offsets align with expectations.
Tip: A single test is rarely conclusive; multiple points validate calibration. - 7
Document results and plan next steps
Record the final offsets, temperatures tested, and any observations. Schedule future checks and note when you should re-test after service or major repairs.
Tip: Keep a calibration log handy for quick reference during future cooks.
Questions & Answers
Why is my oven reading higher than the set temperature?
Oven drift can come from aging heating elements, worn gaskets, or sensor offsets. Verify with a thermometer and adjust gradually, ensuring you do not exceed manufacturer limits.
If your oven reads higher, it may be due to aging parts or sensor offsets. Calibrate gradually and verify with a thermometer.
How often should I calibrate my oven thermostat?
Calibration is recommended if you notice inconsistent results or after major oven repairs. A yearly check is a common practice for high-use kitchens.
Calibrate if you notice inconsistent results or after repairs; many people check yearly.
Can an electronic oven be calibrated using the control panel?
Yes, most electronic ovens offer a calibration option in the settings. Follow the manual and perform a verification test after adjustment.
Yes, use the built-in calibration in the settings and verify with a thermometer.
What if my oven still reads low after calibration?
Persistent low readings may indicate sensor failure or heating element issues. If offsets remain after safe adjustments, seek professional service.
If readings stay low after calibration, you may need professional help.
Should I recalibrate after replacing the temperature sensor?
Yes, replacing the sensor can change readings. Recalibrate and re-test to confirm accuracy after replacement.
Yes, recalibrate after sensor replacement to confirm accuracy.
Is it safe to calibrate a gas oven on my own?
Only follow manufacturer instructions; if unsure, contact a professional. Gas calibrations can involve gas lines and safety risks.
If unsure about gas safety, call a professional.
Watch Video
Key Takeaways
- Verify temperature with a thermometer for accuracy
- Calibrate in small increments and recheck
- Test across several temperatures to confirm consistency
- Document results for ongoing maintenance
- Seek professional service if persistent drift remains