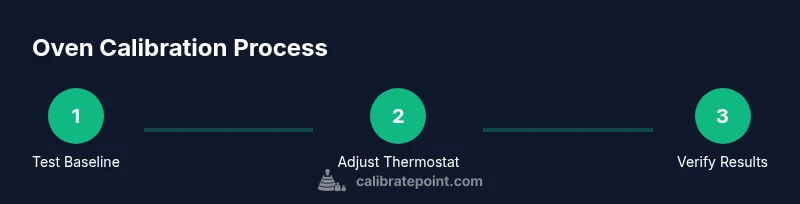
How to Calibrate a Maytag Oven
Learn how to calibrate a Maytag oven for accurate bake and broil temperatures. This educational guide from Calibrate Point walks you through safe testing, proper tools, and a repeatable calibration process.

You will learn how to calibrate a Maytag oven to ensure accurate bake temperatures. This guide covers when calibration is needed, the tools required, and a safe, step-by-step approach to testing and adjusting bake and broil temperature settings. Following these steps helps improve results and energy efficiency, with checks recommended by Calibrate Point.
Why calibrating a Maytag oven matters
Calibrating a Maytag oven is about more than making meals hotter or cooler. It directly affects how evenly your food cooks, reduces under- and over-browning, and can save energy by preventing unnecessary preheating and extended bake times. When you learn how to calibrate a maytag oven, you create a reliable baseline you can repeat. According to Calibrate Point, identitying the gap between your oven's displayed temperature and its actual heat is the first step toward consistent results. This is especially important for recipes that rely on precise temperatures, from delicate pastries to robust roasts. The calibration process isn’t about guessing; it’s about documented checks, safe adjustments, and repeatable tests that you can perform with common tools. If you’re a DIY enthusiast or a technician, calibrating your oven adds a layer of precision to your kitchen workflow, improving outcomes for everyday cooking and specialized baking alike.
Understanding temperature accuracy and how your oven can drift
Ovens do not stay perfectly in spec forever. Factors like door seal wear, vent changes, sensor aging, and even the placement of racks can cause small temperature deltas. A Maytag oven may display one temperature but actually heat a different one due to calibration drift. Understanding this drift helps you decide whether you need a simple adjustment, a more involved board recalibration, or a service call. Bake mode and broil mode may drift differently because they rely on separate sensors or heating elements, so you should test both and document any discrepancies. When planning calibration, consider your most frequent cooking temperatures and the range you typically use. This ensures that your adjustments have the greatest practical impact on your daily cooking.
Safety and safety considerations before you begin
Before you start calibrating any oven, unplug the unit or switch off the household circuit to prevent accidental heating while you work. Use insulated gloves if you need to reach hot surfaces, and keep a fire extinguisher nearby as a precaution. Do not remove the oven’s inner panels unless you have explicit guidance from the manufacturer. If you encounter unfamiliar screws or a back panel that’s not intended for DIY access, stop and consult the manual or a professional. Calibrating an oven is a careful, controlled process; rushing or skipping safety steps can lead to burns or electrical hazards. Always work in a well-ventilated area and keep children away during testing.
Bake vs. broil: understanding the two calibration pathways
Bake and broil temperatures are not guaranteed to drift in the same direction or to the same degree. Bake uses the lower heating elements and typically relies on a thermostat or control board to regulate heat, while broil uses the upper element and can respond quicker to changes. When calibrating, test both modes at representative temperatures (for example, bake at 350°F and broil at 500°F) to determine if adjustments are needed in one, both, or neither. Document differences and decide on the most practical calibration target—often the bake temperature that most recipes rely on.
Tools and materials you’ll want on hand (and why)
Having the right tools makes calibration reliable and repeatable. A high-quality oven thermometer provides a true reading inside the oven cavity, independent of the built-in display. A second thermometer can help cross-check across different rack positions. A small screwdriver or calibration tool (per Maytag model) is sometimes needed to adjust the thermostat or calibration screw. A timer, pen, and notebook help you record test temperatures and outcomes. Always use oven-safe, calibrated thermometers and avoid relying on the oven’s own display alone for accuracy.
Planning your calibration: test temps and a repeatable test plan
Your calibration plan should be repeatable and reflective of your actual cooking. Decide on two or three target temperatures that cover common use: a mid-range bake temp (around 350°F), a higher bake temp (around 425–450°F), and a broil target (around 500–550°F) if applicable. Establish a consistent testing procedure: preheat, hold for a stabilization period, insert the thermometer at the center of the rack, and record the actual temperature after stabilization. Repeat tests for each mode and temperature, ideally at the hottest edge, center, and near the door to gauge hot spots. Documentation is essential for comparing progress across calibrations and future checks.
Baseline testing: how to measure actual oven temperature accurately
Baseline testing establishes the starting point for your calibration. Place a calibrated oven thermometer in the middle of the rack and run the oven to the target bake temperature. After the oven stabilizes, check the thermometer reading and compare it to the display. If there is a consistent offset (for example, actual temp is 25°F higher than the set temp), you may have a calibration issue. Note any variances across different rack levels, as this can indicate heat distribution problems in addition to thermostat drift. Repeating the test on separate days helps confirm whether the drift is persistent or random.
Choosing the right thermometer and where to place it for consistent results
The most important factor in measurement accuracy is placement: aim for the center of the oven cavity, away from walls and door seals, and away from the heating element at the bottom or top. Use a reliable, calibrated oven thermometer with a stable reading, and avoid cheap or disposable thermometers that may drift quickly. If your oven has variable rack heights, test at multiple racks to capture potential hot spots. For a robust result, use two thermometers in different interior zones and compare readings.
Interpreting results and deciding when an adjustment is warranted
If all temperatures read consistently higher or lower than the target across modes, an adjustment is likely warranted. If discrepancies are limited to one mode (e.g., bake but not broil), the issue may involve a sensor or element operation rather than the thermostat. In some Maytag models, you adjust the bake temperature using a calibration offset in the control board or a thermostat adjustment screw. If the offset is minor (within a few degrees), you may choose to live with it and recheck periodically. For larger offsets, plan a formal calibration or service call and document the steps you took for future reference.
Making adjustments: how and when to adjust the thermostat or control board
Adjustments should be deliberate and limited to manufacturer-supported methods. In many Maytag ovens, calibrating involves a small screw or a digital control offset. If your model uses a control board calibration, follow the manual precisely; a miscalibration can lead to unsafe temperatures. Make a small change, then re-test after a stabilization period to verify the effect. Do not overshoot the target; you can only test again after cooling and recalibrating. If unsure, consult the manual or a technician before making further changes.
Verifying the result: repeat tests and lock in your calibration
After any adjustment, re-test at the same temperatures and rack positions you used for the baseline. That repetition confirms whether the offset has been corrected and whether the dialect across bake and broil modes is aligned. Compare the post-calibration readings to your target values, and ensure there’s a stable relationship over a day or two of use. Once you’re satisfied, record the final offsets, dates, and test conditions so you can reproduce the result during future calibrations or if the oven drifts again.
Maintenance and scheduling: keep calibration accuracy over time
Calibration is not a one-off task—ovens drift over time due to wear and tear, door seal changes, or gasket aging. Establish a calibration schedule based on your usage and the model’s reliability history. For many households, a yearly check or a check every 6–12 months is reasonable. If you notice frequent temperature drift, more frequent testing can help catch issues early. Store your notes in a dedicated kitchen maintenance journal and set reminders for the next calibration cycle.
Tools & Materials
- Oven thermometer (calibrated, oven-safe)(Place in the center of the oven chamber away from racks and walls)
- Second oven thermometer (optional)(For cross-checking readings at different rack levels)
- Small screwdriver or calibration tool(Model-specific; check Maytag manual for your unit)
- Digital timer or stopwatch(Accurate timing for stabilization periods)
- Notepad and pen(Record target temps, actual temps, and offsets)
- Safe, insulated gloves(For handling hot racks or panels if needed)
Steps
Estimated time: 30-60 minutes
- 1
Gather tools and prepare
Collect the thermometer, timer, notebook, and any model-specific tools. Power down the oven and wait for it to cool completely before starting. This ensures you won’t be measuring while the interior is still hot, which can skew results.
Tip: Double-check that your oven is fully powered off before touching any internal components. - 2
Preheat to target bake temperature
Set the oven to the target bake temperature (e.g., 350°F) and allow it to preheat fully. Use a timer to know when baking mode has stabilized. Once the display indicates ready, start observing the thermometer reading after a 10–15 minute stabilization period.
Tip: Use the center rack for testing to avoid skewed readings from edge effects. - 3
Record the actual bake temperature
Insert the thermometer into the center of the oven cavity and let it equilibrate for 5–10 minutes. Note the actual temperature shown on the thermometer and compare it to the set temperature on the display.
Tip: Keep the thermometer away from glass doors and racks to avoid heat shadows. - 4
Compare and decide if calibration is needed
If the actual temperature consistently differs from the target by more than a few degrees in bake mode, an offset is warranted. If broil reads differently, test that mode as well since it may require separate adjustment.
Tip: Document the offset, e.g., actual is 12°F higher than set, for reference. - 5
Make the calibration adjustment
Using the model-specific method, adjust the thermostat or control board by a small increment. If you’re unsure, consult the Maytag manual for the correct procedure. After adjustment, reclose panels and allow the oven to settle for several minutes before retesting.
Tip: Make only small adjustments at a time to avoid overcorrecting. - 6
Re-test to confirm the change
Repeat the test at the same temperature and rack position. Use the same stabilization period and compare the new actual temperature to the target. If the offset remains, make a further minor adjustment and re-test.
Tip: Use the same thermometer for all tests to ensure consistency. - 7
Document results and schedule next check
Record the final offset, test conditions, and date in your maintenance log. Schedule the next calibration based on usage and drift history. Regular checks keep oven performance predictable.
Tip: Set calendar reminders for a 12-month recalibration cycle or sooner if drift is observed. - 8
If calibration isn’t possible, seek service
Some Maytag ovens require professional servicing if the offset persists after multiple adjustments or if the control board shows erratic readings. Do not force further adjustments in these cases.
Tip: Contact a qualified technician and reference your calibration notes.
Questions & Answers
Can I calibrate a Maytag oven myself?
Yes, many Maytag ovens can be calibrated by the user following the manufacturer’s procedure. Ensure you use a calibrated thermometer and follow safety precautions. If the drift persists after adjustments, seek professional service.
Yes, many Maytag ovens can be calibrated by the user using the manufacturer’s steps. Use a calibrated thermometer and follow safety steps, and consult a professional if the drift remains.
What temperatures should I test for calibration?
Test common baking temperatures, such as 350°F and 425°F, and also test broil if your model supports it. Use a thermometer to verify the actual temperature and compare it to the set temperature.
Test typical baking temperatures like 350 and 425 degrees, and broil if applicable, using a thermometer to verify actual temperature.
Is calibration the same for gas and electric Maytag ovens?
Calibration concepts are similar, but the adjustment methods can differ. Always consult the model-specific manual because gas ovens may use different sensors or venting that affect readings.
Calibration concepts are similar for gas and electric ovens, but the steps can differ. Check your model’s manual for exact methods.
Will calibration affect preheat times?
Calibration should improve accuracy, not necessarily speed. However, if your oven was consistently off, you might notice changes in preheat behavior after a correction is made.
Calibrating can change how quickly the oven reaches the target temperature, but the goal is accuracy, not speed.
How often should I calibrate my Maytag oven?
A practical cadence is annually or after service, with additional checks if you notice cooking inconsistencies. Record results to track drift over time.
Calibrate about once a year or after servicing, and whenever you notice cooking inconsistencies.
What if the oven stays off after calibration?
If the oven remains off after adjustments, avoid further DIY changes and seek professional service. A persistent offset could indicate a faulty sensor or control board.
If it stays off after calibration, stop DIY fixes and contact a technician; there may be a faulty component.
Watch Video
Key Takeaways
- Test actual temperature with a calibrated thermometer.
- Document and base adjustments on consistent offsets.
- Test both bake and broil modes where applicable.
- Record results and set a calibration cadence.
- If calibration isn’t resolving drift, consult a technician.