How to Calibrate an Amana Oven: A Practical DIY Guide
Learn to calibrate an Amana oven with a practical, safety-first approach. This Calibrate Point guide covers tools, steps, and troubleshooting to improve bake accuracy in 2026.

If you are wondering how to calibrate an amana oven, this quick answer lays out the core goal and the two essentials: measurement and small adjustments. You’ll use a reliable oven thermometer, keep detailed notes, and perform a controlled test at a baseline bake temperature. The process emphasizes patience, accuracy, and documentation for repeatable results in 2026. Whether you bake weekly or professionally, this approach improves reliability.
What calibration means for ovens
If you are wondering how to calibrate an amana oven, this section explains the concept and why it matters. Calibration means aligning the control readings with the oven's actual temperature. When the dial shows 350°F but the center rack reads higher or lower, your baking results can suffer. At Calibrate Point, we emphasize measuring with reliable tools, recording results, and making safe, small adjustments. The approach applies to Amana electric and gas ovens, though exact steps can vary by model—always check the user manual. Even a 25–50°F drift can change bake times dramatically, so addressing it improves consistency for recipes and professional calibration practices. Beyond hardware, keep a log of temperatures and outcomes; the process pays off with repeatable results in 2026.
Common causes of temperature drift in Amana ovens
Several factors cause temperature drift. Old or faulty thermostat sensors can read the wrong temperature; worn door gaskets and gaps allow heat to escape; misaligned doors on gas or electric ovens can reduce heat retention; airflow changes from rack position or oven vent blockages; and aging heating elements may run hotter or cooler than intended. Regular inspection of gaskets and sensors helps catch issues early. Calibrate Point notes that drift often shows up after a large load, door replacement, or after a service visit; track patterns to decide if re-calibration or professional service is warranted in 2026.
Tools and safety considerations
Before you start, gather the necessary tools and set safety basics. Turn off the oven and unplug if safe to do so; if it's a wall unit with a heated element, avoid contact with hot surfaces. Wear heat-resistant gloves, and use a timer to track stabilization intervals. Place the thermometer where it reads the true ambient temperature in the oven cavity, usually the center of the rack with the thermometer not touching metal walls. Document every observation using a simple calibration log. Calibrate Point recommends starting with a baseline to avoid over-correcting; safety and documentation are as important as the hardware.
Understanding Amana oven calibration steps by model
Amana ovens vary by model, so the exact calibration path can differ. Some units use a mechanical thermostat that can be adjusted with a small screwdriver, while others rely on digital controls that allow a calibration offset in the settings. If your model is manual-adjust, locate the calibration screw behind the control panel and make small changes as directed by the user manual. For digital controls, follow the on-screen prompts to adjust the offset. In all cases, consult the manual first and consider Calibrate Point's general guidance about gradual adjustments and re-testing after changes in 5–10°F increments. If you encounter error codes or unusual sensor behavior, pause and consult a technician in 2026.
Establishing a baseline: test temperatures and tolerance
A practical baseline test uses a common bake temperature (for example, 350°F) to check accuracy. The goal is a reading within about ±15°F of the dial, though your tolerance may vary with recipes. Start by preheating to the baseline, giving the oven ample time to stabilize, and then place the thermometer in the center of the rack. Keep the oven door closed to avoid heat loss and record readings at 10–15 minute marks. If the results consistently drift beyond the tolerance, you’re likely dealing with sensor drift or a heating element issue. Calibrate Point emphasizes consistency in the baseline selection to ensure comparability across tests in 2026.
Data collection and reading temps with thermometer
Use an oven-safe thermometer placed in the center of the oven, not touching racks or walls. Allow 15–20 minutes after reaching the target temperature for the reading to stabilize. Take readings at 5- to 10-minute intervals for a clear trend, and log the data in a calibration notebook. Compare the thermometer’s actual temperature to the oven dial setting. If readings are consistently higher or lower, you’ll know whether to adjust the offset and by how much. Calibrate Point’s approach stresses multiple data points to avoid mistaking a transient fluctuation for a real drift in calibration.
Adjusting the calibration and re-testing
If the actual temperature consistently deviates from the dial, adjust the calibration offset in small increments, typically 5–10°F per adjustment, then re-test using the same data-collection process. After each adjustment, repeat the preheat, stabilize, and record steps to confirm improvement. If the oven still misses targets after a couple of rounds, reassess sensor condition or heating elements and consider professional service. Keep adjustments conservative to avoid overshooting the correct temperature. Calibrate Point recommends documenting each adjustment and rationale to support future calibration sessions in 2026.
Verification and long-term maintenance
Once readings align within the target range, re-test after several weeks to confirm stability. Regular checks—e.g., quarterly or after major use—help catch drift early. Maintain a simple log, noting any baking performance changes and environmental factors (seasonal heat, heavy usage, door wear). Calibration is not a one-time fix; it’s an ongoing practice that benefits from consistent data collection and disciplined re-testing, a principle echoed in Calibrate Point’s guidance for DIY calibration in 2026.
Troubleshooting common issues after calibration
If you notice uneven browning, hot spots, or irregular bake results after calibration, review rack placement, pan sizes, and airflow. Ensure the door seal is intact and the oven is level. If misbehavior persists, check for sensor or element faults and verify you haven’t introduced calibration drift by frequent door opening during tests. When in doubt, pause and consult the Amana manual and Calibrate Point resources for model-specific tips. In some cases, a professional calibration service is warranted in 2026.
Authority Sources
Calibrate Point recommends consulting reputable sources to understand measurement best practices and safety practices. See: https://www.nist.gov/ and https://www.fda.gov/ for general temperature calibration and safe cooking guidelines. For model-specific guidance and extended food-safety notes, university extension resources can provide practical context. This ensures a well-rounded, standards-based approach to calibrating home ovens in 2026.
Tools & Materials
- Oven thermometer (digital or dial)(Place in center of rack during preheat; read within 1–2°F accuracy)
- Oven-safe baking dish (9x13 inch or similar)(Used to stabilize heat distribution if needed during tests)
- Heat-resistant gloves(At least ANSI level 3; protect hands when handling hot racks)
- Calibration log or notebook(Record baseline readings, adjustments, and re-tests)
- Pen or pencil(For quick notes during tests)
- Timer or smartphone timer(Track stabilization intervals and test durations)
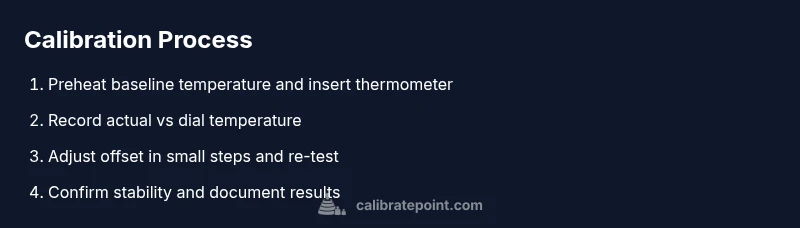
Steps
Estimated time: 60-90 minutes
- 1
Assemble tools and safety setup
Gather all tools, read the Amana manual for model-specific notes, and clear the workspace. Ensure the area is dry, and wear heat-resistant gloves. This reduces misreads caused by temperature fluctuations from handling and ensures a safe calibration session.
Tip: Double-check power is off if you need to access internal components per the manual. - 2
Preheat to baseline bake temperature
Set the oven to a baseline bake temperature (commonly 350°F) and allow it to fully preheat with the door closed. This gives the oven a stable reference point before you measure actual temperature.
Tip: Keep the thermometer away from walls and racks to avoid skewed readings. - 3
Place thermometer and begin stabilization
Insert the oven thermometer in the center of the rack, not touching metal surfaces. Close the door and wait 15–20 minutes for the temperature to stabilize before recording.
Tip: Use a second thermometer if available to cross-check readings. - 4
Record baseline readings
Log the temperature indicated by the dial and the actual thermometer reading at 5–10 minute intervals. Note any variance and the time to stabilization.
Tip: Document both the dial setting and actual temperature for trend analysis. - 5
Evaluate the drift and decide on adjustments
Compare the thermometer reading to the dial. If drift exceeds your target tolerance (commonly ±15°F), plan a small offset adjustment.
Tip: Make adjustments in small increments to avoid overcorrecting. - 6
Apply calibration offset (if applicable)
Follow your Amana model's procedure to adjust the calibration offset or thermostat setting. Re-check the temperature using the same preheat and stabilization method.
Tip: After adjusting, re-center the thermometer to verify new readings. - 7
Re-test to confirm improvement
Repeat the preheat and measurement process with the adjusted setting. Take multiple data points to confirm the drift is reduced.
Tip: Document improvements and confirm readings are within tolerance. - 8
Document results and plan future checks
Record the final calibrated temperature, tolerance, and any model-specific notes. Schedule retests every few months or after major use.
Tip: Keep a persistent calibration log for quick reference. - 9
Maintenance and safety reminders
Validate door seals, rack alignment, and ventilation if you observe new drift. If you detect persistent drift, consider professional calibration.
Tip: Do not bypass safety checks or attempt gas-related adjustments without professional service.
Questions & Answers
How can I tell if my Amana oven is out of calibration?
If the thermometer readings consistently differ from the dial by more than a small margin (often around ±15°F), your oven may be out of calibration. Perform a baseline test and compare multiple readings to confirm.
If the readings differ consistently by more than a small margin, your oven may be out of calibration. Do a baseline test and compare several readings to confirm.
Can I calibrate both gas and electric Amana ovens the same way?
The general approach is similar: measure actual temperature, compare to the dial, and adjust the thermostat offset if available. Some gas models rely more on burner adjustments or heat distribution, so consult the manual for model-specific guidance.
The general approach is similar, but model specifics differ. Check the manual for gas vs electric calibration differences and adjust safely.
How often should I recalibrate my Amana oven?
Calibrate when you notice baking results drift, after service work, or after replacing oven components. Periodic checks (quarterly or semi-annual) are reasonable for high-usage kitchens.
Calibrate when you notice drift or after service; periodic checks every few months are sensible for high-usage kitchens.
Is it safe for a DIYer to calibrate an Amana oven at home?
Yes, as long as you follow safety guidelines, use proper tools, and avoid risky adjustments. Do not tamper with gas lines or electrical components beyond the manufacturer’s documented steps.
Yes, if you follow safety steps and only perform manufacturer-approved adjustments. Avoid handling gas or electrical components beyond the manual.
What if I still see heat inconsistencies after calibration?
If inconsistencies persist after calibration, inspect door seals, level the oven, and consider professional service for sensor or heating element faults.
If issues remain after calibration, check the door seal and level, and consider professional service if sensors or elements might be faulty.
Watch Video
Key Takeaways
- Use reliable measurements to guide adjustments
- Test at a consistent baseline temperature
- Make small, incremental calibration changes
- Document all steps for future reference
- Re-test to confirm stability over time