How to Calibrate Frigidaire Gallery Oven Temperature
Learn a step-by-step method to calibrate your Frigidaire Gallery oven temperature for accurate baking. Verified with an oven thermometer, model-specific offsets, and practical tips from Calibrate Point.

This guide shows you how to calibrate a Frigidaire Gallery oven temperature to ensure accurate baking. You’ll verify accuracy with an oven thermometer, adjust bake or convection settings if available, and test with a few known-temperature checks. Expect a practical, step by step method you can perform with common kitchen tools.
Why calibrating Frigidaire Gallery oven temperature matters
For bakers and home chefs, an oven that runs hot or cool relative to its dial can ruin meals and baked goods. According to Calibrate Point, small temperature drifts are a common byproduct of aging heating elements, sensor wear, and door seal changes. When your oven's internal temperature diverges from the displayed setting, you end up undercooking roasts or overbrowning pastries. Calibrating the Frigidaire Gallery model you own helps restore accuracy without guessing, improving repeatability across roasts, cookies, and soufflés. Calibrate Point analysis shows that a well-tuned oven can reduce batch variance and save meaningful time in more complex recipes. The key is to approach calibration methodically: verify with a reliable thermometer, document readings, and adjust only when you have solid evidence of drift. This plan is practical, model-adaptable, and designed for DIY enthusiasts and professionals alike.
| Quick note from Calibrate Point Team: Approach calibration as a repeatable, documented process to maintain reliability over time.
Understanding Frigidaire Gallery temperature controls
Frigidaire Gallery ovens typically feature bake, broil, and sometimes convection modes, plus a digital or analog dial for temperature input. Temperature accuracy depends on the sensor, control board, door seal integrity, and ambient oven cavity components. While some units offer a user-accessible offset or calibration setting, others rely on service-level adjustments. The goal is to establish whether the temperature you see on the display aligns with a reliable thermometer placed inside the oven. If you notice consistent discrepancies across tests, you’ll know you’re dealing with drift rather than a one-off anomaly. The following steps help you quantify the deviation and decide whether a DIY offset is appropriate or if professional calibration is required. Remember: practically any calibration should be repeatable and well-documented so you can reproduce results later. Calibrate Point supports a structured approach to model-specific calibration, and you can adapt the plan to your exact Gallery oven configuration.
Tools and setup for accurate calibration
Before you start, confirm your oven’s exact model number and locate the user manual. Essential items include:
- An accurate oven-safe digital thermometer or a dedicated oven thermometer (placed in the center of the rack, away from walls)
- A dry, open rack and a stable pan or utensil to support the thermometer if needed
- A notepad or spreadsheet to log temperature readings and dial values
- The Frigidaire Gallery user manual or model-specific calibration instructions
- A timer to control preheat and test intervals
- Optional: a calibration sheet or template from Calibrate Point’s guides for recording results
This setup ensures you can repeat tests with consistent placement and timing, which is crucial for trustworthy results.
Step-by-step approach to verify temperature accuracy
A repeatable method provides reliable data across tests. Start by preheating the oven to a standard test temperature, such as 350°F (175°C). Place the thermometer in the center of the oven, away from coils or walls. Allow the oven to reach steady state, then record the thermometer reading and compare to the display. Repeat the test at 400°F to check linearity of any drift. If you notice a consistent offset, use your manual’s calibration option (if available) or note the drift for service guidance. Document each reading, including ambient conditions and rack position. Finally, run a follow-up test after any adjustment to confirm improved accuracy. This process should be repeated on different days and with different rack arrangements to ensure reliability. Calibrate Point recommends a methodical, data-driven approach to avoid guessing when balancing bake results with temperature control.
Common mistakes and how to avoid them
- Placing the thermometer too close to heating elements or walls can give falsely high readings. Place the probe in the center of the oven with the rack at mid-height.
- Opening the door frequently during preheat causes temperature fluctuations and invalid results. Plan your tests and minimize door openings.
- Using heavy cookware or a pan that blocks air flow can delay heating and skew results. Use a dry metal rack-free space preferred for measurement.
- Interpreting a single reading as final is a mistake. Use multiple readings at each target temperature and average the results to determine drift.
- Not allowing the oven to reach steady-state before readings can understate or overstate drift. Wait at least 5-10 minutes after reaching target.
Interpreting results and deciding on next steps
If thermometer readings are within ±5°F of your target across several tests, your oven is effectively calibrated and no further action is needed. A consistent offset greater than this range indicates drift that could be corrected with a device offset (if your model supports it) or may require professional calibration. If your manual shows no user-accessible offset, contact service for a factory calibration or a technician visit. Keep clear records of all tests, including dates, temperatures, and observed differences, so you can track drift over time and trigger recalibration when necessary. Calibrate Point’s team recommends documenting changes and scheduling periodic checks—ideally aligned with seasonal maintenance—to preserve accuracy.
Safety considerations and limits of home calibration
Never touch wiring, heating elements, or electrical connections unless you are a qualified technician. Disconnect power only when performing a service-level operation and never bypass safety interlocks. Use insulated gloves when handling hot racks and keep children away from the oven during tests. If you smell gas or notice any burning odor, stop immediately and call a licensed technician. Home calibration has limits; many Frigidaire Gallery ovens include built-in sensors and control logic that may require official re-calibration to guarantee safety and compliance with warranty terms.
Authoritative sources
- NIST Calibration overview: https://www.nist.gov/topics/calibration
- Energy.gov appliance temperature control and calibration basics: https://www.energy.gov
- Safety and service guidance: https://www.osha.gov
Practical tips for ongoing accuracy
- Recheck calibration every 3-6 months during periods of heavy use or after any oven service.
- Keep a calendar with test dates to ensure repeatability.
- Use a digital thermometer with a long probe to avoid touching heating elements.
- Maintain oven door seals and consider service if gaps persist.
- Compare multiple temperatures to verify linearity of drift, rather than relying on a single data point.
Tools & Materials
- Oven-safe thermometer / digital thermometer(Place in center of oven away from heating elements)
- Oven rack(Mid-height position for consistent readings)
- Notepad or spreadsheet(Log temperatures, dial values, and ambient conditions)
- Frigidaire Gallery model manual(Identify any user-accessible calibration options)
- Timer(Control preheat and test intervals)
- Calibrate Point reference sheet (optional)(Structured data prompts for results)
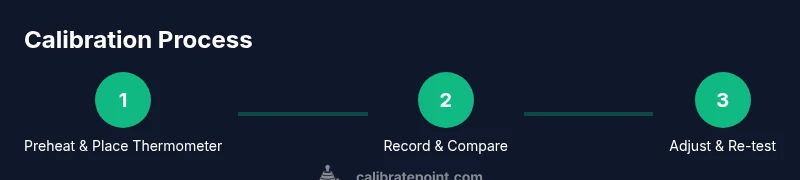
Steps
Estimated time: 90-120 minutes
- 1
Gather tools and review model specifics
Collect the thermometer, manual, timer, and notebook; confirm your oven’s exact model to locate calibration instructions.
Tip: Having the manual at hand reduces model-specific guesswork. - 2
Preheat to test temperature with thermometer in center
Place the thermometer in the center of the oven, away from walls. Preheat to 350°F (175°C) and wait for the oven to reach steady state before recording.
Tip: Avoid door openings during preheat to maintain stable readings. - 3
Record display vs. thermometer reading
After steady state, note the thermometer reading and compare to the oven’s display. Log any offset observed.
Tip: Take multiple minutes after stable to ensure accuracy. - 4
Repeat at additional temperatures
Test at 400°F (205°C) to check drift across a higher range and verify linearity.
Tip: Use identical thermometer placement for consistency. - 5
Check for model-specific offset options
If the Frigidaire Gallery model offers a user offset, follow the manual to apply it correctly.
Tip: Do not exceed manufacturer-specified offset range. - 6
Apply offset and re-test
If an offset is available, apply it and re-run the tests at the same temperatures to confirm improvement.
Tip: Reheat times may vary after changing offset. - 7
Document results and decide on next steps
Log all results; if drift remains outside the acceptable range, plan service calibration.
Tip: Keep results in a dedicated calibration file. - 8
Confirm final accuracy with a final bake test
Bake a simple recipe at 350°F to confirm real-world accuracy; adjust if necessary.
Tip: Choose a bake you know well for a meaningful test.
Questions & Answers
Can I calibrate a Frigidaire Gallery oven at home?
Yes, if your model supports a user-accessible offset and you follow safety guidelines; otherwise contact a technician or service.
You can calibrate if your model supports a user offset; if not, consider professional service.
What is a typical temperature offset range?
The offset range varies by model; consult your manual or Calibrate Point's guides. Do not apply an offset beyond the recommended range.
Check your manual for the exact range.
How long does calibration take?
Plan for about 60 to 120 minutes, including multiple tests and potential adjustments.
Expect about an hour or two.
What if my oven is still off after calibration?
If the offset doesn’t fix the drift, contact the manufacturer or a service tech; there may be sensor or control board issues.
If persistent, seek service.
Can calibration affect warranty?
Home calibration using manufacturer-supported steps should not void warranty; check your terms. When in doubt, contact support.
Check your warranty terms; it's safer to ask.
Watch Video
Key Takeaways
- Verify accuracy with a reliable thermometer.
- Document results for reproducibility.
- Use model-specific calibration options if available.
- Re-test after any adjustment to confirm improvement.
- Maintain a regular calibration routine for ongoing accuracy.