How to Calibrate LG Oven: Step-by-Step Guide
Learn how to calibrate your LG oven for accurate baking. This comprehensive, step-by-step guide covers using an independent thermometer, testing at multiple temperatures, applying built-in calibration options if available, and documenting results for reliable cooking every time.

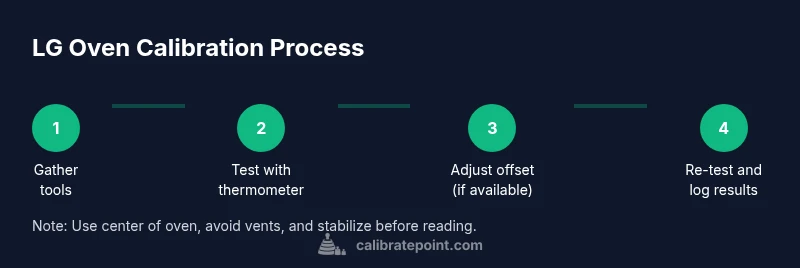
By following this guide, you’ll calibrate your LG oven for accurate bake temperatures and even results. Start with an independent oven thermometer, confirm the oven’s actual temperature at a centered rack, and apply any built-in calibration option if your model supports it. If no offset is available, document the delta and plan service if discrepancies persist. Safety steps and careful timing are included for reliable results.
Why calibrating LG ovens matters
LG ovens, like most consumer ranges, can drift from the set temperature over time due to wear, door seal changes, or thermostat aging. Calibrating ensures that a dish baked at a given temperature reaches the intended heat, producing predictable browning and proper rising. To begin, gather an independent oven thermometer and a simple temperature log to document discrepancies across multiple temperatures. Some LG models offer a built-in temperature offset; if your model supports it, you can apply a small offset and re-test. If no offset is available, rely on external checks and note the delta for future reference. During testing, place the thermometer in the center of the oven, away from vents and racks that may distort readings, and allow the oven to stabilize for 10-15 minutes before taking a measurement. This data-driven approach builds confidence in your calibration.
Understanding oven temperature accuracy and what you measure
The key concept is the difference between the set temperature and the oven’s actual temperature inside the cavity. Temperature drift can be caused by thermostat aging, door seal leakage, or heating element wear. Document measurements at multiple temperatures to see if drift is consistent across the range or isolated to a single setpoint. When you record data, note the ambient kitchen conditions and time since the last door opening. If your LG model has a calibration or offset function, the manual will describe how to adjust it. If not, you can still achieve better results by using a separate thermometer for guidance and adjusting cooking expectations accordingly. The goal is to bring the actual oven temperature within a small, repeatable range of the target temperature.
How to test with an independent thermometer
This practical test uses a reliable oven-safe thermometer. Start by placing the probe in the center of the oven, on the middle rack. Preheat the oven to your target temperature (commonly 350°F) and let it stabilize for 10-15 minutes. Read the thermometer, then compare against the oven's display. If there is a delta, record it and repeat at a second temperature to confirm consistency. Maintain the oven door closed during readings and avoid drafts that can skew results. Document each test with date, time, and environmental notes for future reference.
Using built-in calibration options and alternatives
If your LG oven includes a temperature offset or calibration setting, follow the menu path described in the manual to apply a small offset and re-test using the thermometer. If your model lacks a dedicated calibration control, your options include scheduling service or using cooking methods to compensate (for example, adjusting recipes or staging temperatures). Always document the offset and testing results so you can reproduce the calibration. If you’re unsure whether your model supports calibration, check the model’s user guide or LG’s official support portal. A data-driven approach minimizes guesswork and maximizes repeatability.
Safety, maintenance, and when to seek service
Power safety is essential. Before handling any interior components beyond the control panel, unplug the unit or disconnect power if feasible and safe. Use heat-resistant gloves when handling hot racks or probes, and keep children away from the oven during testing. Use a high-quality, oven-safe thermometer with a clearly visible display. If the oven continues to show discrepancies after repeated tests and offsets, contact LG support or a licensed technician. Regularly cleaning the gasket and ensuring the interior is free of food debris improves consistent heat distribution over time.
What to record and how to judge success
Create a simple calibration log with Date, Test Temperature, Actual Temp (thermometer), Display Temp, Delta (Actual minus Display), Offset Applied, and Notes. A successful calibration yields a repeatable delta within a small range across multiple tests. If the delta remains inconsistent or large after offset adjustments, treat it as a potential hardware issue that warrants service. Maintain your log for future reference and retest after any oven maintenance or door gasket replacement.
Tools & Materials
- Oven-safe digital thermometer with probe(Long, heat-resistant probe; prefer one with an external readout.)
- Pen and notebook or digital log app(Use to record test temps, readings, and offsets.)
- Baking sheet and aluminum foil(For consistent placement and testing of readings.)
- LG oven manual or access to official LG support(Check for any built-in calibration/offset feature.)
- Kitchen timer(Track stabilization times and test intervals.)
- Optional camera or smartphone(Document setup and results for future reference.)
Steps
Estimated time: 60-90 minutes
- 1
Prepare tools and review model documentation
Gather all required tools and locate your LG oven’s model number. Review the user manual or official support site to confirm whether a calibration/offset feature exists and how it’s accessed. This step prevents surprises during testing.
Tip: Have the manual handy or save a PDF to your phone for quick reference. - 2
Position the thermometer correctly
Place the oven-safe thermometer in the center of the oven and on the middle rack. Ensure the probe is away from vents, walls, and racks to avoid skewed readings. Close the door gently and let the oven come to room temperature before starting.
Tip: Center placement minimizes hot-air bias from the oven cavities. - 3
Preheat to a standard temperature
Preheat the oven to a common test temperature (for example, 350°F) and allow it to preheat fully. Keep the thermometer plugged in and visible. Do not open the door during this phase to maintain stable heat.
Tip: Stabilization is key; give the oven 10–15 minutes after reaching setpoint. - 4
Record the thermometer reading
Once stabilized, read the thermometer and compare it to the display reading. Note any delta. Repeat at a second standard temperature (e.g., 400°F) to see if the delta is consistent.
Tip: Consistency across temps strengthens calibration validity. - 5
Check for built-in calibration option
If your model shows a calibration or offset option in the menu, follow the manual steps to apply a small offset. Save the setting and re-test with the thermometer.
Tip: Document the exact offset value and the affected temperatures. - 6
Re-test with offset applied
After applying the offset, repeat the stabilization and measurement process for the initial temperature. Confirm that the thermometer and display align within the expected delta.
Tip: Wait a few minutes after changing the offset before testing again. - 7
Test at a second temperature
Repeat testing at the second temperature to confirm the offset works across the range. If readings align, you’ve achieved a repeatable calibration.
Tip: If not, re-check placement and allow extra stabilization time. - 8
Log results and decide on next steps
Compile all data into your calibration log: dates, temps, actual readings, deltas, and offsets. If results are inconsistent or out of range, plan to service the oven or contact LG support.
Tip: Keep a copy of the log for service visits or future reference. - 9
Perform a final test and maintain records
Do a final test after any service or major adjustment to verify stability. Store the results in your log and note the recommended maintenance interval.
Tip: Set reminders for periodic rechecks, e.g., every 6–12 months.
Questions & Answers
Can I calibrate an LG oven myself?
Yes, if your model provides a built-in calibration/offset option and you have a reliable thermometer. Follow the manual steps and document results. If no offset exists or results remain inconsistent, seek professional service.
Yes, you can if your model supports calibration and you have a thermometer; otherwise consider service.
What if the oven reads differently on different racks?
Racking can affect heat distribution. Use the center rack for testing and note if variance persists across all racks. Calibration typically targets overall accuracy, not rack-specific readings.
Heat can vary by rack; test center first and check overall accuracy.
How do I know calibration is successful?
Calibration is successful when the thermometer reading closely matches the setpoint across multiple test temperatures and remains repeatable on subsequent tests.
Success means thermometer and display stay in close agreement across temps.
Can I calibrate the broil setting?
Most home ovens do not offer a broil calibration offset. Calibration generally applies to bake temperatures. Check your manual for any model-specific options.
Broil is rarely adjustable; bake calibration is typical.
What safety steps should I follow during calibration?
Turn off power when needed, use oven mitts, keep children away, and avoid leaving the door open while stabilizing temperatures.
Be careful with hot parts and keep kids away during testing.
What should I do if calibration fails?
If discrepancies persist after offset adjustments, contact LG support or a qualified technician for further assessment.
If it still doesn’t read correctly, seek professional help.
Watch Video
Key Takeaways
- Verify actual vs. display temps with a thermometer
- Use the center oven region for stable readings
- Apply built-in offsets if your model supports them
- Log all data for repeatability and service references
- Retest after any calibration change to confirm accuracy