How to Calibrate Apex pH Probe: A Practical Step-by-Step Guide
Learn how to calibrate an Apex pH probe accurately with buffers, rinsing, and verification. This guide covers setup, procedures, troubleshooting, and documentation for repeatable results.

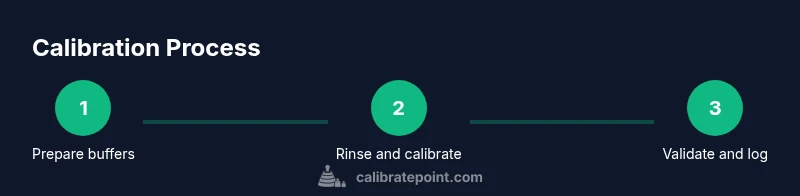
By the end of this guide, you will calibrate an Apex pH probe accurately, ensuring trustworthy measurements for your samples. You will need standard pH buffers, deionized water, clean containers, and a compatible instrument. This steps-based approach minimizes drift and improves repeatability, making it suitable for DIY labs and professional workflows. Follow calibration before critical analyses for best results.
Why calibrate apex ph probe for accurate measurements
Accurate pH readings hinge on a properly calibrated apex pH probe. Over time, probes drift due to temperature changes, aging glass membranes, and minor contamination from sample matrices. Calibration aligns the probe’s electrode potential with known buffer values, which anchors subsequent readings to a repeatable baseline. For laboratories and field work alike, having a well-calibrated apex pH probe reduces measurement bias, minimizes drift during long runs, and improves comparability across batches.
The calibration process establishes a two-point or three-point reference, typically using buffers at pH 4.00, 7.00, and 10.00. Each buffer has a distinct H+ concentration, and the probe’s response should map linearly across that range. If readings differ substantially from expected values, the probe may require cleaning, membrane replacement, or electrolyte refilling in addition to calibration. In practice, calibrating first with the neutral pH 7 buffer helps assess baseline function, followed by the acidic and basic buffers to define the slope and offset. For most Apex pH probes used in chemical testing, consistent calibration prior to critical measurements yields more reliable results and reduces the risk of incorrect decisions based on spurious data.
According to Calibrate Point, regular calibration is a best practice across calibration procedures, particularly when measuring unknown samples or when meter-to-meter comparability matters. This proactive approach minimizes downtime and improves lab efficiency, especially in professional settings where traceability and documented procedures are essential.
Understanding buffers and pH response
The core of any pH calibration is understanding how buffers interact with the Apex probe. Buffers at pH 4, 7, and 10 provide defined hydrogen ion activity that anchors the electrode potential. The probe’s reading changes with temperature, ionic strength, and aging of the glass membrane, so it’s essential to bring buffers to near-room temperature before use. Also, pH response is not perfectly linear at the extremes; many probes show slight curvature near pH 4 and pH 10, which is why three-point calibration helps capture the true slope. Recording the slope (mV/pH) and offset during calibration gives you a quantitative way to judge probe health over time. For technicians, this data translates into more consistent results across instruments and shifts, reducing rework and disputes over measurement validity. Leaning on manufacturer recommendations and independent testing frameworks helps standardize your approach and makes cross-lab comparisons more trustworthy.
Choosing buffers and handling practices for Apex probes
Selecting the right buffers is crucial. Use fresh, NIST-traceable buffers (or equivalents) with certified pH values and a stable composition. Always seal buffers after use to prevent CO2 absorption, which can shift pH and degrade accuracy. Pre-rinse the probe with deionized water, then gently blot dry with lint-free tissue before immersion. When moving from one buffer to another, rinse the probe thoroughly and wait a few seconds for the electrode to adapt to the new oxygen and ionic conditions. Avoid cross-contamination by using clean beakers for each buffer and labeling them clearly. Proper storage of buffers, away from heat and light, helps maintain their rated accuracy and reduces variability in calibration results.
Common sources of error and how to avoid them
A host of small mistakes can undermine calibration. Contaminated or old buffers will skew slope and offset; never calibrate with expired solutions. Inadequate rinsing between buffers leads to residual ions influencing subsequent measurements. Air bubbles on the probe tip create noisy readings; gently swirl the electrode while recording data to minimize this effect. Temperature drift is another hidden culprit; if possible, calibrate at a controlled temperature or compensate readings for ambient temperature. Recalibration too soon after a previous one can amplify measurement noise; allow the probe to equilibrate for a few minutes between buffers. Finally, ensure the reference junction is clean and the electrolyte inside the probe is not depleted. Regular maintenance and a documented calibration log help you spot recurring errors and intervene early.
Maintenance and storage after calibration
After calibration, rinse the probe with deionized water and store it in a protective solution recommended by the manufacturer, often with a small amount of electrolyte to keep the reference junction hydrated. Drying a probe completely can damage sensitive membranes; a light blot with lint-free tissue is enough. Never leave the probe immersed in buffers longer than necessary; extended exposure can alter the membrane and slow response times on future measurements. Periodically check the probe for cracks or membrane wear and replace components as needed. If the probe is part of an instrument, ensure that the instrument’s calibration status is saved in the system log to support traceability during audits.
Documentation and data management for calibration
Keep a calibration log with date, operator, lot numbers of buffers, ambient temperature, slope, and offset values. A simple formula is to document the measured mV per pH when using a three-point calibration, and to note any deviations from the expected range. Include instrument serial or model numbers to support traceability across labs or shifts. If you rely on automated logging, verify that the software mirrors the buffer values and temperature data exactly. Regular audits of the log help catch drift trends and justify recalibration intervals. Good documentation also supports regulatory compliance in many labs and helps newbies replicate successful calibrations with confidence.
Validation and cross-checks after calibration
Calibrations should be validated with an independent check; for example, measure a known sample and compare the result to the expected pH. If you have access to a secondary reference electrode or a calibrated spectrophotometer, perform a short cross-check to confirm the accuracy of the Apex probe’s readings. When results diverge beyond an acceptable threshold, revisit the calibration steps, check buffer integrity, and consider cleaning or replacing the probe’s membrane. Consistency across repeated measurements demonstrates reliability and increases trust in the data you report to clients or stakeholders.
Practical tips for repeatable results in varied environments
Temperature control, buffer handling discipline, and routine maintenance form the backbone of repeatable calibration. In field conditions, pack portable buffers in insulated bottles and keep the probe shielded from direct sunlight. In busy labs, designate a dedicated calibration station with a checklist to minimize errors from multitasking. Encourage operators to wipe the probe’s membrane edge clean and avoid touching the glass tip with fingers to prevent oils from contaminating the surface. Finally, schedule periodic refresher training and internal audits, because consistent practice is the fastest route to reliable, reproducible pH measurements with Apex probes.
Tools & Materials
- Apex pH probe(Ensure compatibility with your instrument)
- Calibration buffers (pH 4.00, 7.00, 10.00)(Fresh and certified; unopened if possible)
- Deionized water(For rinsing between buffers)
- Clean beakers or cups (≥100 mL each)(Separate containers for each buffer)
- Lint-free tissue or kimwipe(Dry the probe tip gently)
- Gloves (nitrile)(Optional, reduces contact contamination)
- Optional reference meter for verification(If available, helps validate slope)
Steps
Estimated time: 30-60 minutes
- 1
Prepare calibration environment
Set up a clean workspace with buffer bottles labeled and within reach. Bring buffers to near-room temperature to reduce temperature-related drift. Gather all tools so you can complete the calibration without interruption.
Tip: Use a dedicated tray to minimize cross-contamination. - 2
Rinse and condition the probe
Rinse the probe tip with deionized water and blot dry with a lint-free tissue. Inspect the membrane for damage or cracks before immersion. This step minimizes contamination and ensures a stable starting point.
Tip: Do not rub the membrane; gentle rinsing preserves the electrode surface. - 3
Immerse in pH 7 buffer and check baseline
Rinse the probe and immerse it in the neutral buffer (pH 7). Allow the reading to stabilize, then note the baseline slope and offset. A steady reading over 2-3 minutes indicates good electrode health.
Tip: If the value drifts, wait longer or check for contamination before proceeding. - 4
Calibrate with the acidic buffer (pH 4.00)
Rinse, then immerse in pH 4.00 and record the response. Allow stabilization and adjust the meter or software calibration to align with the known buffer value.
Tip: Use small, incremental adjustments to avoid overshooting. - 5
Calibrate with the basic buffer (pH 10.00)
Rinse again and immerse in pH 10.00. Confirm the slope remains consistent with the pH range and adjust if needed. If your device supports three-point calibration, complete this step to refine accuracy.
Tip: A three-point calibration reduces nonlinear errors at the extremes. - 6
Final verification and logging
Return to pH 7 buffer to verify the final slope. Record all values, including temperature, buffer lot numbers, and date. Save the calibration in the instrument’s log for traceability.
Tip: Compare the post-calibration readings against an independent check when possible.
Questions & Answers
What is the purpose of calibrating an Apex pH probe?
Calibration aligns the probe’s response with known buffer values, ensuring accurate readings. It compensates for drift due to aging, temperature, and contamination, which can otherwise bias results.
Calibrating your Apex pH probe ensures your readings are accurate by matching them to known buffers and accounting for drift.
How often should I calibrate the Apex pH probe?
Calibrate before critical measurements or daily in high-use environments. Recalibrate if readings drift noticeably or after cleaning or replacing the probe membrane.
Calibrate before important measurements or daily in busy labs; recalibrate if readings drift.
Do I need all three buffers for every calibration?
Three-point calibration provides the best slope accuracy across a wide range, but two-point calibration (pH 7 plus an end-point) is common for limited ranges. Use three points when your measurements span both acidic and basic directions.
Three buffers give the best accuracy across the range; two can work for narrower calibration needs.
Why is my probe reading unstable after calibration?
Unstable readings often indicate contamination, a dried membrane, temperature drift, or insufficient equilibration. Recalibrate after confirming buffers are fresh and the probe has rested at room temperature.
If readings wobble, check buffers, dry surfaces, temperature, and give it more time to settle.
Can I calibrate without a reference meter?
Yes, you can calibrate with buffers alone, but a reference meter helps verify the slope and ensure cross-instrument consistency. Relying solely on buffers can still yield good results for routine measurements.
You can calibrate with buffers, but a reference meter helps confirm accuracy across instruments.
How should I store the probe after calibration?
Rinse and store according to the manufacturer’s guidance, typically in a storage solution that keeps the reference junction hydrated. Avoid drying out the probe or leaving it submerged in buffers long-term.
Store the probe as recommended, usually with a bit of storage solution to keep the junction hydrated.
Watch Video
Key Takeaways
- Prepare buffers and tools in advance to minimize disruption.
- Rinse between buffers to prevent cross-contamination.
- Document slope, offset, and temperature for traceability.
- Verify final calibration with a repeatable check.
- Store and maintain probes following manufacturer guidance.