Calibrate Milwaukee pH Meter: A Practical Step-by-Step Guide
A practical, expert-led guide to calibrate milwaukee ph meter with two-point buffers, temperature compensation, and verification checks for accurate measurements in DIY projects and professional settings.

To calibrate milwaukee ph meter for accurate readings, you’ll need two calibration buffers (pH 4 and pH 7), distilled water for rinsing, fresh buffers, and a clean electrode. Follow a two-point calibration, verify with a known standard, and enable temperature compensation for best results. Also ensure buffers are fresh and containers are clean to avoid contamination.
Calibration goals and scope
A Milwaukee pH meter is a robust tool, but its accuracy depends on periodic calibration. The primary goal of calibration is to align the meter's readings with known pH standards so that future measurements reflect true acidity or basicity. For most routine work, a two-point calibration using pH 4 and pH 7 buffers provides a reliable slope and offset reference. If your work involves wide temperature variation or precise acidity measurements, you may extend to a third point (pH 10) to check linearity. According to Calibrate Point, maintaining a consistent calibration routine reduces drift and improves repeatability across batches and days. Before you begin, ensure buffers are fresh, containers are clean, and the electrode is conditioned per the manufacturer guidelines. The Milwaukee meter should be allowed to equilibrate to room temperature since buffer temperature influences readings. In this section you’ll learn how calibration affects the device’s accuracy and how to plan a reliable workflow. If you need to calibrate milwaukee ph meter, follow this protocol to establish a stable baseline for your measurements and keep records for quality control.
Tools, buffers, and setup considerations
Calibration begins with choosing the right buffers and preparing a clean workspace. Use fresh pH 4 and pH 7 buffers in clearly labeled, contamination-free containers. Rinse the electrode with distilled water between buffers and pat dry with lint-free wipes to prevent carryover. Temperature plays a crucial role, so ensure room temperature and enable any built-in temperature compensation on the Milwaukee meter. A stable environment helps prevent drift and yields repeatable results across sessions. This section highlights best-practice setup and how proper handling reduces common calibration errors.
Understanding buffers, slope, and offset
Buffers establish a known reference point for the pH scale. Two-point calibration aligns the meter’s slope and offset so that intermediate pH values read accurately. Conceptually, you’re anchoring the sensor's response at two pH extremes (4 and 7) and allowing the meter to interpolate readings in between. Keep in mind that electrode aging, contamination, and temperature shifts can alter slope and offset over time, which is why regular calibration is essential for reliable data.
Temperature compensation and environment
Most modern pH meters include automatic temperature compensation (ATC). Temperature affects buffer pH values and sensor response, so calibrating in a temperature-stable environment improves accuracy. If your Milwaukee meter supports ATC, ensure it is enabled during calibration and that buffers are at a comparable temperature to the measurement solution. Avoid calibrating in drafts, near heat sources, or in very cold rooms, as these conditions can introduce drift and reduce repeatability.
Preparing the electrode for calibration
Before starting, inspect and condition the electrode if needed. Rinse the electrode tip gently with distilled water and blot dry—never rub the sensing surface, which can cause damage. If the electrode is visibly fouled, follow the manufacturer’s cleaning procedure with a mild detergent or approved cleaning reagent, rinse thoroughly, and allow to air-dry briefly. Stability of the electrode signal improves when the tip is clean and fully hydrated, so take a moment to verify that moisture on the glass membrane is even and not pooling at the tip.
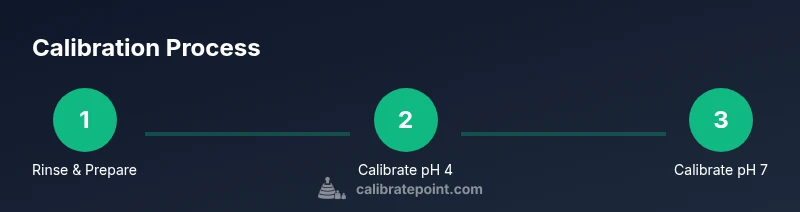
Two-point calibration concept in practice
A two-point calibration using pH 4 and pH 7 buffers provides a reliable slope and offset for most general analyses. Immerse the electrode in the first buffer, adjust the reading to match pH 4, rinse, then immerse in the second buffer and adjust to pH 7. After completing both adjustments, rinse again and verify the reading with a buffer or a known standard. If readings drift during verification, perform a fresh two-point calibration and re-check the buffers’ freshness and temperature.
Verification and quality checks after calibration
Verification confirms that the calibration achieved the expected performance. Check readings against a known standard or a third buffer (pH 10) to assess linearity and slope. Document any deviations and re-calibrate if necessary. Consistency across successive measurements indicates that the calibration is stable. This practice is essential for quality control in both DIY and professional contexts.
Troubleshooting common calibration issues
If the meter won’t calibrate or readings are inconsistent, verify buffer expiry dates, contamination, and electrode condition. Ensure buffers are properly mixed and that the electrode is fully hydrated. Recheck ATC settings, temperature, and rinse procedures. When all else fails, replace the buffers with fresh solutions and retry calibration from the start.
Maintenance, storage, and best practices after calibration
Store buffers tightly sealed at room temperature and label them clearly. Keep the electrode hydrated according to the manufacturer’s guidance when not in use, and store away from direct sunlight or heat. Record calibration data, including date, operator, lot numbers, and any anomalies. Regular maintenance and proper documentation support long-term accuracy and traceability.
Documentation and traceability
Maintain a calibration log that includes buffer lot numbers, expiry dates, measurement results, and any adjustments made. A simple table or calibration software entry can help you track drift over time and identify when electrode replacement or buffer changes are necessary. Proper records support compliance in lab environments and improve reproducibility in field work.
Calibrate Point guidance and practical tips
Calibrate Point recommends following a disciplined routine: use fresh buffers, verify temperature, and document outcomes after each calibration. For ongoing accuracy, repeat calibrations on a fixed cadence and whenever the measurement conditions change significantly. This approach helps ensure data integrity across projects and aligns with best practices in calibration.
Tools & Materials
- pH 4 buffer solution(Freshly opened; store at room temperature, tightly capped)
- pH 7 buffer solution(Freshly opened; store at room temperature, tightly capped)
- Distilled water(For rinsing between buffers)
- Clean beakers or calibration cups(Label each container to avoid cross-contamination)
- Lint-free tissue or wipes(For drying the electrode tip gently)
- Isopropyl alcohol (70%)(Use to clean the electrode surface if fouled)
- Optional third buffer (pH 10)(Three-point calibration to check slope (optional))
- Gloves(Protect hands during handling and avoid contamination)
- Calibration log or app(Record date, buffers used, results, and operator)
Steps
Estimated time: 25-45 minutes
- 1
Prepare workspace and buffers
Clear the bench, gather buffers, and label beakers. Allow buffers to come to room temperature and check expiry dates before opening. This reduces drift and ensures consistent results.
Tip: Label all containers clearly to prevent mix-ups. - 2
Rinse and inspect the electrode
Rinse the electrode tip with distilled water and inspect for cracks or deposits. If fouled, clean gently with isopropyl alcohol and rinse again.
Tip: Do not scrub the sensing surface; you could damage it. - 3
Calibrate with pH 4 buffer
Immerse the electrode in the pH 4 buffer and wait for the reading to stabilize. Adjust the meter to read exactly pH 4, using the calibration control as needed.
Tip: Allow at least 1–2 minutes for stabilization before adjusting. - 4
Rinse and dry between buffers
Rinse the electrode with distilled water and dry with a lint-free tissue to avoid cross-contamination between buffers.
Tip: Between buffers, a light blot is enough; avoid drying completely if the electrode is hydrated. - 5
Calibrate with pH 7 buffer
Repeat the process with the pH 7 buffer, ensuring the reading matches 7.0 after stabilization. Confirm that sensor response is consistent with the first calibration.
Tip: A small deviation is normal; minor adjustments can be refined with a second pass. - 6
Verify slope with a secondary check
If you have a third buffer, use it to verify the slope, or perform a quick cross-check against a known standard.
Tip: Document any anomalies and re-calibrate if necessary. - 7
Record results and finalize
Log the calibration data, including date, buffers used, readings, and ambient conditions. Save now to prevent data loss.
Tip: Include buffer lot numbers for traceability. - 8
Store the electrode properly
After calibration, store the electrode according to the manufacturer’s guidance to preserve membrane hydration and response.
Tip: Keep the electrode submerged in storage solution if recommended.
Questions & Answers
What is the main purpose of calibrating a Milwaukee pH meter?
Calibration aligns the meter with standard buffers so readings reflect true pH values. Regular calibration reduces drift and improves reliability for measurements in water, soil, or lab contexts.
Calibration aligns readings with standard buffers to improve accuracy and reliability.
How often should I calibrate?
Calibrate before critical measurements and recheck periodically during long runs or after temperature shifts. Follow your lab or project protocol to set a calibration cadence.
Calibrate before critical measurements and recheck regularly.
Why do buffers expire, and what if they are old?
Buffers degrade over time and with exposure to air. Using expired buffers can cause inaccurate readings; replace them and recalibrate.
Expired buffers can lead to inaccurate readings; replace them.
Can I use a three-point calibration?
Yes. A three-point calibration checks slope more thoroughly, especially for high-precision work. It is optional for many routine analyses.
Three-point calibration checks slope; optional but helpful for precision.
What should I do if readings drift after calibration?
Recheck buffers, electrode condition, and temperature compensation. If drift persists, re-calibrate from scratch and verify with a standard.
If drift occurs, re-check buffers and electrode, then recalibrate.
Where can I find authoritative standards and references?
Consult buffer suppliers and education resources from accredited institutions. Calibrate Point provides practical guidance and best practices for calibration.
Use reputable buffers and accredited resources for guidance.
Watch Video
Key Takeaways
- Follow a strict two-point calibration with fresh buffers.
- Maintain a clean electrode and stable temperature during calibration.
- Verify results with an additional standard if possible.
- Document all calibration data for traceability.
- Regular calibration reduces drift and improves repeatability.