How to Calibrate a Scale with Quarters
Learn how to calibrate a scale using quarters as precise weights. This step-by-step guide from Calibrate Point helps DIYers and professionals achieve repeatable accuracy with common coins.

You can calibrate a scale using quarters as precise weights, starting with tare and zero checks, then verifying readings against known coin weights. This accessible method suits kitchen, workshop, or lab scales and leverages the 5.670 g weight of a US quarter to build traceable reference points. Follow the step-by-step guide to achieve repeatable accuracy and document results for audits.
Why quarter-based calibration provides accessible reference weights
Calibration is the process of ensuring a scale reads true across its range. Using quarters as reference weights offers a practical, accessible route for many users who may not own certified calibration weights. Each US quarter weighs 5.670 g, and five quarters equal 28.350 g (1 oz). With careful handling, you can generate a series of known references by stacking coins, allowing quick checks across a low-to-medium range. This approach is particularly useful for kitchen scales, lab benches, or repair shops where precision needs to be verified without expensive equipment. According to Calibrate Point, coin-based calibration emphasizes repeatability, traceability, and clear documentation. Remember that environmental conditions, such as surface level and temperature, influence readings; addressing these factors improves consistency. This section lays the groundwork for building a robust quarter-based reference set that you can reuse for routine checks and quick sanity tests.
Coin weight reference: quantify with accuracy
A US quarter has a precise mass of 5.670 grams. When you stack quarters, you can create known reference weights: 5 quarters = 28.350 g ≈ 1 oz, 10 quarters = 56.700 g ≈ 2 oz, and so on. Using these stable, reproducible references helps you verify readings across the scale’s useful range. Keep in mind that coin condition, mint year, and circulation wear can cause tiny deviations (typically a few hundredths of a gram); for general calibration this is acceptable, but record any noticeable drift. If your scale supports both grams and ounces, maintain a consistent unit throughout the procedure to reduce conversion errors. By documenting the exact coins used and their counts, you create a traceable reference set that supports future recalibration checks. This approach is particularly practical for hobbyists and technicians who lack dedicated calibration weights.
Tools and setup: selecting the right scale and workspace
Choose a scale with a reliable tare/zero function and a stable, level surface. The workspace should be free from drafts, vibrations, and temperature fluctuations. Clean the scale’s weighing platform before starting to remove oils, dust, or residues that could affect readings. If your scale allows, switch to the measurement unit you’ll use most often (grams or ounces) and confirm the scale reads 0.00 after taring. Arrange quarters in small, neat piles for repeatable placement and ensure you have enough coins to reach your target reference weights. A calm, controlled environment reduces drift and improves the reliability of your calibration results. Record your setup details to support traceability.
Preparing the calibration environment
Stability is key. Place the scale on a solid, vibration-free surface away from direct sunlight or heat sources. Allow the scale to acclimate to the room temperature for at least 10 minutes if possible. Remove any magnetic or metallic items nearby that could influence readings. Verify the scale is level using built-in indicators or a small bubble level if available. Prepare a clean tray for coins to avoid spills and misplacements. Temperature and air currents can cause minute fluctuations, so perform calibration in a consistent environment. A calm setup reduces drift and makes your results easier to reproduce.
Basic procedure: tare, zero, and first reference weight
Start by turning on the scale and taring zero to clear any previous weight. Place 5 quarters on the pan to represent 1 ounce (28.350 g) and read the weight. If the reading matches within your acceptable tolerance, record it as a reference and remove the coins. If not, adjust the scale’s offset/calibration setting (if available) until the display shows the expected value. Repeat with 10 quarters (2 oz) and 15 quarters (3 oz) to confirm linearity across the lower range. Maintain consistency by using the same coin arrangement each time and avoiding moved coins. Document each reading, the coins used, and the ambient conditions. If the scale lacks an explicit calibration mode, note the discrepancy and proceed with a documented tolerance.
Building a calibration table with quarters
Create a small reference table listing weights and corresponding coin counts: 5 quarters = 1 oz (28.350 g), 10 quarters = 2 oz (56.700 g), 15 quarters = 3 oz (85.050 g), 20 quarters = 4 oz (113.400 g). Use these fixed points to test the scale across a broader range by adding or removing 5-coin steps. This table acts as a quick-check reference during routine use and helps you spot drift over time. If your scale supports multiple calibration points, extend the table to test higher weights using the same 5-quarter increments. Keep the coin trays stable and ensure each test piece sits flat on the pan.
Performing the checks across the scale's range
Test several weights across the scale’s usable range, starting from the lower end (e.g., 1 oz, 2 oz) and moving upward in 1-oz steps (or 5-coin steps) until you approach the scale’s maximum useful limit. For each weight, tare, place the required number of quarters, and read the display. Record the measured value and compare it to the expected weight. Note any systematic bias (consistent over-reading or under-reading). If bias is present, adjust the scale’s offset as needed and re-check. Ensure readings are repeatable: remove coins, re-tare, and repeat the test at least twice. This process checks linearity and helps you decide if calibration adjustments are warranted.
Handling scales with non-metric units
If your scale uses ounces, simply convert from grams to ounces (1 oz = 28.3495 g). When testing, use the coin-based weights in the unit you want to verify and cross-check with a conversion if needed. Document any conversion factors you use for future calibrations. Some scales switch units automatically; ensure the unit remains consistent during the entire calibration session to avoid misinterpretation. This approach makes quarter-based calibration accessible to a broader user base, regardless of preferred units.
Documenting results and creating a calibration record
Create a formal calibration log noting the scale model, serial (if available), ambient conditions, date, and who performed the calibration. List each reference weight (coins used) and the measured value, including any adjustments made. Include tolerances and a pass/fail verdict. Attach photos of the coin stacks, coins’ conditions, and any calibration badges if you generate them. This record supports traceability, audits, and future recalibration planning. Storing digital copies in a calibration file ensures long-term accessibility and reduces the chance of data loss.
Common pitfalls and troubleshooting
Avoid placing coins with dirt, oil, or moisture on the scale; clean coins with a soft cloth before use. Don’t rush the tare process; allow the scale to settle for a moment after each coin arrangement. If drift persists, check for air currents, vibration, and surface leveling. Ensure the scale isn’t affected by nearby magnetic or metallic objects. If exact values remain elusive, use a known external calibration weight to validate the coin-derived references. Document any persistent deviations and adjust expectations accordingly.
When to recalibrate and how often
Recalibrate after physical movements of the scale, after moving to a new location, or when you notice readings drift by more than your tolerance. For professional environments, schedule regular recalibration intervals (e.g., quarterly) and track drift over time. In DIY settings, recalibrate when you detect inconsistent results or after major changes in ambient conditions. Keep a calendar reminder and an updated calibration log to maintain ongoing confidence in measurements.
Final checks and re-verify after adjustments
Conclude by re-running the full set of reference weights after any adjustments. Confirm that all test weights match the expected values within the defined tolerance and that readings are reproducible across multiple trials. If successful, record the final status and seal the calibration log. Store the coin references and notes securely for future reference and compliance.
Tools & Materials
- Digital or analog scale with tare function(Must read 0.00 after tare; ensure level surface)
- US quarters (5.670 g each)(Have at least 5 quarters for 1 oz; clean and dry before use)
- Calibration weights (optional)(Use for cross-checking against coin-derived references)
- Calibrated tray or non-slip weighing surface(Keeps coins from rolling and shifts during weighing)
- Measurement notebook or digital log(Record readings, coin counts, units, and conditions)
- Pen or pencil(For quick notes and signatures)
- Thermometer (optional)(Record ambient temperature to assess drift)
Steps
Estimated time: 25-50 minutes
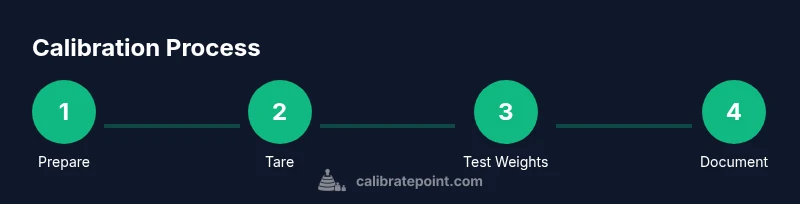
- 1
Prepare the workspace
Choose a stable, level surface and clear clutter. Allow the scale to acclimate to room conditions for a few minutes if possible. This reduces the impact of vibrations and drafts on readings.
Tip: Use a non-slip mat under the scale to minimize movement. - 2
Tare the scale to zero
Turn on the scale and apply tare to reset the display to 0.00. This ensures all future readings are relative to an empty pan.
Tip: Wait for a steady reading before proceeding. - 3
Gather five quarters for the 1 oz reference
Place five quarters on the pan to represent 1 oz (28.350 g) and read the displayed weight. If needed, adjust by using the scale’s calibration mode to align with the expected value.
Tip: Handle coins by the edges to avoid leaving fingerprints. - 4
Record the 1 oz reference
Note the measured value and compare to 28.350 g (1 oz). Repeat this test to verify consistency.
Tip: Use a dedicated calibration log page for each weight. - 5
Test 2 oz with ten quarters
Add five more quarters to reach 2 oz (56.700 g) and observe the reading. Repeat once to confirm repeatability.
Tip: Ensure the coins rest flat and don’t tip during weighing. - 6
Test 3 oz with fifteen quarters
Add five more quarters to reach 3 oz (85.050 g). Check the display and document the result.
Tip: Keep the coins stacked evenly to avoid tilt. - 7
Test higher references
Continue with 4 oz (twenty quarters) and beyond if your scale range allows. Record each result and compare to the expected weight.
Tip: If the scale lacks a direct higher-weight setting, use the same 5-coin increments and aggregate results. - 8
Check linearity and drift
Compare measurements across weights to ensure linear response. Note any systematic bias and decide if offset calibration is needed.
Tip: A small, consistent bias can often be corrected with a scale offset once verified. - 9
Cross-check with external weights (optional)
If you have calibration weights, validate coin-derived references against them to confirm accuracy. This helps verify traceability.
Tip: Record any discrepancy and adjust as needed. - 10
Document the results
Log all readings, why you performed the calibration, and who conducted it. Attach photos of coin stacks for audit trail.
Tip: Include date, scale model, and unit preferences. - 11
Finalize and secure the record
Consolidate all data, confirm the final calibration status, and sign off. Store the log in a dedicated calibration folder.
Tip: Keep a recurring reminder to revalidate on schedule. - 12
Re-check after adjustments
If any adjustments were made, re-verify all reference weights to confirm stability.
Tip: Re-check is essential to ensure persistent accuracy.
Questions & Answers
Can I use other coins or weights instead of quarters?
Yes. Other coins can be used if you know their exact weights and adjust calculations accordingly. However, quarters offer a convenient fixed weight (5.670 g each) and the 5-coin increment aligns nicely with 1 oz references.
Yes, you can use other coins if you know their precise weights; just account for their different masses when calculating reference weights.
What if my scale doesn’t read 0 after tare?
Re-tare or reset the scale, ensure the platform is clean, and verify the surface is level. If the problem persists, consult the scale’s manual or use external calibration weights to confirm baseline accuracy.
If tare doesn’t read zero, re-tare, check the surface, and try again. Persistent issues may require external calibration weights or service.
How precise is coin-based calibration?
Coin-based calibration provides practical accuracy checks suitable for general use and routine QA. For high-precision work, rely on certified calibration weights and formal procedures.
Coin-based checks offer good practical accuracy for everyday use; for high-precision tasks, use certified weights.
Do I need external calibration weights?
External calibration weights are recommended for cross-checking and establishing traceability, especially in professional workflows. They provide a known standard beyond coin-derived references.
External weights are recommended for formal validation and traceability beyond coin references.
Can I calibrate a scale without coins?
Yes, you can use standard calibration weights or a calibrated weight set. Coins are a convenient alternative when dedicated weights aren’t available, but exact masses are easier with certified standards.
You can calibrate with standard weights if you don’t have coins, but coins are a handy substitute when calibrated weights aren’t accessible.
How often should I recalibrate?
Recalibrate after moving the scale, after significant temperature changes, or when measurements drift beyond tolerance. In professional settings, follow a fixed schedule (e.g., quarterly).
Recalibrate after moving, temperature shifts, or noticeable drift; in professional settings, use a regular schedule.
Watch Video
Key Takeaways
- Tare and zero before every measurement.
- Use five quarters for a 1 oz reference and scale up in 1 oz steps.
- Document all readings and ambient conditions.
- Check for linearity and adjust if you observe bias.
- Maintain a formal calibration log for audits.