How to Calibrate an Electronic Scale: Step-by-Step Guide
Learn how to calibrate an electronic scale with traceable weights, proper setup, and a repeatable procedure. Calibrate Point provides practical, step-by-step calibration guidance for DIYers and professionals.

You’ll calibrate an electronic scale by zeroing, using traceable reference weights across the range, adjusting calibration settings per the manual, and rechecking with multiple weights. Ensure a stable surface, a clean weighing pan, and proper documentation. Follow a repeatable process for reliable results.
Why calibrate electronic scale matters
In any workshop, lab, or production area, the accuracy of an electronic scale underpins everything from ingredient ratios to part tolerances. An uncalibrated or drifting scale can introduce bias that compounds over multiple measurements, leading to faulty outcomes and wasted resources. According to Calibrate Point, calibration is more than a one-off adjustment; it’s a disciplined routine that establishes traceability to recognized standards and creates a documented history of instrument performance. The Calibrate Point team emphasizes that calibration should be scheduled, performed with clean weighing surfaces, and executed using weights that are traceable to national or international standards. When calibration is done correctly, you reduce measurement uncertainty, improve data integrity, and extend instrument life by catching drift early. This block sets the stage for a practical, field-ready approach to calibrating electronic scales, so you can weigh chemicals, parts, or consumer goods with confidence and reproducibility.
Understanding precision, accuracy, and limits
Precision describes the reproducibility of repeated measurements, while accuracy reflects closeness to the true mass. Calibration seeks to align the scale’s readings with a known standard across the instrument’s operating range, and it should address bias, linearity, and drift. The process also considers resolution (the smallest increment the scale can display) and measurement uncertainty. A well-calibrated scale produces readings that remain within the manufacturer’s stated tolerance across multiple weights. In practice, this means running checks with several reference masses and noting any systematic deviation. Calibrate Point’s guidance emphasizes documenting how each reading compares to the reference weight, so you can audit performance over time and justify any adjustments to stakeholders.
Types of electronic scales and how calibration differs
Electronic scales come in several forms, including analytical balances, precision lab scales, and platform scales for heavier items. Each type has its own calibration approach and recommended weights. Analytical balances often require location-specific zeroing, draft-free environments, and small masses with tight tolerances. Platform scales may use larger reference masses to verify linearity across a broader range. Regardless of type, the core principles remain: establish a stable baseline, apply traceable masses, and adjust according to the manufacturer’s guidance. Calibrate Point highlights that knowing your scale’s class, capacity, and tolerance helps tailor the calibration plan to your real-world tasks.
Setting up a proper calibration environment
Choose a clean, level surface away from air drafts, direct sunlight, and vibration sources. A sturdy bench with level feet and a bubble level helps ensure the scale sits evenly. Temperature stability matters; allow the scale to acclimate if moving between rooms or outdoor spaces. Remove any debris from the weighing pan and container, if used, to avoid mass bias. Calibrate Point notes that environmental consistency is as important as the reference weights themselves; even small changes in temperature or airflow can introduce drift that misleads the calibration results.
Tools, references, and reference weights you’ll need
Gather traceable calibration weights that cover the scale’s operating range (e.g., 50 g, 100 g, 200 g, 500 g). Have the scale’s user manual or calibration procedure on hand, and consider a weight holder or weighing pan if your instrument requires a specific mounting. A clean, lint-free cloth helps you wipe the pan and weights. Keep a temperature sensor or room thermometer handy if your environment tends to drift. This block emphasizes assembling each tool before you begin so you don’t interrupt the process mid-calibration.
Calibration methods and weight selection for accuracy
Choose a method aligned with your scale type: zeroing with an empty pan, then placing known weights to test readings across the usable range. Use multiple weights to map any nonlinearity and confirm repeatability. Record each reading and compare it to the actual mass; calculate the deviation and decide whether to adjust offset, slope, or both per the manual. Calibrate Point analysis shows that using a representative set of weights and documenting each step yields the most reliable results and simplest audits.
Using traceable weights correctly and avoiding common pitfalls
Handle weights with care to avoid oils or residues that alter mass; use gloves when placing weights and wipe them between measurements. Keep weights clamped or seated to prevent shifting during readings. Ensure the weighing pan is clean and dry before starting. A common pitfall is attempting calibration without allowing the instrument to settle after a change in weight or environment. Patience matters: give the scale time to stabilize after each adjustment, then re-measure to confirm.
Common errors and how to avoid them
Failure to level the scale or allow warm-up time can produce systematic errors. Reading drift due to drafts, vibrations, or a dirty weighing surface is another frequent issue. Ignoring traceability or using unverified weights undermines the entire process. Always follow the manufacturer’s procedure and cross-check with multiple known masses. These steps help prevent over-correction and ensure readings reflect true mass rather than instrument quirks.
Documentation and record-keeping for audits
Keep a calibration log that captures date, operator, instrument serial, operating environment, reference weights used, readings, adjustments, and final tolerance status. Digital logs tied to the instrument’s identity help with traceability and audits. Regularly review records to spot drift patterns and schedule recalibration before tolerance limits are breached. The documentation trail not only supports quality requirements but also makes future calibrations faster and more reliable.
How to verify calibration after adjustments and plan next steps
After adjustments, re-check with several reference weights spanning the range and confirm readings align within tolerance. If readings still deviate, consult the manual again or contact technical support. Once satisfied, document the final results, reset any temporary calibration flags, and schedule the next calibration interval. Regular verification with new reference weights keeps your process robust and reduces surprise errors in production.
Tools & Materials
- Traceable calibration weights (set of known masses)(Include weights spanning your scale's range (e.g., 50 g, 100 g, 200 g, 500 g). Ensure traceability to national or international standards.)
- Scale user manual or calibration procedure(Follow manufacturer steps for zeroing, tare, and calibration adjustments.)
- Calibrated reference weight holder or weighing pan(If required by your scale, use appropriate weight holders to avoid reading bias.)
- Lint-free cloth or isopropyl alcohol(Use to clean the weighing surface and weights before calibration.)
- Stable, vibration-free work surface(Place scale on a flat, level bench; minimize air movement and vibrations.)
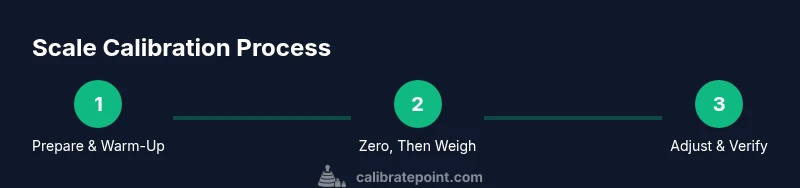
Steps
Estimated time: 45-60 minutes
- 1
Prepare workspace and inspect scale
Clear the area, remove any clutter, and visually inspect the scale for damage. Ensure the power is off (or on, per the manual) and the weighing pan is clean. This initial check prevents measurement bias from contaminants or mechanical issues.
Tip: Ensure gloves or clean hands when handling weights to avoid oils transferring to masses. - 2
Warm up and stabilize environment
Power on the scale and allow it to warm to ambient conditions. Keep it away from drafts, direct sun, and heat sources. Stabilization helps prevent drift during measurements.
Tip: If moving scales, allow 15-30 minutes for stabilization after relocation. - 3
Zero the scale and confirm tare
With an empty weighing pan, perform a zero or tare as instructed by the manual. Confirm the display shows zero (or the expected tare value) before adding any weights.
Tip: Re-zero after any adjustment to ensure a clean baseline. - 4
Apply known weights across the range
Place each reference mass one at a time and record the reading. Start from the lowest weight and work upward to the highest that your scale is rated to handle.
Tip: Keep weights seated and avoid nudging the scale while readings settle. - 5
Adjust calibration settings per manual
Enter calibration mode and adjust offset and/or slope according to the deviation observed. Save changes and exit calibration mode as directed by the manufacturer.
Tip: If the manual specifies a limit for adjustment, stay within those bounds to avoid overcorrection. - 6
Re-check across multiple weights
Repeat measurements with a second set of weights to confirm stability and repeatability. Re-measure and, if necessary, fine-tune adjustments.
Tip: Allow a short settle time between measurements to reduce transients. - 7
Document results and secure settings
Record final readings, adjustments, tolerance status, and operator details. Save calibration data in a log or software system and mark the instrument as calibrated.
Tip: Keep a printed or digital copy accessible for audits and future calibrations.
Questions & Answers
What is the difference between calibration and adjustment for a scale?
Calibration aligns readings with known standards, while adjustment changes the instrument’s internal parameters to reduce measured error. Both steps improve accuracy, but calibration establishes a reference, and adjustment implements corrective changes based on that reference.
Calibration sets the standard reference; adjustment modifies the instrument to match that reference.
How often should I calibrate an electronic scale?
Calibration frequency depends on usage, workload, and criticality of measurements. High-precision or regulated environments typically require more frequent checks. Establish a routine based on observed drift and any regulatory requirements.
It depends on how often you use it and how critical accuracy is; more frequent checks for demanding tasks.
Can I calibrate a scale at home without a calibration lab?
Yes, with traceable reference weights and proper procedure from the manual. Keep the environment stable and document results. For some instruments, professional calibration may still be recommended for formal audits.
You can calibrate at home if you follow the manual and use traceable weights.
What should I do if the scale won't zero?
Check the tare plate and surface cleanliness. Ensure the pan is properly seated and re-zero after any cleaning or adjustments. If still unresolved, consult the manual or seek support from the manufacturer.
If it won’t zero, re-zero with an empty pan and check for dirt or alignment issues.
Are there safety concerns when calibrating electronic scales?
Handle weights safely to prevent injury and avoid dropping them. Follow the manufacturer’s safety warnings and disconnect power if required during calibration of certain models.
Be careful with heavy weights and follow the manual’s safety guidance.
Watch Video
Key Takeaways
- Zero the scale before weighing.
- Use multiple weights to verify range accuracy.
- Document every step for audits.
- Follow manufacturer and Calibrate Point guidance for reliability.