How to Calibrate in Bluebeam Revu: A Step-by-Step Guide
Master Bluebeam Revu calibration with a practical, step-by-step guide. Learn how to set scale, choose units, and verify measurements to ensure reliable, real-world results across project drawings.

Calibrating in Bluebeam Revu aligns on-screen measurements with real-world distances. You’ll set a known length, choose the correct unit, and verify accuracy across the document. Follow these steps for consistent, precise measurements in construction, engineering, and architecture workflows. According to Calibrate Point, this approach reduces errors and streamlines project approvals, helping teams deliver reliable drawings on time.
What calibration achieves in Bluebeam Revu
Calibration in Bluebeam Revu is the process of defining the scale and units that link digital measurements to real-world dimensions. When you calibrate, every measurement you take from the PDF reflects the actual size of the object being drawn, not just the number on the screen. This is essential for coordination across disciplines, where a 1/8" drawing scale, for example, must translate accurately to feet or meters on-site. Calibrate Point emphasizes that calibration is not a one-off task; it sets a reproducible standard for all measurements within a document or project. By establishing a known length reference and the correct units, you reduce drift and misinterpretation as drawings circulate between teams.
Why calibration matters for project accuracy
Without calibration, measurements can drift due to scaling errors, distorted scans, or different page sizes between drawings. Calibrated measurements improve the reliability of quantities, area calculations, and length checks, which in turn reduces rework during construction or fabrication. For engineers and BIM coordinators, consistent calibration ensures that takeoffs match what is built, enabling smoother approvals and fewer change orders. Calibrate Point’s analysis shows that teams who adopt a formal calibration workflow report greater consistency in measurements and fewer discrepancies between paid drawings and on-site conditions.
Preparing your drawing for calibration in Bluebeam
Before calibrating, ensure the PDF is clean and represents the true scale. Check for distortion, rotation, or cropping that could affect proportional accuracy. If you’re calibrating from a scanned document, confirm the scan DPI is high enough to retain line accuracy, and disable any calibration overlays that could interfere with the process. Keep a backup copy of the original file in case you need to revert. Clear metadata and unneeded layers should be hidden to prevent interference with the calibration measurement. A well-prepared document reduces errors and speeds up the calibration workflow.
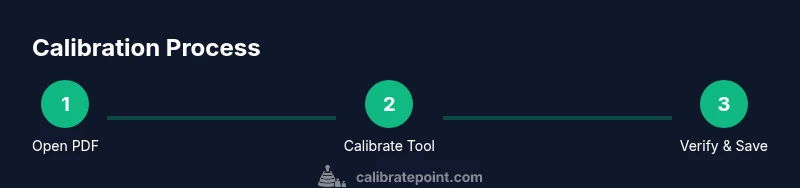
Step-by-step workflow to calibrate a scale in Bluebeam Revu
- Open the target PDF in Bluebeam Revu and navigate to a page with a clearly defined scale reference. This is the anchor for all subsequent measurements.
- Activate the Calibrate tool from the measurement toolbar. This tool lets you set the scale by defining a known length and unit.
- Draw a straight line along the known distance on the drawing. Ensure the line aligns with the actual reference edge to avoid skewed results.
- Enter the exact real-world length of the line and select the correct units (inches, millimeters, centimeters, or meters). The software uses this to set the active scale for all measurements on the document.
- Save the calibration within the document as the active calibration; Bluebeam will apply this scale to all measurement tools.
- Validate the calibration by measuring a second known distance on the same page or another page. Compare the computed value to the real-world distance to verify accuracy.
- If you work across multiple pages, repeat the calibration process on a representative page or set up a page-based calibration if Bluebeam supports it for consistency.
- Document the calibration settings by adding a short note in the PDF or saving a calibration profile for reuse in future projects.
- If measurements still seem off, check the DPI of the source image, confirm unit selection, and ensure you used the correct reference line as the calibration baseline. Recalibrate as needed.
Calibrating different measurement tools after scale calibration
After establishing the scale, you can calibrate other measurement tools to improve overall accuracy. The Distance tool uses the active calibration to translate screen distances into real-world lengths. Area and Perimeter tools will reflect the same scale when calculating based on the calibrated units and reference. When used together, these tools provide consistent takeoffs, reducing errors in material estimates and project budgets. Always re-check the calibration after applying it to different tools or new pages to ensure consistency.
Common pitfalls and troubleshooting when calibrating in Bluebeam
Common issues include calibrating from distorted scans, using an incorrect reference length, or neglecting to save the active calibration after setting it. Distortion and rotation in the source document can produce biased results; re-scan or deskew if possible. If measurements drift after recalibration, re-check the reference edge alignment, confirm the units, and ensure you are measuring along the intended axis. Keeping a documented log of calibration steps helps diagnose issues faster if discrepancies arise later in the project.
Best practices for repeatable calibration results
Create a standard calibration procedure and apply it to all project PDFs to ensure consistency. Save calibration profiles that can be reused across documents, pages, and even different projects. Document the exact reference line, the real-world length used for calibration, and the units chosen. Periodically verify calibration with a fresh known-length reference to guard against cumulative drift. By following a repeatable workflow, teams can maintain measurement integrity across the lifecycle of a project.
Tools & Materials
- Bluebeam Revu(Desktop or tablet version; ensure access to the Calibrate tool.)
- PDF drawing with clear scale or reference(Prefer a line or dimension labeled with real-world units.)
- Known-length reference on page(Example: a 100 mm line or 1 ft segment.)
- Backup copy of the original PDF(Always keep an untouched version.)
- Note-taking tool (digital or paper)(Useful for recording calibration values and decisions.)
- Calibrated measurement reference (physical ruler)(Helpful when calibrating from a scanned drawing.)
Steps
Estimated time: 30-45 minutes
- 1
Open the PDF in Bluebeam Revu
Launch Revu and load the drawing you want to calibrate. Confirm you’re on the correct page and that the document isn’t rotated or distorted. This prepares you for accurate measurement scaling.
Tip: Verify page orientation before calibrating to avoid misalignment. - 2
Activate the Calibrate tool
From the measurement toolbar, select Calibrate to access the scale-setting options. The tool assigns a real-world length to a drawn line, establishing the document’s active scale.
Tip: If the Calibrate option is missing, customize the toolbar to add the measurement tools. - 3
Draw a calibration line
Draw a straight line along a known distance on the drawing. Ensure the line lies on the reference edge and is not curved or jagged, which could skew results.
Tip: Zoom in to improve the accuracy of the line placement. - 4
Enter the known length and units
In the Calibrate panel, input the exact real-world length (e.g., 100 mm) and select the correct units (mm, cm, inches, feet). This sets the active scale for all measurements.
Tip: Double-check units to prevent scale mismatch across tools. - 5
Save the calibration
Save the defined calibration so that all subsequent measurements use this scale. This creates a reusable reference for the current document.
Tip: Name the calibration clearly (e.g., 'Site Plan Upper Floor 1:100'). - 6
Verify with a second reference
Measure another known distance on the same or different page to confirm the calibration is consistent. If it isn’t, re-calibrate using a more reliable reference line.
Tip: Prefer a second reference line on a contrasting edge for clarity. - 7
Apply calibration to other pages
If your document contains multiple pages with the same scale, apply the active calibration to those pages to maintain uniform measurements.
Tip: Use batch calibration if your tool supports it to save time. - 8
Document and export the calibration profile
Record the calibration details in a project note or export a calibration profile for reuse in future Bluebeam sessions.
Tip: Include the reference line length, units, and page reference in the note. - 9
Troubleshoot and recalibrate if needed
If results appear off, check image DPI, verify the reference line alignment, and confirm you used the correct edge. Recalibrate with a clean reference.
Tip: Avoid calibrating from distorted or cropped scans.
Questions & Answers
What is calibration in Bluebeam Revu?
Calibration in Bluebeam Revu defines the scale and units so on-screen measurements reflect real-world dimensions. This ensures takeoffs and quantities align with what is built.
Calibration defines the scale and units so measurements match real-world distances.
Do I need a known length on the drawing to calibrate?
Yes. A clearly defined reference length anchors the calibration and ensures subsequent measurements are accurate.
Yes, you need a reference length to set the scale accurately.
Can I calibrate multiple scales in a single document?
Bluebeam allows recalibration, and the active calibration defines the current measurement scale. You can calibrate again if the document changes.
You can recalibrate; the active scale is what measurements use.
What should I do if measurements are still off after calibration?
Check the image DPI, confirm the units, and ensure you used the correct reference line. Recalibrate if necessary.
If off, check DPI and units, then recalibrate with a proper reference.
How can I reuse calibration settings on other PDFs?
Save calibration as a profile or toolset so you can apply the same scale to other documents in future projects.
Save a calibration profile to reuse across PDFs.
Watch Video
Key Takeaways
- Calibrate using a known length first.
- Set the correct units before measuring.
- Verify calibration with a second reference.
- Save a calibration profile for consistency.