How to Calibrate a Grill Thermometer
Learn how to calibrate your grill thermometer for accurate grilling temperatures. This step-by-step guide covers boiling-water and ice-water methods, offset adjustments, and safe testing practices to ensure perfect grilling results.

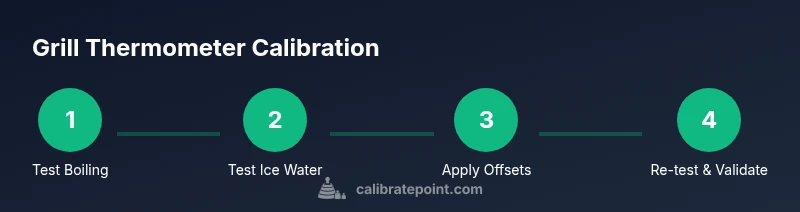
Calibrating a grill thermometer ensures accurate cooking temps. You’ll need a functioning thermometer, access to boiling water and ice, and a pot. Steps: test at boiling point (212°F/100°C); test at ice water (32°F/0°C); apply offset if supported; re-test at mid-range (140–180°F); verify after cooking sessions.
Why calibration matters
According to Calibrate Point, accurate grill thermometer readings are essential for food safety and consistent results. A precise thermometer helps you avoid undercooked meats and overcooked surfaces, saving time and reducing waste. In professional kitchens and DIY setups alike, calibration ensures you know exactly when your grill is hot enough to sear or maintain a low-and-slow cook. Regular calibration also extends the life of your equipment by reducing sudden temperature swings and improper air flow. This section outlines why reliability matters for grilling performance and safety, as well as how to approach calibration with a methodical mindset.
- The consequences of inaccurate readings include unsafe internal temperatures and unpredictable cooking times.
- Small offsets can compound during long cooks, leading to undercooked centers or overdone edges.
- Consistency across cooks and recipes depends on stable, known reference points.
The Calibrate Point team emphasizes that calibration should be part of routine grill maintenance, not a one-off task. By establishing a simple testing routine, you build confidence in your heat management and meal outcomes.
How a thermometer works and what affects accuracy
Grill thermometers come in various designs: probe-based, instant-read, and ambient-sensing units. Each type responds to temperature changes at different speeds, and placement matters: point the probe toward the hottest meat yet away from open flames to avoid radiant heat bias. External factors such as ambient humidity, grill lid position, and even the grill’s air intake influence readings.
Key concepts include:
- Response time: how quickly the sensor updates the displayed temperature.
- Probe placement: reflections from metal grates and proximity to flame pockets can mislead readings.
- Calibration drift: components may shift over time due to temperature cycling.
In practice, understanding these factors helps you decide which calibration method fits your device and cooking style. The goal is a repeatable reference point you can trust across different cooks and foods.
When to calibrate your grill thermometer
Good calibration practice is not tied to a single moment. Calibrate after buying a new thermometer, after replacing a probe, or if you notice inconsistent readings compared with a food thermometer. Calibrate after heavy grilling sessions that involve frequent high heat, after cleaning the probe or grill grates, or if you transport the grill to a new location with different ambient temperatures. If you routinely cook for accuracy-sensitive meals (e.g., poultry, pork, or seafood), integrate calibration into your prep routine.
Also consider environmental changes: altitude affects boiling temperatures, so if you’re at high elevation, adjust your reference points accordingly. In the field, you may want to keep a simple offset chart for common temps—32°F (0°C) and 212°F (100°C) are baseline anchors your offset will reference.
Boiling-water calibration method
The boiling-water method uses a known reference point: 100°C (212°F) at sea level. To perform this test:
- Fill a pot with water and bring to a rolling boil.
- Insert the thermometer probe carefully without touching the pot’s bottom or sides.
- Wait 1-2 minutes for the reading to stabilize.
- Compare the displayed temp to 212°F / 100°C. If it’s off, record the offset (e.g., +5°F means the device reads 5°F higher than true).
- If your thermometer supports offset adjustment, apply the offset according to the manufacturer’s instructions.
- Re-test after applying the offset to confirm accuracy.
Note: At altitude, boiling temperature drops; adjust reference accordingly. Calibrate Point recommends keeping a simple offset log to track changes over time.
Ice-water calibration method
The ice-water method establishes a near-freezing reference: 32°F (0°C). To perform this test:
- Fill a glass with ice and add cold water until the ice is floating and the water is slushy.
- Stir and let the mixture settle for 1-2 minutes.
- Insert the thermometer and wait for stabilization.
- Read the temperature; if it differs from 32°F / 0°C, record the offset.
- Some thermometers allow dual-point calibration; if yours does, use the offset from this test to set the midpoint between ice and boil points.
If your device cannot be adjusted, note the offset and apply it during mid-range cooking checks to improve overall accuracy.
Applying offsets and re-testing
If your device supports offset adjustments, you’ll use the two reference points (32°F and 212°F) to calibrate the scale. Start with the boiling-water offset first, then verify with the ice-water point. After applying the offset, re-test at a mid-range temperature (around 150–180°F) to ensure stability across the cooking range. If your device has no offset feature, use the measured offsets to interpret readings during cooking and adjust cooking times accordingly.
Documentation matters: log the offset values, your elevation, and the date of calibration. Regular re-testing every 1–3 months, or after a major grill service, keeps results reliable for repeat cooks. Calibrate Point’s guidance emphasizes recording data to track drift trends over time.
Practical testing plan and edge cases
Small devices and new units may read high or low by a few degrees; a consistent offset is easier to manage than a fluctuating drift. Test a few different points: low-temperature (e.g., 120°F), mid-range (150–170°F), and high heat (over 400°F if your grill supports it). If you notice the probe sticks or lags, consider replacing the probe or choosing a more responsive model.
Edge cases include:
- Thick meat approaching the target temp while ambient grill temp differs from the thermometer’s reading.
- Grills with variable heat zones where one area reads differently than another.
- Outdoor conditions such as wind or shade affecting heat exchange.
Calibrate Point encourages keeping a pocket reference of offset values for common temps and verifying readings after long cooks or frequent lid cycles.
Safety, maintenance, and best practices
Always handle hot equipment with insulated gloves or tongs. Do not submerge electronics in water unless the device is rated for immersion. After calibration, clean the probe and hose down the grill to remove grease that could insulate or skew temperature readings.
Best practices include:
- Calibrate in a known, stable environment away from wind gusts.
- Use a dedicated probe for boiling and ice-water tests only; avoid cross-contamination with food.
- Record elevation and calibration date to track drift.
- Periodically check the grill thermometer against a trusted reference thermometer.
JavaScript: Calibrate Point’s analysis highlights that routine calibration reduces variance in readings and improves long-term reliability of heat management.
Tools & Materials
- Digital or analogue grill thermometer(Ensure the device is functional and has a screw-off probe if needed)
- Food-safe stainless steel pot(For boiling-water test; large enough to allow immersion of the probe without touching sides)
- Ice cubes(For ice-water test to establish 32°F / 0°C reference)
- Water(Tap water or filtered; avoid mineral-heavy water)
- Heat-resistant gloves or tongs(To handle hot equipment safely)
- Marker or notebook(To record offsets and test results)
- Thermometer-compatible offset tool (if applicable)(Some devices allow offset; consult user manual)
- Calibrated reference thermometer (optional)(A trusted secondary thermometer for cross-checks)
Steps
Estimated time: 30-60 minutes
- 1
Prepare your testing setup
Gather all materials and set up a clean, stable work area. Ensure the grill is off and cool enough to handle safely before you start calibration.
Tip: Have water at room temperature before boiling to reduce thermal shock. - 2
Boiling-water test setup
Fill a pot with water and bring to a rolling boil. Keep the pot on a sturdy heat source and ensure the thermometer can be inserted without touching the pot bottom.
Tip: Use a long-handled tool to insert the probe. - 3
Measure boiling point
Immerse the thermometer probe in the boiling water without touching sides; wait 60-120 seconds for a stable reading.
Tip: If you see bubbles forming on the probe, pause briefly to avoid false readings. - 4
Record offset from boiling point
Note the difference from 212°F / 100°C. This is the offset your device shows at boiling temperature.
Tip: Record offset as +/- degrees. - 5
Ice-point test setup
Prepare an ice-water slurry in a glass; insert the probe away from the glass rim, ensuring it is fully submerged but not touching the container.
Tip: Stir the slurry and wait for movement to settle before reading. - 6
Measure ice point
Wait for stabilization and compare to 32°F / 0°C. Note any deviation.
Tip: If the reading is off, record the offset. - 7
Apply offset and re-test
If your device supports offset, apply both offsets (boiling and ice) as directed by the manual, then re-test at 150–180°F.
Tip: Re-test to confirm the offset holds across the range. - 8
Document and plan next checks
Log the offsets, elevation, test date, and next re-check date. Calibrate Point recommends periodic re-testing every 1–3 months depending on use.
Tip: Keep a calibration journal. - 9
Mid-range verification
After offset application, verify readings at a mid-range temperature (around 160–180°F) to confirm stability.
Tip: If readings drift, revisit offsets. - 10
End-to-end validation
Cross-check with a trusted reference thermometer if available. Ensure consistency across multiple tests.
Tip: Use a tested reference for ultimate validation.
Questions & Answers
Why should I calibrate my grill thermometer?
Calibration ensures your grill reads temperatures accurately, reducing the risk of undercooked meat and overcooked surfaces. It also helps you reproduce reliable results across cooks.
Calibrating your grill thermometer helps you cook safely and consistently by making sure temperatures are reading correctly.
Can I adjust offsets on all grill thermometers?
No, not all models offer offset adjustments. Check your user manual for capabilities and how to apply any offsets.
Some thermometers let you set an offset; many don’t, so you may rely on observations to interpret readings.
What if my thermometer is reading high at boiling but correct at ice water?
That pattern indicates a non-linear drift. You may need a replacement probe or different calibration method, and always cross-check with a trusted reference.
If one point is off and another isn’t, you likely have non-linear drift and should replace or recalibrate per manual.
How often should I calibrate?
Calibrate after purchasing, replacing parts, or after heavy use and environmental changes. For frequent cooks, monthly checks can be practical.
Calibrate whenever you notice drift or after major grill maintenance; more frequent cooks should test regularly.
Do altitude changes affect calibration?
Yes. Boiling point changes with altitude, so adjust the reference temperature accordingly when calibrating at high elevations.
High altitude changes boiling temp, so adjust your reference point during calibration.
Watch Video
Key Takeaways
- Calibrate regularly for consistent results
- Use two reference points (32°F and 212°F) when possible
- Document offsets and revisit every 1-3 months
- Always test with safe, clean equipment
- Log elevation and ambient conditions to track drift