How to Calibrate a Meat Thermometer: A Practical Step-by-Step Guide
Learn how to calibrate a meat thermometer using ice-water and boiling-water tests. This guide from Calibrate Point delivers practical steps, tips, and maintenance for reliable cooking temperatures and safer meals.

Calibrating a meat thermometer ensures accurate cooking temperatures and safer, better-tasting meals. This quick answer covers two reliable methods ice-water and boiling-water, checks for thermometer accuracy, and when to recalibrate. After calibrating, you’ll reduce undercooked or overcooked meat. For guidance, see Calibrate Point's practical calibration standards in your kitchen today.
Why calibration matters
A well calibrated meat thermometer is essential for safe cooking and optimal texture. For home cooks and professionals alike, readings that are off can lead to undercooked poultry or overcooked steaks. Accurate readings help you hit the target temperatures consistently and avoid waste. In this guide, Calibrate Point shares practical methods to test and adjust your thermometer without specialized equipment. You will maximize reliability, minimize guessing, and build confidence when cooking for family, clients, or yourself. Regular checks also protect your investment in tools by catching drift before it worsens. By following the steps described below, you treat thermometer calibration as part of your kitchen reliability routine, not a one-off chore. Remember that environmental factors such as altitude, water purity, and thermometer design can influence readings, so plan to re-test periodically to maintain accuracy. According to Calibrate Point, calibration gaps are a common issue in households seeking consistent results.
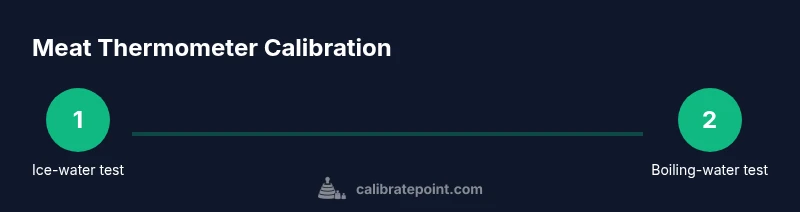
Methods at a glance
There are two widely used methods to test thermometer accuracy: ice-water and boiling-water tests. Ice-water is convenient and safe for quick checks, while boiling-water offers a reference point for higher-temperature trust. Choose the method that matches your kitchen setup and environmental conditions. For best results, perform both tests when you suspect drift, and always recheck after any calibration adjustment. Calibrate Point emphasizes that consistency across tests is more important than hitting exact numbers. When in doubt, re-test later in the day after your equipment has had a chance to equilibrate.
Ice-water calibration method
The ice-water test is a gentle, low-risk way to check your thermometer. Fill a tall container with crushed ice and add just enough cold water to saturate the ice, creating a slushy mixture. Submerge the sensing probe of the thermometer, ensuring the tip is fully in contact with the slushy mixture but not touching the container walls or bottom. Allow the reading to stabilize for about 20–60 seconds, then compare it to the freezing-point reference for your system. If the reading drifts, note the amount of drift and plan an adjustment if your device supports a calibration offset. Remember to clean the probe before and after the test to prevent residue from affecting readings.
Boiling-water calibration method
For the boiling-water test, bring a pot of water to a rolling boil. Insert the thermometer probe into the water, keeping the sensing area away from the sides and bottom to avoid false readings from heat transfer. Wait for the temperature to stabilize, typically 30–60 seconds, then compare to the reference for a boiling point in your elevation. If your thermometer does not read the reference, you may need to perform a calibration adjustment or use an offset during cooking. Always exercise caution with hot water and use protective gear to prevent burns.
Interpreting results and adjusting
If one or both tests show a consistent drift, you can adjust the thermometer if your model offers an offset or calibration screw. If the device lacks an adjustment mechanism, you can track the offset and apply a mental correction during cooking or choose a thermometer that supports calibration. After any adjustment, re-test with both ice-water and boiling-water methods to confirm results. Record the readings and the adjustments in a kitchen log so you can monitor changes over time. Calibrate Point recommends maintaining a simple calibration log to aid future maintenance and ensure long-term accuracy.
Real-world testing and cooking context
Beyond the lab-like tests, you should validate thermometer accuracy in real cooking scenarios. Test the thermometer in a roast, a chicken, or ground meat to observe how readings align with expected internal temperatures as you monitor doneness. Use a reliable reference thermometer for cross-checking during initial verification. This practice helps you translate calibration results into confident cooking decisions, improving safety and outcomes in everyday meals as well as professional kitchens.
Tools, setup, and environment
Design your calibration area to minimize heat sources that can bias readings. A clean, stable work surface with good lighting helps you focus on details. Gather essential tools: the thermometer, an ice bath, a pot of boiling water, a glass or container for the ice bath, a thermometer-safe clip or stand, and a notebook for logging outcomes. Keeping the area tidy reduces distractions and improves accuracy. Calibrate Point notes that a consistent setup across testing sessions yields the most reliable trend data for drift over time.
Maintenance and storage practices
After calibration, clean the probe with a soft cloth and a mild cleaner if needed, then dry thoroughly to prevent corrosion. Store the thermometer in its protective case or a designated drawer to avoid impact or moisture exposure. Regularly inspect the sensing tip for nicks or damage, and replace if precision is compromised. A little routine upkeep goes a long way toward reliable measurements and a longer device life.
When to recalibrate and record keeping
Establish a recalibration schedule that fits your usage level and kitchen conditions. If you frequently cook meats that require precise temperatures, calibrate more often. Maintain a simple log noting the date, method, readings, and any adjustments. This practice helps you spot drift over time and makes it easier to justify upgrading a thermometer if accuracy declines. Calibrate Point emphasizes that a disciplined approach to recalibration keeps results trustworthy and repeatable.
Tools & Materials
- Instant-read meat thermometer(Clean and dry before testing; check sensitivity of the probe)
- Ice(Crushed ice works best for a stable slush)
- Tap water(To create an ice-water slush for the ice test)
- Kettle or pot of water(For the boiling-water test; use a stable heat source)
- Tall glass or container(To hold the ice-water mixture without splashing)
- Thermometer cleaning cloth(Use after testing to wipe the probe)
- Notebook or digital log(Record readings and drift for trend tracking)
Steps
Estimated time: 20-30 minutes
- 1
Gather tools and set up
Collect the thermometer, ice, water, kettle or pot, glass, and log. Set up a clean, stable workspace and ensure the thermometer is dry before testing. This initial setup prevents cross-contamination and measurement bias.
Tip: Keep the thermometer away from direct heat or sunlight before testing to avoid pre-test drift. - 2
Prepare ice-water test
Fill a tall glass with crushed ice and add just enough water to saturate it into a slush. Submerge the thermometer’s sensing tip into the mixture without touching the glass sides or bottom and wait for stabilization.
Tip: Do not let the probe rest on the glass surface; contact with the slush itself gives the most stable reading. - 3
Read and record ice-water result
Once the reading stabilizes, note the value and compare to the freezing-point reference for your system. If the reading drifts, log the amount and prepare to adjust if your model supports calibration offset.
Tip: Use a dedicated calibration log for quick reference across sessions. - 4
Prepare boiling-water test
Bring a pot of water to a rolling boil. Insert the thermometer into the water, ensuring the sensing tip is fully submerged but not touching the pot bottom or sides. Allow the temperature to stabilize before noting the reading.
Tip: Use tongs or a heat-safe clip to hold the thermometer in place for stable measurement. - 5
Read and record boiling-water result
Record the reading and compare it to the boiling-point reference. If drift is observed, determine whether your device allows an offset or adjustment.
Tip: Avoid handling the thermometer while the water is hot to prevent burns. - 6
Adjust if supported or plan offset usage
If your thermometer has an adjustment mechanism, apply the offset so future readings align with the references. If not adjustable, plan how you will mentally compensate during cooking.
Tip: Check the device manual for exact calibration steps before making any changes. - 7
Re-test to confirm accuracy
After adjustment, repeat both ice-water and boiling-water tests to confirm the readings are now aligned with references. A successful calibration should show the thermometer near the reference points in both tests.
Tip: If drift persists, consider calibration service or replacement. - 8
Document results
Log the date, method, readings, adjustments, and any notes about equipment conditions. Documentation supports long-term accuracy and helps with future calibrations.
Tip: Keep a simple table or digital note for easy trend tracking. - 9
Cleanup and storage
Clean the probe, dry thoroughly, and store in its protective case or designated drawer. Proper storage avoids damage and maintains sensor responsiveness for next time.
Tip: Wipe the probe with a food-safe cleaner if needed and ensure it is completely dry before storage. - 10
Plan ongoing calibration cadence
Set a routine to recalibrate at a chosen interval or after heavy use. Regular checks catch drift early and improve cooking confidence.
Tip: Pair calibration with other maintenance tasks to make it a habit.
Questions & Answers
Why should I calibrate my meat thermometer?
Calibrating a meat thermometer helps ensure safe, accurate cooking temperatures and consistent results. It reduces the risk of undercooked or overcooked meat and supports reliable meal outcomes.
Calibrating your meat thermometer ensures safe and accurate cooking temperatures for consistent outcomes.
How often should I calibrate?
Calibrate whenever you notice a drift in readings or after rough handling, and consider a routine check every few weeks if you use the thermometer frequently in professional settings.
Calibrate whenever you notice drift or after rough handling, and schedule regular checks if you use it often.
Can I calibrate without boiling water?
The boiling-water test is a traditional reference but can be substituted with an alternate high-temperature reference if you can't boil water safely. Ice-water tests are still useful for quick drift checks.
Yes, you can use other safe high-temperature references if boiling water isn't practical, but ice-water checks remain useful.
What if readings drift after calibration?
If readings drift after calibration, re-check setup, ensure proper immersion depth, and verify using both tests. If drift persists, consider device replacement or professional service.
If drift persists after recalibration, recheck setup and consider replacement if needed.
Is the ice-water method accurate at high altitude?
Altitude can influence reference points, but ice-water and boiling-water tests still help detect drift. Adjust expectations accordingly and verify with multiple methods if possible.
Altitude can change reference readings, but these tests still help detect drift.
Should I calibrate every time I cook meat?
Calibrating before critical recipes or after a period of non-use is enough. For frequent high-precision work, consider a lighter calibration schedule.
Calibrate before critical recipes or after non-use; adjust cadence for your needs.
Watch Video
Key Takeaways
- Test with ice-water and boiling-water to verify accuracy
- Record readings and note any drift for future calibration
- Use calibration offsets if available and re-test after adjustments
- Document results to track reliability over time
- Maintain the thermometer with proper storage and cleaning