How to calibrate a Taylor meat thermometer
Learn how to calibrate taylor meat thermometer with ice-water and boiling-water tests, step-by-step instructions, and best practices for reliable cooking temperatures.

Master accurate cooking temps by calibrating your Taylor meat thermometer. Start with ice-water (32°F/0°C) and boiling-water (212°F/100°C) tests at sea level, clean the probe, and adjust via the calibration nut or digital setting. This quick guide outlines tools, steps, and safety tips for long-term reliability.
Understanding Taylor Meat Thermometers and Why Calibration Matters
Taylor meat thermometers are a staple in home and professional kitchens for verifying meat doneness. They come in dial and digital formats, each with a temperature range typically suitable for roasting and grilling. However, even the best instruments drift over time due to pH exposure, cleaning, or temperature cycling. A drift of a few degrees can be the difference between a perfectly cooked roast and an overdone meal. For cooks who rely on precision—whether you’re grilling steaks, roasting poultry, or smoking brisket—calibrating your thermometer is a simple, essential maintenance task.
According to Calibrate Point, accuracy in temperature readings translates to food safety and flavor consistency. We recommend performing a calibration check at least every few months if you use the device frequently, and certainly after any impact or drop that could misalign the sensing element. The goal is not to test every cook, but to ensure your instrument reads true at standard reference points. In practice, you should use iced water and boiling water tests to anchor the instrument to known temperatures. If your unit provides alternate reference temperatures (for example, at altitude) be prepared to adjust expectations accordingly. By following a consistent procedure, you’ll build confidence that your Taylor thermometer reflects the true internal temperature of your food, not an artifact of the instrument itself. This article explains how to calibrate taylor meat thermometer and maintain accuracy over time.
Calibration Methods: Ice-Water and Boiling-Point Tests
The ice-water test is the simplest and most common initial check. Fill a glass or container with crushed ice and add just enough water to reach a slushy mixture around 0°C (32°F). Submerge the probe into the ice-water, avoiding contact with the sides or bottom, and wait for a stable reading. If the thermometer reads 0°C/32°F, it is within tolerance. If it’s off by more than 1–2 degrees, you should pursue calibration. The boiling-point test requires water to reach a rolling boil, then you insert the probe, again avoiding contact with the container walls. At sea level, water boils at 100°C/212°F; readings within a couple of degrees of these values indicate healthy performance. Altitude and air pressure affect boiling temperatures, so consider corrections if you’re cooking at higher elevations. Calibration adjustments depend on the device type: analog dial thermometers typically use a small calibration nut at the stem base; digital models may have a calibration menu. Always dry the probe after testing and store the thermometer away from heat sources to minimize drift. For safety, handle hot water with heat-resistant gloves and use tongs to retrieve the probe when needed.
Interpreting Readings: How to Identify Drift and When to Recalibrate
Readings that consistently drift in one direction across both the ice-water and boiling-water tests indicate a calibration offset that should be corrected. Most consumer Taylor thermometers have a tolerance of about 1–2 degrees, but even small deviations can affect cooking outcomes, especially for poultry and fish where precise temperatures matter for safety. If you notice asymmetrical drift—such as ice-water correct but boiling-water consistently high—you may only need a partial adjustment or rechecking the calibration nut. If both tests drift outside tolerance, perform a full recalibration following the manufacturer’s adjustment method. Keep in mind that extreme temperatures, frequent cleaning with abrasive cleaners, or dropping the device can contribute to drift. Document any observed drift, then schedule regular checks as part of kitchen maintenance.
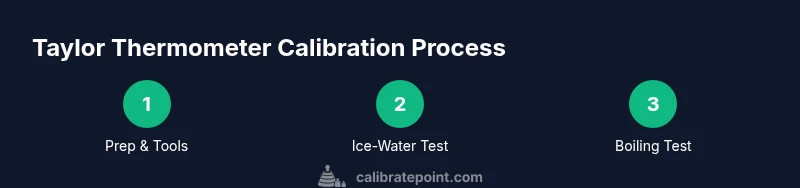
Step-by-Step Calibration Guide
This section translates the theory into a practical workflow. The steps below mirror the actions you’ll perform in the standalone STEP-BY-STEP block and are designed to be followed in sequence for reliable results. Begin with a clean probe, prepare both reference baths, and proceed to read, adjust, and verify. If you own a dial thermometer, the adjustment is typically a small rotation of the calibration nut; for digital units, access to a calibration menu is common. Always ensure the probe (not the handle) is fully immersed in the reference liquid during readings. After calibration, wipe the stem and let it reach room temperature before the next use. Finally, log the results to track changes over time and catch future drift early.
Maintenance and Best Practices for Long-Term Accuracy
Calibrating is not a one-off task. Regular maintenance preserves accuracy and extends device life. Clean the probe with a mild solution after each use, dry thoroughly, and avoid exposure to corrosive cleaners that can deteriorate sensor materials. Store the thermometer away from heat sources, direct sunlight, and moisture when not in use. If you own a dial thermometer, inspect the dial for cracks and ensure the adjustment nut turns smoothly without requiring excessive force. For digital devices, keep the battery fresh and avoid leaving the unit in hot cars or near ovens, which can affect electronics. Consider calibrating after accidental drops or after replacing batteries, and always record the date and results. This is not only about precision but also about traceability for professional settings.
Troubleshooting Common Issues with Taylor Thermometers
If readings are consistently inconsistent, first check the calibration: make sure you’re testing with the thermometer fully submerged and that the reference liquids are at the correct temperature. If there is no obvious drift, the probe could be damaged or the sensor may be failing; in this case, consult the manufacturer’s warranty or consider replacement. For sticky or unresponsive digital models, attempt a soft reset or recalibration from the settings menu. Avoid exposing the thermometer to rapid temperature changes, as thermal shock can degrade performance over time. If you use the thermometer in a commercial kitchen, consider keeping a calibrated backup unit for more reliable workflow.
Tools & Materials
- Taylor meat thermometer (dial or digital)(Ensure it's clean and functional before testing)
- Ice water bath(Crushed ice with just enough water to reach 0°C/32°F)
- Boiling water bath (sea level)(Rolling boil; use a deep pot and stable setup)
- Calibrated reference thermometer (optional but recommended)(Two-point verification improves confidence)
- Calibrated adjustment tool (calibration nut wrench or small pliers)(Only for dial thermometers; handle gently)
- Dry cloth or towel(Dry probe after tests to prevent corrosion)
Steps
Estimated time: 15-25 minutes
- 1
Gather tools and prep workspace
Collect the thermometer, ice water, boiling water setup, and any reference tools. Clear the area of clutter and ensure you have a stable surface. This reduces errors during the tests and protects the devices from cross-contamination.
Tip: Label the test surfaces and keep a small notebook to log readings. - 2
Prepare ice-water bath
Fill a tall glass or container with crushed ice and add enough water to create a slushy mix at 0°C/32°F. Submerge the thermometer probe fully into the ice-water without touching sides or bottom. Wait for a stable reading before recording.
Tip: Crushed ice melts slowly; avoid creating a watery mix that skews results. - 3
Prepare boiling-water bath
Bring a pot of water to a full rolling boil. Submerge the probe into the boiling water, avoiding contact with the pot's sides. Wait a few seconds for the reading to stabilize and record the temperature.
Tip: Do not let the probe rest on the bottom—keep it centered in the liquid. - 4
Compare readings and decide on adjustment
If the ice-water reading is not 0°C/32°F or the boiling-water reading is not 100°C/212°F (sea level), you have an offset. Note the difference and determine which calibration method applies to your unit.
Tip: Two-point calibration is most reliable; avoid guessing based on a single test. - 5
Make the calibration adjustment
For dial thermometers, rotate the calibration nut at the stem base until the needle aligns with the correct reference temperature. For digital units, use the calibration menu or button sequence per the manual.
Tip: Make small adjustments and re-test after each minor turn or setting change. - 6
Re-test and verify
Repeat both the ice-water and boiling-water tests to confirm readings now match the reference temperatures within tolerance. If not, re-adjust as needed and check again.
Tip: Avoid over-tightening the nut; excessive force can damage the sensor. - 7
Document results and cleanup
Record the date, device model, calibration values, and test outcomes. Clean and dry all tools, store the thermometer away from heat sources, and log the next calibration date.
Tip: Keeping a calibration log helps you track drift over time and plan maintenance.
Questions & Answers
How often should I calibrate a Taylor meat thermometer?
Calibrate before major cooking sessions or at least monthly for frequent use. Calibrate again after any drop or exposure to extreme temperatures.
Calibrate before big cooks or once a month, and after any drop or exposure to heat.
Can I calibrate if the reading is within tolerance?
Even if readings seem acceptable, periodic calibration helps maintain accuracy over time and prevents gradual drift from going unnoticed.
Even if readings seem okay, it's best to calibrate regularly to prevent drift.
What should I do if both ice-water and boiling-water tests are off?
You likely have a calibration issue. Re-check the process, adjust, and retest. If the problem persists, consult the user manual or contact Taylor support.
If both tests are off, re-check the steps, adjust, and retest; if it still fails, seek support.
Is altitude a factor in boiling-water calibration?
Yes. Boiling temperature decreases with altitude. Use a correction chart or reference thermometer to adjust expectations accordingly.
Altitude lowers boiling temperature; adjust with a correction chart.
What if my thermometer can't be adjusted?
If there is no calibration adjustment available, rely on best practices, consider service or replacement, and document the device's limitations.
If it can't be adjusted, consider service or replacement and log its limits.
Should I use a second thermometer as a reference?
Using a calibrated reference thermometer can improve confidence in your results, especially for critical foods.
A calibrated reference thermometer helps verify readings during calibration.
Watch Video
Key Takeaways
- Calibrate using two reference points (ice and boil) for reliability
- Small offsets matter; adjust and re-test until within tolerance
- Record calibration results for traceability
- Keep probes clean and dry between tests
- Altitude affects boil temperature; adjust expectations accordingly