How to Calibrate a Meat Thermometer That Starts at 120
Learn how to accurately calibrate a meat thermometer that starts at 120°F, using ice water and boiling water references, offset adjustments, and practical cooking guidance.

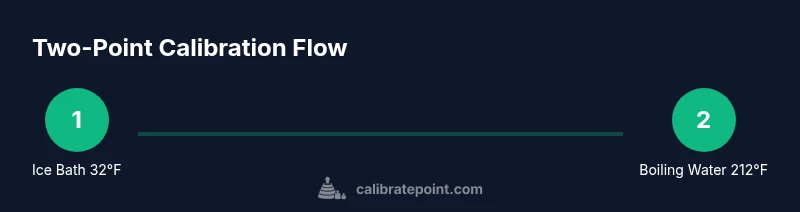
You can calibrate a meat thermometer that starts at 120°F by using two standard reference points: ice water at 32°F and boiling water at 212°F (at sea level). If your model has a calibration screw or function, adjust to align the readings with those references; otherwise note the offset and use it for cooking guidance.
Why accurate thermometer calibration matters
Thermometers are the only reliable way to verify that meat reaches safe internal temperatures. An inaccurate reading can mean undercooked food or overcooked meat that wastes time and money. According to Calibrate Point, reliable calibration is essential for consistent results across batches and for maintaining food safety standards. When a thermometer starts at 120°F, you might assume you can compensate by cooking longer, but a fixed offset can still mislead doneness judgments and timing. Regular calibration turns a kitchen tool into a repeatable instrument, giving you confidence that the thermometer reports true temperatures from roughly the mid range into higher cooking temps. Treat calibration as maintenance, especially after a drop, exposure to heat, or rough handling. In this section we explore why accuracy matters, the implications of a 120°F starting point, and a practical approach to dimensional checks that minimize guesswork.
Understanding why starting at 120°F complicates calibration
A thermometer that only displays temperatures starting at 120°F cannot show the typical ice bath or boil references directly. This makes a two-point calibration harder, because one reference (the ice point at 32°F) is out of reach for direct measurement. Digital models with a fixed minimum or analog dials with a built-in offset may still offer a way to record an offset and interpret readings correctly. The key is to determine whether your device supports an offset or hardware calibration. If it does, you can align the displayed value at a known reference (for example, boiling water) and then use that offset to interpret cooking temperatures. If your device has no adjustment mechanism, you will need to rely on a separate, calibrated reference thermometer for checks and adjust your cooking expectations accordingly.
Reference points you can rely on: ice water and boiling water
In a perfect world you would calibrate to both the ice point and boiling point. Ice water is 32°F (0°C) and boiling water is 212°F (100°C) at sea level. If your thermometer can display both endpoints, place it in a large, stable container of ice water and verify that you read 32°F. Then heat water to a rolling boil and insert the thermometer, ensuring it does not touch the sides or bottom of the pot. Read 212°F. Note that altitude and air pressure can shift boiling temperature slightly, so use this method primarily at or near sea level for a reference. For devices with a high minimum reading, you may only be able to reliably verify the boil point and should document an offset for practical kitchen use, with the understanding that accuracy may be limited in the lower range.
Adjusting non-adjustable thermometers and offset strategies
If your model has a calibration nut, screw, or in-menu offset option, adjust the device until it aligns with the boiling point in 212°F water. Record the offset and test at another known, readable temperature within range if possible. For non-adjustable thermometers, use a calibrated reference thermometer to measure the same sample and note the difference; apply that offset in your cooking notes to estimate doneness. Always re-test after making any adjustment and keep a simple log of the readings, offsets, and the cooking temperatures you target. This practice helps you approximate true temperatures even when a full two-point calibration is not feasible on a high-minimum device.
Common mistakes and how to avoid them
Avoid calibrating with hot oils or ethyl alcohols, as these can damage sensors or give misleading readings. Do not let water boil over or the thermometer tip touch the pot’s bottom or sides, which skews results. Never force-fit a calibration adjustment if your model lacks a true calibration mechanism; forcing can permanently mislead readings. When performing ice water checks, ensure the ice is crushed and the water is slushy, not simply cold water; in boiling water tests, ensure the water is at a full rolling boil and the probe is fully submerged without touching container surfaces. Finally, always dry the probe before use and store it in a stable environment to prevent drift between calibrations.
Safety and care when calibrating
Handle hot water with heat-resistant gloves and use long tongs to place and remove probes. Work in a well-ventilated area and keep children away from hot pots. Sanitize the probe before and after calibration and avoid cross-contamination by using separate utensils for calibration water and raw foods. If you notice persistent skew after several tests, it may be time to replace or service the thermometer. Regular maintenance, gentle handling, and mindful calibration routines extend the life of your tool and improve consistency in cooking results.
Tools & Materials
- Meat thermometer (the one to calibrate)(Primary device; ensure it is clean and dry before starting)
- Reference thermometer (NIST-traceable recommended)(Used to verify reference temperatures against your device)
- Ice water bath(Crushed ice with water to create a stable 32°F reference)
- Rolling boil water(Boiling water at sea level; do not touch the bottom of the pot with probe)
- Measuring container and pot(Size large enough to keep thermometers fully submerged without touching sides)
- Tongs or heat-resistant gloves(Safe handling for boiling water and hot probes)
- Soft cloth or paper towels(Dry the probe between checks)
- Calibration log(Record readings, offsets, and date of calibration)
- Mild cleaning solution(For cleaning after calibration)
Steps
Estimated time: 30-45 minutes
- 1
Check for calibration features
Inspect your thermometer to see if it has a calibration nut, offset option, or in-device menu for calibration. This determines whether you can physically adjust the reading. If no adjustment is available, plan to document offsets and rely on a reference device for verification.
Tip: If there is an adjustment mechanism, do a trial adjustment first to see how the display responds before proceeding to reference temperatures. - 2
Prepare two reference setups
Set up an ice water bath for a 32°F reference and a boiling water bath for a 212°F reference at sea level. Ensure the water is free of bubbles that might affect readings and that the probe is fully submerged without touching the container.
Tip: Use a large container so the probe can be immersed comfortably and avoid skimming the surface film that forms on boiling water. - 3
Test in ice water if achievable
Insert the probe into the ice water and read the temperature. If your device can display temperatures below 120, verify it reads close to 32°F. If not, note the device's limitation and plan the offset approach.
Tip: Move the probe slowly and avoid stirring water too aggressively to prevent temperature fluctuations. - 4
Test in boiling water
Immerse the probe in rolling boil water and compare the reading to 212°F. If the display reads a higher or lower value, record the offset.
Tip: Keep the probe away from the pot’s sides and bottom to avoid heat conduction errors. - 5
Apply the offset or adjust (if possible)
If your thermometer offers a calibration screw or offset feature, set it so the boiling water test reads as close to 212°F as possible. If no adjustment is possible, document the offset and plan how to use it during cooking.
Tip: Make small adjustments and recheck to avoid overshooting the target. - 6
Document results and set a schedule
Log the offset and the date of calibration. Establish a future calibration date based on usage and drift observed. Re-test after major temperature changes or after rough handling.
Tip: Keep the log in a visible place near the thermometer for quick reference before cooking.
Questions & Answers
Can I calibrate a meat thermometer that starts at 120°F at home?
Yes, you can calibrate it using an ice water and boiling water reference when possible, but if the minimum reading is 120°F you may only be able to verify against the boil point. Use a calibrated reference thermometer to measure and document offsets.
You can calibrate at home using ice water and boiling water references, but if your thermometer can't display below 120, you may only verify at boiling temperature. Use a calibrated reference for offset.
What if my thermometer can't be adjusted?
If there is no hardware or software adjustment, rely on an offset measured with a trusted reference thermometer and apply it when cooking. Replace the device if drift persists.
If you can't adjust the device, use an offset measured with a trusted reference thermometer and apply it in cooking. Consider replacement if drift continues.
How often should I recalibrate a meat thermometer?
Calibrate after heavy use, after any known impact, and at least once every few months for regular cooks. For professional environments, follow your facility's standard schedule.
Calibrate after heavy use or impact, and at least every few months for regular use.
Does altitude affect boiling point when calibrating?
Yes, higher altitude lowers the boiling point slightly. Calibrate at sea level or adjust expectations if you are using a method that involves boiling water at altitude.
Altitude lowers boiling point; calibrate at sea level or account for altitude in the readings.
Can I trust a thermometer that reads 120°F as is?
A thermometer starting at 120°F may not be suitable for precise calibration across the full range. Use a reference thermometer to determine offset and rely on reported values for cooking guidance.
If it starts at 120, it's hard to calibrate precisely; use a reference thermometer for offsets and guide cooking decisions.
Watch Video
Key Takeaways
- Identify your thermometer's calibration capability before starting
- Use ice water and boiling water references when possible
- Document offsets and re-test regularly
- If 120°F is a hard minimum, rely on a trusted reference for practical use
- Maintain a clean probe and store it properly