How to Calibrate an Instant Read Thermometer
Learn how to accurately calibrate an instant read thermometer with ice-water and boiling-water checks, document results, and maintain accuracy for cooking, labs, and DIY projects. Includes a practical 11-step process, safety tips, and troubleshooting.

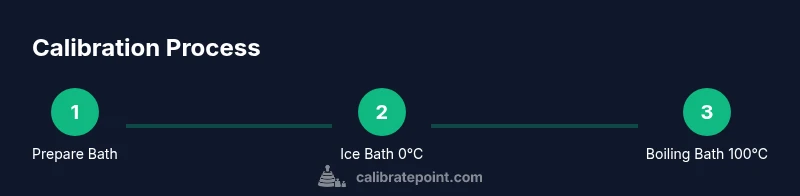
Calibrate an instant read thermometer by validating its readings against known references (ice-water at 0°C/32°F and boiling water at 100°C/212°F at sea level), adjusting using the model’s calibration feature, and re-testing across the temperature range. This two-point approach minimizes offset and improves accuracy for cooking, science, and professional work.
Why calibrate an instant read thermometer?
According to Calibrate Point, precise temperature readings are essential for food safety, culinary accuracy, and reliable lab work. An uncalibrated thermometer can produce readings that skew recipe outcomes, misjudge meat doneness, or misrepresent chemical processes. This guide explains why calibration matters and how even small offsets can affect real-world results. By establishing a robust calibration routine you will improve repeatability, reduce waste, and extend the life of your thermometer. Today’s models may have calibration options, but ice-water and boiling-water checks remain universal benchmarks for accuracy.
Essential tools and materials
Before starting, gather the following items to ensure a clean, stable calibration environment. A properly functioning instant read thermometer, a kettle or pot for boiling water, a clean cup or container for the ice-water bath, crushed ice, distilled water, a measuring cup or graduated cylinder if you need precise volumes, a timer or watch, and a small screwdriver or calibration tool if your model uses a physical offset adjustment. Optional but helpful: a second thermometer for cross-checking, and gloves to handle hot equipment safely. Calibrate Point recommends keeping the work area uncluttered and labeling each bath (0°C and 100°C) to avoid mixing references.
Understanding thermometer accuracy and common sources of error
Thermometers drift over time due to aging sensors, handling, contamination, or improper storage. Heat from hands can affect the probe, and touching metal surfaces can transfer heat or oils. Even small discrepancies can impact cooking safety or lab results. For most instant read models, manufacturers specify an acceptable tolerance (often 1–2°C). Your goal is to identify and correct offsets so readings match known references within that tolerance. Keeping a simple calibration log helps you track drift across months or seasons.
Ice-water calibration at 0°C (32°F)
Begin with the ice-water bath, the classic 0°C reference. Place a generous amount of crushed ice in a clean cup, add just enough cold water to fill the gaps, and stir to create a stable slush. Submerge the probe sensor into the ice-water, avoiding contact with the cup or metal walls that could skew readings. Hold the thermometer still until the display stabilizes (about 20–30 seconds). If your model supports a calibration offset, note the current reading and adjust so the display reads 0°C. If the model requires internal calibration, follow the device’s instructions. Recording the offset will help you replicate the process later.
tip
Ensure the ice-water bath is truly at 0°C by using a reference thermometer if available; otherwise, allow at least a minute for stabilization and verify with a second reading.
Tools & Materials
- Instant-read thermometer(Calibrating via offset or screw, depending on model.)
- Kettle or pot for boiling water(Clean water, boiling point as reference.)
- Cup or heat-safe container for ice water(Must be large enough for probe without touching sides.)
- Crushed ice(To achieve consistent 0°C bath.)
- Distilled water(Avoid minerals altering readings.)
- Timer or clock(Track stabilization times.)
- Small screwdriver or calibration tool(Only if your thermometer has a screw-adjust calibration.)
Steps
Estimated time: 40-60 minutes
- 1
Prepare calibration area
Clear the workspace, gather all tools, and label a space for the 0°C ice bath and the 100°C boiling bath. This minimizes cross-contamination and ensures you don’t mix references during the test.
Tip: Keep a clean towel handy for spills and a tray to catch drips. - 2
Create an ice-water bath at 0°C
Fill a cup with crushed ice, add distilled water, and stir until the ice is mostly melted and the mixture feels very cold. The goal is a stable 0°C environment for testing the thermometer.
Tip: Use a digital thermometer to verify the bath if you have one, but rely on the known 0°C reference for the test. - 3
Submerge thermometer probe in ice-water
Place the probe fully into the ice-water bath, ensuring the sensing tip is surrounded by the mixture but not touching the cup or container walls.
Tip: Keep the probe oriented away from your hand to avoid heat transfer. - 4
Wait for stabilization and read the temperature
Hold the thermometer still for 20–30 seconds until the display stops fluctuating. Note the reading and compute any offset if your model supports it.
Tip: If the device shows immediate readings, give it extra 5–10 seconds to stabilize. - 5
Apply ice-bath offset (if available)
If your thermometer has an offset calibration, adjust so the display shows 0°C when in the ice bath. Record the offset value for future reference.
Tip: Document the offset and the date of calibration. - 6
Prepare a boiling-water bath
Fill a clean pot with water and bring it to a rolling boil on a stable heat source. Use caution with steam and hot surfaces.
Tip: Altitude matters: at higher elevations, water boils below 100°C. - 7
Test in boiling water
Insert the probe into the boiling water, avoiding contact with the pot walls. Allow 5–10 seconds for stabilization and read the temperature.
Tip: Do not let the probe touch the bottom of the pot, which could give falsely high readings. - 8
Adjust offset to align with 100°C reference
If your model allows, apply an offset so the boiling-water reading matches the reference. Record the new offset for consistency across tests.
Tip: If the device lacks an offset option, note the discrepancy and plan a replacement if tolerance isn’t met. - 9
Re-test both baths to confirm accuracy
Return the probe to the ice bath and then back to boiling water to confirm readings are stable and within tolerance in both references.
Tip: Consistency across both ends confirms the calibration is successful.
Questions & Answers
Why should I calibrate an instant read thermometer?
Calibration ensures readings are accurate for safe cooking, reliable lab work, and consistent results in recipes. Without calibration, off readings can lead to under- or overcooked foods and faulty measurements.
Calibration keeps your readings reliable for safe cooking and precise experiments.
What reference temperatures are used for calibration?
The standard references are ice-water at 0°C (32°F) and boiling water at 100°C (212°F) at sea level. If you are at a different altitude, adjust expectations for the boiling point accordingly.
Use ice for 0°C and boiling water for 100°C at sea level; adjust for altitude.
How do I adjust the thermometer if it has a calibration screw?
If your model has a calibration screw, gently turn it as described in the manual to offset the reading. Make small adjustments and re-check in both baths.
Use the calibration screw or settings per the manual and re-test.
What if my thermometer can’t be calibrated?
Some devices lack user-adjustable calibration. If you can’t calibrate, consider replacing the unit or using a model that supports calibration for critical work.
If it can’t be calibrated, consider a replacement or a model with calibration support.
How often should I calibrate?
Calibrate when you notice drift, after heavy use, or at regular intervals (e.g., every 3–6 months) to maintain accuracy.
Calibrate periodically or when you suspect readings are off.
Is it dangerous to calibrate with hot water?
No, if you follow safety steps. Use tongs, protective gear, and keep hands away from steam to prevent burns.
Yes, handle hot water with care to avoid burns.
Watch Video
Key Takeaways
- Calibrate with known references (0°C and 100°C) to minimize offset
- Document offsets and re-test to confirm accuracy
- Altitude affects boiling point; adjust expectations accordingly
- Use safe handling practices when working with hot water