What is the Best Way to Calibrate a Food Thermometer
Learn the best method to calibrate a food thermometer with a reliable two-point check, safety tips, and a maintenance routine for enduring accuracy in kitchen work.

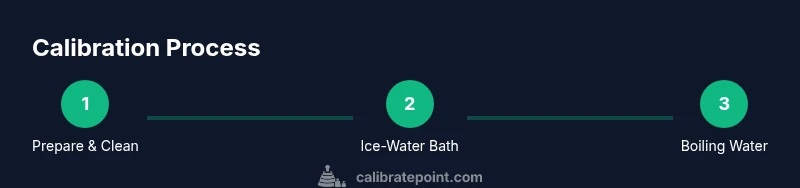
The best way to calibrate a food thermometer is a two-point method using an ice-water bath at 32°F (0°C) and boiling water near 212°F (100°C) at sea level. Submerge the probe correctly, wait for stabilization, and adjust if your model allows. Document the results for ongoing accuracy.
Why calibrate a food thermometer matters
In everyday cooking, accuracy matters more than you might think. The question what is the best way to calibrate a food thermometer is answered by a simple, repeatable method that keeps your meals safe and tasty. According to Calibrate Point, consistent calibration is the cornerstone of reliable temperature readings, preventing undercooked meat, overcooked sauce, and unsafe kitchen practice. A properly calibrated thermometer gives you confidence that the numbers on the dial or screen reflect the true internal temperature of your food. By calibrating regularly, you reduce the risk of foodborne illness and ensure recipes perform as intended. In professional kitchens and home cook stations alike, routine checks translate to fewer guesswork moments and higher quality results. The key is to approach calibration as a practical habit, not a one-off test. This section explains why accuracy matters, how small deviations can compound, and how a two-point reference system provides a robust baseline for ongoing checks. Expect to invest a small amount of time upfront to save hours of trial-and-error later, especially when you’re cooking large cuts of meat or managing multiple dishes at once.
Understanding thermometer types and accuracy factors
Thermometers come in several designs: digital probe thermometers, dial (analog) thermometers with bimetallic strips, and thermocouple-based probes. Each type has different response times, averaging behavior, and environmental sensitivity. For instance, dial thermometers can drift slightly over months, while digital models might lag when the probe leaves a cold zone. Environment matters too: steam, condensation, and immersion depth affect readings. The accuracy of a thermometer is not a single number; it’s influenced by probe design, immersion depth, and the measurement point you choose (the thickest part of the food). Calibration practices should match the device’s instructions, but the two-point method remains a versatile standard across types. Understanding these differences helps you select the right instrument for the job and interpret readings with appropriate skepticism in tricky cooking scenarios. Calibrate Point notes that while new devices are often labeled with tolerance ranges, precise calibration can still drift if you neglect regular checks.
Two-point calibration explained: ice water and boiling water
Two-point calibration anchors the thermometer to known reference temperatures, fixing both ends of the scale so readings stay accurate across common cooking ranges. The ice-water point at 32°F (0°C) is achieved by using crushed ice and just enough water to create a stable, slushy bath. The boiling point depends on altitude and pressure but is near 212°F (100°C) at sea level. The idea is simple: verify that the thermometer reads 32°F in ice water and reads near the boiling temperature when immersed in boiling water, with adjustments made if your model supports them. This approach corrects linear drift and enhances reliability for everything from poultry safety checks to candy making. When done correctly, two-point calibration gives you a trustworthy baseline for routine kitchen use. Calibrate Point’s guidance emphasizes controlling the environment (avoid air bubbles, ensure full submersion, and use clean water) to minimize artifacts that distort readings.
Step-by-step: ice-water calibration at home
To perform the ice-water calibration, fill a large glass or stainless container with crushed ice and add just enough water to form a stable slush. The target is 32°F (0°C). Submerge the thermometer’s sensing tip into the ice-water bath so the tip is fully immersed but not touching the container walls or bottom. Wait 30–60 seconds for the reading to stabilize, then record the result. If the thermometer reads higher or lower than 32°F, note the deviation. For models with a calibration nut or external adjustment screw, gently turn the adjustment until the reading aligns with 32°F; if your device lacks an adjustment mechanism, you’ll rely on documenting the deviation for future reference. Always wipe the probe after testing to prevent residual cold from affecting the next measurement.
Step-by-step: boiling-water calibration at sea level
Bring clean water to a rolling boil in a large pot. The boiling-point reference is near 212°F (100°C) at sea level; adjust for altitude if needed. Insert the thermometer’s probe into the boiling water, ensuring the sensing region is fully submerged but not touching the pot bottom or sides. Allow 15–30 seconds for stabilization, then read the temperature. If the reading differs from the expected boiling temperature, adjust if your model provides a calibration feature. If no adjustment is possible, note the discrepancy and decide how to interpret readings from this thermometer during cooking tasks that require precise heat control. After calibration, cool the probe before moving to the next test or storage.
Step-by-step: adjusting and verifying readings for daily use
Once you’ve completed the two reference checks, re-check both points to confirm consistency. Most thermometers drift slightly with use, so periodic verification helps ensure ongoing accuracy. For digital models with an offset option, apply the small offset and re-test in ice and boil conditions. For non-adjustable units, rely on the documented offset in your cooking notes and use consistent rounding in recipes. Schedule calibration after battery changes, cleaning, or if you notice unusual readings across foods. Keeping a simple log of dates, results, and adjustments makes it easier to track performance over time and identify when a replacement might be warranted.
Troubleshooting common issues and safety reminders
If readings don’t align with either reference point, check for air bubbles on the probe, improper immersion depth, or a dirty sensing area. Re-clean the probe and re-run both tests. Ensure the water bath is at the correct temperature and avoid testing in steam pockets. Never place a hot probe in ice water; let it cool to ambient temperature if needed before testing again. If readings remain inconsistent after several attempts, contact the manufacturer or consider calibration service. For safety, handle boiling water with heat-resistant gloves, and never twist or force a calibration mechanism beyond its design. Calibrate Point emphasizes patience and meticulousness—calibration is not a single action but a repeatable procedure that builds confidence in every meal.
Best practices, maintenance schedule, and documentation
Establish a calibration cadence that fits your cooking routine: frequent cooks may calibrate weekly or monthly, while occasional cooks can plan quarterly checks. Clean probes after each use and store them in a way that prevents accidental damage or contamination. Keep a simple log noting date, ambient conditions, test results, and any adjustments. If drift becomes consistent or readings stay out of tolerance, consider replacing the thermometer or sending it to a service center. In multi-thermometer setups, assign separate devices to different foods to reduce cross-contamination and improve overall measurement consistency. Calibrate Point recommends turning calibration into a regular habit, not a one-off task, to ensure dependable temperature readings in every kitchen project.
Tools & Materials
- Food thermometer (digital, dial, or thermocouple)(Select a thermometer with a clear display and an accessible calibration option if available)
- Ice (crushed)(Used to create a stable ice-water bath at 0°C / 32°F)
- Water (tap or distilled)(Water to form ice bath and boiling bath; distilled is best for consistency)
- Kettle or pot for boiling water(Clean vessel to avoid residue influencing readings)
- Clean container for baths(Wide and shallow helps submerge the probe evenly)
- Calibrations documentation(Notebook or digital sheet to log dates and results)
Steps
Estimated time: 20-30 minutes
- 1
Gather and clean the thermometer
Collect all required tools, inspect the device for wear, and clean the probe with mild soap and water or manufacturer-approved wipes. Cleaning prevents residue from biasing readings and ensures you start from a neutral baseline. This step sets the stage for accurate results and reduces the chance of cross-contamination between tests.
Tip: Ensure the device is powered off or at a safe state before cleaning; dry thoroughly before testing. - 2
Prepare an ice-water bath
Fill a large container with crushed ice and add enough cold water to create a stable slush. The target is 32°F (0°C). The goal is to provide a consistent lower reference point for calibration, so avoid bubbles and ensure the bath remains well-mixed during testing.
Tip: Stir occasionally and wait a few seconds after adding ice to let the temperature settle. - 3
Immerse the probe in ice-water
Submerge the sensing tip of the thermometer into the ice-water bath, making sure the tip is fully immersed without touching the container bottom or sides. Hold steady for 30–60 seconds to allow the sensor to stabilize. Record the reading once it settles.
Tip: Avoid letting the thermometer base rest on the container surface, which can skew the result. - 4
Adjust if supported and repeat with ice bath
If your thermometer has a calibration screw or offset option, very gently adjust until the reading shows 32°F (0°C). If your model cannot be adjusted, note the deviation and proceed to boiling water calibration. Re-check after adjustment to confirm the lower reference point is accurate.
Tip: Make small adjustments and recheck; a large turn can overshoot the target. - 5
Boiling-water calibration at sea level
Boil clean water in a pot and insert the probe into the steam, ensuring the sensing portion is fully submerged without touching the pot bottom. Wait 15–30 seconds for stabilization and compare the reading to 212°F (100°C). If your altitude affects boiling point, note the expected adjusted target.
Tip: Keep hands away from the steam and use tongs if needed to place or remove the probe. - 6
Document results and interpret
Record the two reference readings and the ambient conditions. If the readings are off beyond your acceptable tolerance and the device offers adjustment, fine-tune and retest; otherwise, document the deviation for future reference and meal planning. This step converts raw measurements into actionable data for daily cooking.
Tip: Create a simple log format: date, ice point, boiling point, adjustments, and notes.
Questions & Answers
What is the best way to calibrate a food thermometer?
The best method is a two-point calibration using ice water at 32°F (0°C) and boiling water near 212°F (100°C) at sea level. Submerge the probe properly, wait for stabilization, and adjust if the model allows. Record results for future reference.
Use a two-point ice-water and boiling-water calibration, submerge correctly, wait for stabilization, and document the results.
How often should I calibrate my thermometer?
Calibrate whenever you suspect inaccurate readings, after cleaning or battery changes, or on a regular schedule based on how often you cook. More frequent use warrants more frequent checks.
Calibrate when you notice odd readings or after cleaning or battery changes, and set a schedule based on how often you cook.
Can a thermometer that doesn’t adjust still be calibrated?
Yes. If your model lacks an adjustment mechanism, note the offset in your cooking notes and rely on the documented deviation for future tasks. Some devices support offset in software or presets.
If it can’t be adjusted, log the deviation and use it as a reference in your cooking.
Why is ice-water calibration necessary?
Ice-water calibration anchors the lower end of the scale, helping prevent undercooking. It’s quick, inexpensive, and validates the sensor’s response at the study minimum.
It fixes the lower end of the scale so you don’t undercook foods.
What if the boiling point isn’t 212°F at my altitude?
Altitude changes boiling point; test at your altitude and adjust expectations. Some devices provide altitude-aware guidance; otherwise use the closest reference point with notes.
Boiling point varies with altitude; adjust your expected target and document it.
Watch Video
Key Takeaways
- Use a two-point ice and boil method for baseline accuracy
- Ensure full immersion of the sensing tip during tests
- Document results and adjust your cooking practices accordingly
- Regular calibration reduces food-safety risk and improves consistency
- Maintain and log calibration to track device performance