How to Calibrate an Outdoor Thermometer: A Practical Step-by-Step Guide
Learn how to calibrate an outdoor thermometer accurately with a practical, step-by-step method, safety tips, data logging, and verification using trusted references from NIST and NOAA.

Goal: learn how to calibrate an outdoor thermometer for accurate ambient readings in weather, gardening, or HVAC planning. You will need a reference thermometer, a stable outdoor spot, and basic tools. This quick guide provides safe, repeatable steps suitable for DIY enthusiasts and pros alike. Follow temperature exposure considerations and safety tips. Document readings and schedule checks.
Why calibrate an outdoor thermometer?
Outdoor temperature readings influence many everyday tasks, from watering schedules to heating and cooling decisions. A thermometer that spends long hours in direct sun or strong winds can drift away from the actual air temperature, leading to decisions based on inaccurate data. According to Calibrate Point, outdoor instruments drift when exposed to sunlight, humidity, and aging sensors, so regular calibration becomes part of sound practice. The Calibrate Point team found that even small biases can accumulate over a day or a week, especially if you rely on the readings to trigger irrigation or HVAC setpoints. By calibrating, you ensure readings reflect ambient air temperature rather than transient environmental factors. In practice, aim to calibrate at least once per season, and after any sensor replacement, relocation, or major weather event. This section explains why accuracy matters, what constitutes an acceptable error for typical outdoor conditions, and how a simple check can save you time and money in the long run.
What causes drift in outdoor thermometers?
Several environmental factors contribute to drift. Sun exposure heats the sensing element, while shade and airflow stabilize it differently across the day. Humidity, rain, and dust can affect the enclosure or the shield, altering heat transfer and response time. Temperature sensors age, drift, or lose calibration over years of operation, especially if powered by batteries that sit in extreme cold or heat. In many budget models, the sensor or housing is a simple metal strip or a small semiconductor that is sensitive to ambient conditions. The result is an equation drift: the reading on your outdoor unit moves away from the true air temperature. Recognizing drift helps you plan a practical calibration routine rather than guessing or relying on outdated data. Calibrate Point's guidance emphasizes establishing a stable baseline condition before attempting adjustments, and validating results with a trusted reference thermometer.
What you need before you start
Before you begin, assemble a few essentials to ensure a controlled, repeatable process. You will need a calibrated reference thermometer or a secondary trusted instrument, and the outdoor thermometer you want to calibrate. A sheltered, level outdoor spot protected from direct sun and wind is ideal. Have a notepad or digital log ready for recording readings, plus a timer to track stabilization intervals. If your thermometer has an adjustable dial or firmware offset, keep a small screwdriver and any instruction manual handy. It’s also useful to have an ice-water bath (0°C) to verify the ice-point reference, even if you ultimately rely on a shaded, ambient check for typical conditions. Finally, prepare a simple shade structure or radiation shield to minimize solar bias during comparisons. This preparation helps you reduce variability and improves the reliability of your results.
Setting up a safe calibration space
Choose a location that is stable and free from direct sun, gusty wind, or heat sources like grills or vents. Attach both thermometers side-by-side, ideally to the same support or mounting pole, with their sensors at roughly the same height above ground. Ensure both devices are in a similar enclosure environment—if one is clearly in a shade sleeve, move the other as needed. Keep the area dry and dry hands when handling probes. If using an ice-water bath, place the test and reference probes in separate jugs or cups to avoid cross-contamination. Remember to keep the testing area within reach to log readings quickly; a calm, shaded space reduces measurement noise and helps you reach stable temperatures faster.
Baseline check: placement and initial readings
Place both thermometers in their shared test environment and allow them to stabilize for several minutes. Record the readings at regular intervals—every 5 to 10 minutes for at least 30 minutes, longer if temperatures are changing rapidly. Compare the test unit with the reference thermometer; aim for a stable difference that remains consistent across successive checks. If the drift is obvious (for example, a consistent 2–3 degree Fahrenheit difference over 30 minutes), note the deviation and plan how to apply a correction. Some thermometers allow you to adjust offsets; others require you to account for the drift in your data logs. Use a neutral shade to ensure neither unit warms due to sun exposure during initial measurements.
Calculating and applying the correction
Once you’ve captured a stable difference, compute the correction value for the test unit. If your device allows calibration, adjust the offset by the measured difference in the appropriate unit (Celsius or Fahrenheit). If adjustments aren’t possible, you’ll document the drift and apply the offset in spreadsheets or data-collection software when you interpret readings. Re-check after applying the correction to verify that both instruments now read within an acceptable range of each other. If the values still diverge, reassess the setup or test for sensor damage. Calibrate Point recommends repeating the process with a fresh baseline if changes occur in the environment or after replacing the sensor.
Re-checking and confirming accuracy
After applying the adjustment, re-check the outdoor thermometer against the reference in the same shaded setup. Run a fresh set of readings for another 20–40 minutes, compare the results, and look for a consistent offset. Document the final offset and the conditions under which it was achieved. If possible, corroborate with a secondary reference thermometer or use a secondary validation method such as an ice-point check for additional confidence. Periodic re-calibration is prudent in climates with wide diurnal swings or when sensors experience vibration or movement from wind. Consistency over multiple days strengthens trust in your data.
Data logging, verification, and maintenance
Create a simple log that captures the date, time, outdoor temperature, reference reading, test reading, and the calculated correction. This data becomes a baseline you can revisit with changing seasons or sensor maintenance. Periodically re-test to ensure the offset remains within your specified tolerance; environmental changes may shift the response, requiring updates. If you notice a sudden shift, inspect for sensor damage, loose mounting, or moisture ingress. Regular maintenance, including cleaning and resealing, helps sustain measurement integrity over years. The Calibrate Point team suggests scheduling a formal calibration check at least once per year, especially if the thermometer contributes to critical decisions about irrigation or energy use.
AUTHORITY SOURCES
For further reading and validation, consult these authoritative references:
- NIST: https://www.nist.gov/pml
- NOAA: https://www.noaa.gov
- OSHA: https://www.osha.gov
Tools & Materials
- Calibrated reference thermometer (known-accurate)(A trusted standard, ideally traceable to NIST)
- Outdoor thermometer to calibrate(The unit you want to adjust)
- Ice-water bath supplies(Cup, ice, water to create 0°C reference)
- Shade structure or radiation shield(Minimizes solar bias during comparisons)
- Notepad or digital log(Record readings and calculations)
- Pen or marker(Label data and final offset)
- Calibration adjustment tool (if available)(Screwdriver or firmware option, per device)
- Clock or timer(Track stabilization intervals precisely)
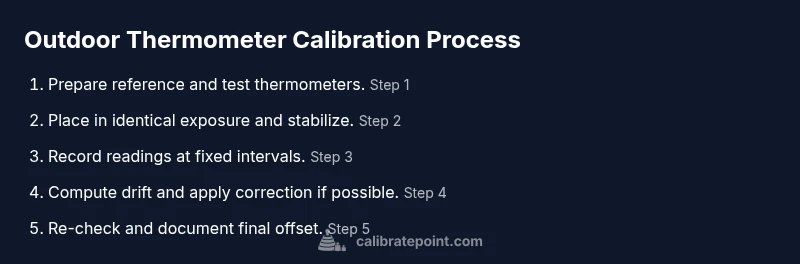
Steps
Estimated time: 2-3 hours
- 1
Prepare and place side-by-side
Set up the reference and test thermometers side-by-side at roughly the same height, away from direct sun and heat sources. Make sure both are in the same enclosure environment and mounted securely.
Tip: Use identical shielding and position to reduce environmental bias. - 2
Stabilize in shade
Allow readings to settle in a shaded area for 15-20 minutes, avoiding wind gusts that could alter airflow around the sensors.
Tip: Keep a fixed placement to avoid micro-shifts that affect results. - 3
Record initial readings
Take readings every 5-10 minutes for 30 minutes. Note both temperatures and the time of day for each pair of readings.
Tip: Use the same time intervals throughout the test for consistency. - 4
Compute drift
Calculate the average difference between the reference and test readings. Look for a stable offset across the measurement window.
Tip: If the offset changes, extend the measurement window. - 5
Adjust the test unit (if possible)
If your device has an adjustable offset or dial, apply the measured correction. If not, plan to use the drift as a documented offset in your data.
Tip: Consult the device manual to confirm adjustable controls before tweaking. - 6
Re-check after adjustment
Repeat the measurement cycle to verify that readings now align within an acceptable range.
Tip: A second pass confirms the change was effective. - 7
Document results
Log final offset, conditions, and any changes made to the device. Use this record for future calibrations.
Tip: Date, time, sun exposure, and wind conditions should be included. - 8
Schedule ongoing checks
Set a calibration interval (seasonal or after sensor changes) to maintain ongoing accuracy.
Tip: A recurring schedule reduces drift surprises.
Questions & Answers
What is the purpose of outdoor thermometer calibration?
Calibration ensures readings reflect ambient air temperature, not environmental biases from sun, wind, or aging sensors.
Calibration makes sure your outdoor thermometer shows the real air temperature.
Can I use ice water to calibrate?
Yes, an ice-water bath provides a 0°C reference point for verification. Combine with a shaded ambient check for full validation.
Ice water gives a solid 0 degree reference when you calibrate.
How often should calibration be performed?
Calibrate seasonally or after sensor changes, relocation, or major weather events. More frequent checks are prudent in climates with wide temperature swings.
Do a check each season or after any sensor change.
What if the outdoor unit can't be adjusted?
If you cannot adjust the unit, record the offset and apply it in your data analysis, or use a documented correction factor.
If you can't adjust it, log the offset and use it in data.
Is a radiation shield required for accuracy?
A radiation shield minimizes solar bias and improves accuracy. If not available, ensure measurements are taken in steady, shaded conditions.
Yes, a shield helps keep sun bias low.
What are common mistakes to avoid?
Avoid direct sun, quick-trend readings, and mixing units; ensure stabilization time and consistent placement.
Don’t rush readings or place the thermometer in direct sun.
Watch Video
Key Takeaways
- Start with a stable shaded setup to reduce bias
- Document each reading for reproducibility
- Use a trusted reference thermometer as the standard
- Regularly schedule calibration to prevent drift